GAZ 66 trucks, BRDM Spandrel TOW in center, AAMGs to right.

GAZ 66 and US infantry - lt. AA, AT, TOW. Metal is quality, crisp, clean. Infantry are a bit smaller than GHQ, but that will help them fit better onto the vehicles, actually. They're fragile. Wasn't expecting the GAZ to be pieces, but it makes them more detailed.

US .50 cal AAMGs. All this stuff is nicely detailed but fragile.

Heads up! US guided munitions to left, Russian AAMGs to right. Nice!

Compared to the GHQ Russky AAMGs [right], I think I prefer the CinC [left]. Lots of spares now! However, if a barrel broke, I'd almost certainly just glue a small piece of piano wire in place and leave it at that. They may be different MG models, but the CinC looks more like the pics I'm seeing on the 'web.

Bridge is excellent - crisp detail, nearly no cleaning.

WORKING ON THE BMP-2's
Good view of BMP-2 hatches: Commander opens forward [for protection, one presumes] and driver rotates to side, around the three periscope vision apertures. Want to have the hatches open right, right? Shows how thin the top armor is, too...funky camo scheme...
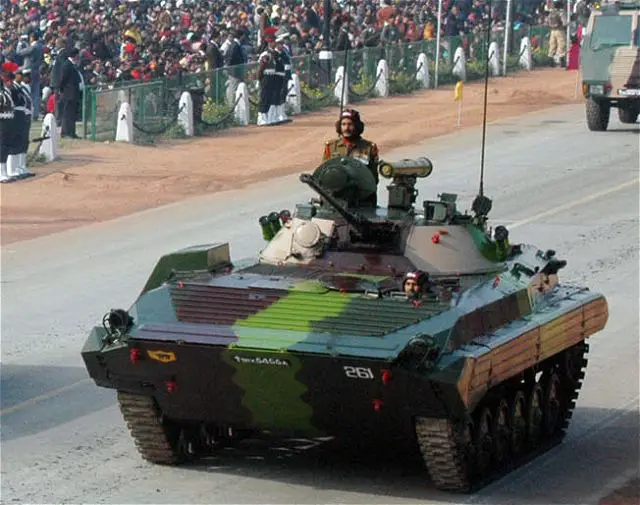
https://www.armyrecognition.com/may_2013_news_defence_army_military_industry_uk/indian_army_will_upgrade_entire_fleet_of_russian-made_bmp-2_sarath_infantry_fighting_vehicle_1305133.html
Another great pic - you can see how the driver's hatch flips over to open up then lays flat.

By Фальшивомонетчик (original picture) SuperTank17 (crop) - Crop of File:Rep parad4.jpg, Public Domain, https://commons.wikimedia.org/w/index.php?curid=7576920
Jeweler's saw - a must if you want to work with metal or plastic - gives a close cut and only removes a little of the material. Also, it's pretty cheap and will last forever, basically.

The blade is flexible, and you can tilt a bit to shift the angle of the cut - not much, a little goes a long way with this technique! You can see how perfect the cut on the driver's hatch is! May replace periscope glass - it's so tiny it'll be easy as any bit of debris will suit.


Commander's hatch is sticking up vertically atop the turret [it opens forwards] silhouetted against the green clothes pin holding the craft stick on which the mini is mounted.

And with the crew member added, here's the command BMP-2. The crew member is actually firing an M-72 LAW but it sort of looks like a laser sight, so I may leave it as-is.

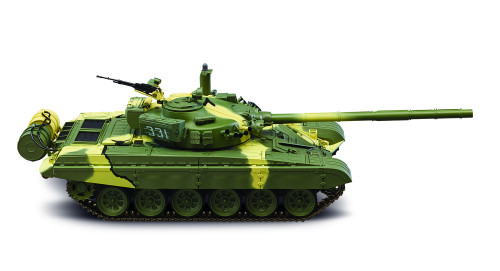
WORK ON THE T-74s
Need to figure out a few things, like where the AAMG will go and how the hatches open, plus crew and how to set them down.
Hatch opens forward - nice pose! Little bits of red for lights will help model pop.

http://www.wwpd.net/2017/01/tighten-down-those-turrets.html
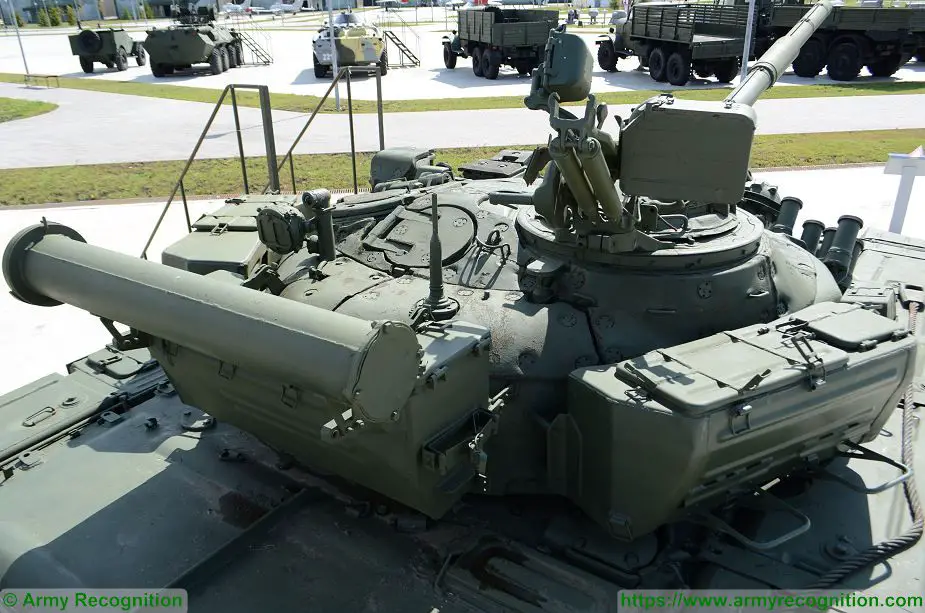
Below shows the AAMG mount fwd, with spotlight back. Apparently the ring rotates.

http://www.tanks-encyclopedia.com/coldwar/USSR/soviet_T-72.php
Another great close-up of turret AAMG mount [ammo can to right].
https://www.armyrecognition.com/russia_russian_army_tank_heavy_armoured_vehicles_u/t-72a_t-72_a_main_battle_tank_technical_data_sheet_specifications_information_description_pictures.html
Model kits can be great sources of info - they aren't 100% reliable, but they help.
https://www.model-space.com/gb/build-the-russian-tank-t72-full-kit.html
This is not only a great shot, but this is an exceptional website! Note how the commander has turned around the AAMG for use, putting the spotlight and the hatch to the back.

https://thesovietarmourblog.blogspot.com/2015/05/t-72-soviet-progeny.html
OK, so I've learned a few things from the web, and now it's time to get these tanks assembled.
First, I use the jewelers saw to make vertical cuts where the hatch folds up, then cut horizontally across the tank [tilted on the craft stick to the verticle...much easier to cut] until the hatch is just about to come off. Then I used a new X-acto blade to gently pull it off.

Left tank has hatch removed, two others have the vertical cuts.
Below, hatch removed - shiny spot at 7 o'clock on turret to left is where removed from.

Some crew members - US LAW shooters. the Stiff position and slender build makes them perfect as crew, if not great for infantry on the table!

I pre-position them first, then cut to fit where I want them. They're fiddly, so I use a clamp to handle them [the kind that reflexively closes on the held object].

And here they are - two sort of crouched down behind the open hatch, one standing.

I then attach the AAMGs. I started the hole with a very sharp, new X-acto blade, and gently made a small guide hole, then used a very small Dremel drill bit to drill the holes for the peg on the AAMG. I also run a little superglue on the gun itself, hoping to keep the barrel from breaking as easily [doubt it will work if roughly handled, but...here's to trying!].

Note that from this angle you can see the ammo can I glued to the right side of the gun. It didn't come with one, but I cut a little box shape off the sprues. It may sound crazy, but without it the gun looks quite narrow and loses a lot of bulk, so I felt obliged.

This only leaves the GAZ-66 trucks and the Spandrel BRDMs to assemble and crew, and then I'm ready to finish priming this batch!
No comments:
Post a Comment
Thanks for your comment! t will be posted after it's moderated.