Thursday, March 15, 2018

Paint British Desert Rats: MASTER POST updated July 2023

Check out this little honey - perfect for home defense, getting rid of pests in your fields, or providing a base of fire for your maneuver element!

Deactivated Dunkirk era British Dovetail Bren gun MK1
Dunkirk Era British Dovetail Bren Gun Mk1: 
http://www.deactivated-guns.co.uk/deactivated-guns/allied-deactivated-guns/deactivated-dunkirk-era-british-dovetail-bren-gun-mk1/prod_3902.html

I've been playing with my Desert Rats for years now, and substituting Italian Infantry for them - shameful! Well, not shameful for only a few months, but several years?? In any event, I am finally committed to finishing off my North Africa opposed sides, a British Armour Company with full support, and Italian Bersaglieri / Carri companies with full support. 

The Italians are nearly done, and there's more than enough to play two sides of them with my fast-playing WWII rules, "Up the Blue!" [which are evolving so well it gives me warm fuzzies every time I think of it]. The Brits Crusader Squadron, aka "The Cruds" have their base paint and coating done, but still lack weathering, decals, stowage, etc. Immediately following on them, I've my prized Honey Stuarts which will be Robert Crisp's squadron from Operation Crusader, he having written a favorite memoir.


I will be using this post as a master post to which I will be continuously adding as I work out the painting details for various Units. Presently, the focus will be Operation Crusader Units, including 22nd AB Crusaders, 4th AB Honeys, Scots Guards Motor Company. Altho I've figs for Div Cav Recce, 11th Hussars Rolls Royce AC Company, and an Infantry Company [which should probably match the Div Cav and be Aussie or Kiwi.


This will be regularly updated, so check in any time, or make contributions!


PREVIOUS POSTS DISCUSSED:

Reference books: [CLICK]
Crusader I, II & III models [CLICK]
Early Cruiser and Light tank models [CLICK]

BRITISH UNIFORM - BASICS
SD = Service Dress, The more formal uniform, looks like a suit, but officers, MPs and others would wear it or pieces of it in the field to distinguish them from the men.

BD = Battle Dress, a uniform designed for the field, usually looser and with cheaper cloth and less refined cut / style / finish, e.g. plastic buttons instead of brass. Oddly, the color often contrasted strongly with that of the web gear, e.g. grey web gear over khaki, dark olive web gear over brown.


KD = Khaki Drill, the tropical / desert / hot weather uniform, issued in places like India, SE Asia, and the Mediterranean. 

Denim = usually overalls for field service, loose and easy to work in, usually a khaki to olive green or green color.


General Desert appearance
From "British Eighth Army North Africa 1940-43" by Robin Adair, p.15: 
Soldiers arriving from Britain would have rifle, steel helmet, webbing equiptment, chest respirator, BD trousers and blouse plus greatcoat and a wool cardigan. 
Tropical kit issue on arrival in the ME would be KD items; shirt, shorts, trousers, long woolen socks w'hose tops, leather ankle boots w'either cloth puttees or canvas web gaiters. Hats were pith helmets, steel helmets, forage caps or officer's service dress caps. 
For the cold [most nights and much of the winter], the khaki BD blouses ['jacket' to you civilians] trousers,wool cardigan and the standard issue greatcoat were worn.  
"However, from the time he arrived in the desert, his apparel would largely be a matter between him and his C.O." According to Osprey MaA #368.
Typical officer garb would be: Civilian scarf, KD shirt or tunic, corduroy trousers, suede desert boots, sheepskin coat, a felt Service Dress cap, tank beret or dress cap / garrison cap [see below]. [good luck finding figures that look like this!]

MEN
Tattoos! [easy to make with a blue micron pen]

Flesh: tanned [or not] portrayed with Flesh, Elf Flesh, Dwarf Flesh, Vallejo Orange Brown, Lt. Brown, sunburned a bit reddish for new arrivals, darker tans for veterans.

HEAD / HAT / HELMETS
Helmets: thick chin straps, painted Unit badge, sackcloth cover, painted desert tan/yellow. Three main types of camoflage were used:
1. sandbag sacking covers,
2. sand colored camo netting,
3. sand colored paint mixed with sand, giving an uneven surface appearance [might look right with a bit of filing?]
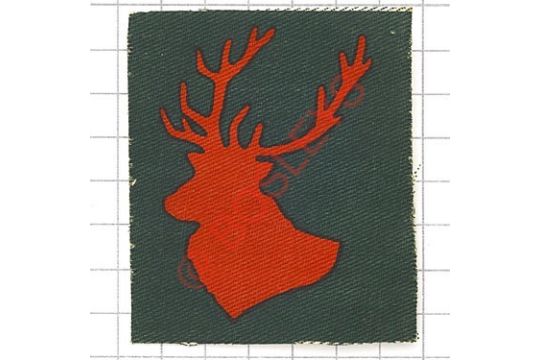
Painted helmet insignia occasionally used, e.g. Camerons, Seaforths, Scots Guards[?] and a desert rat.
Field Service Cap [US = garrison cap] or Forage Cap [a flat hat pulled open to rest upon the head] would be BD color. 


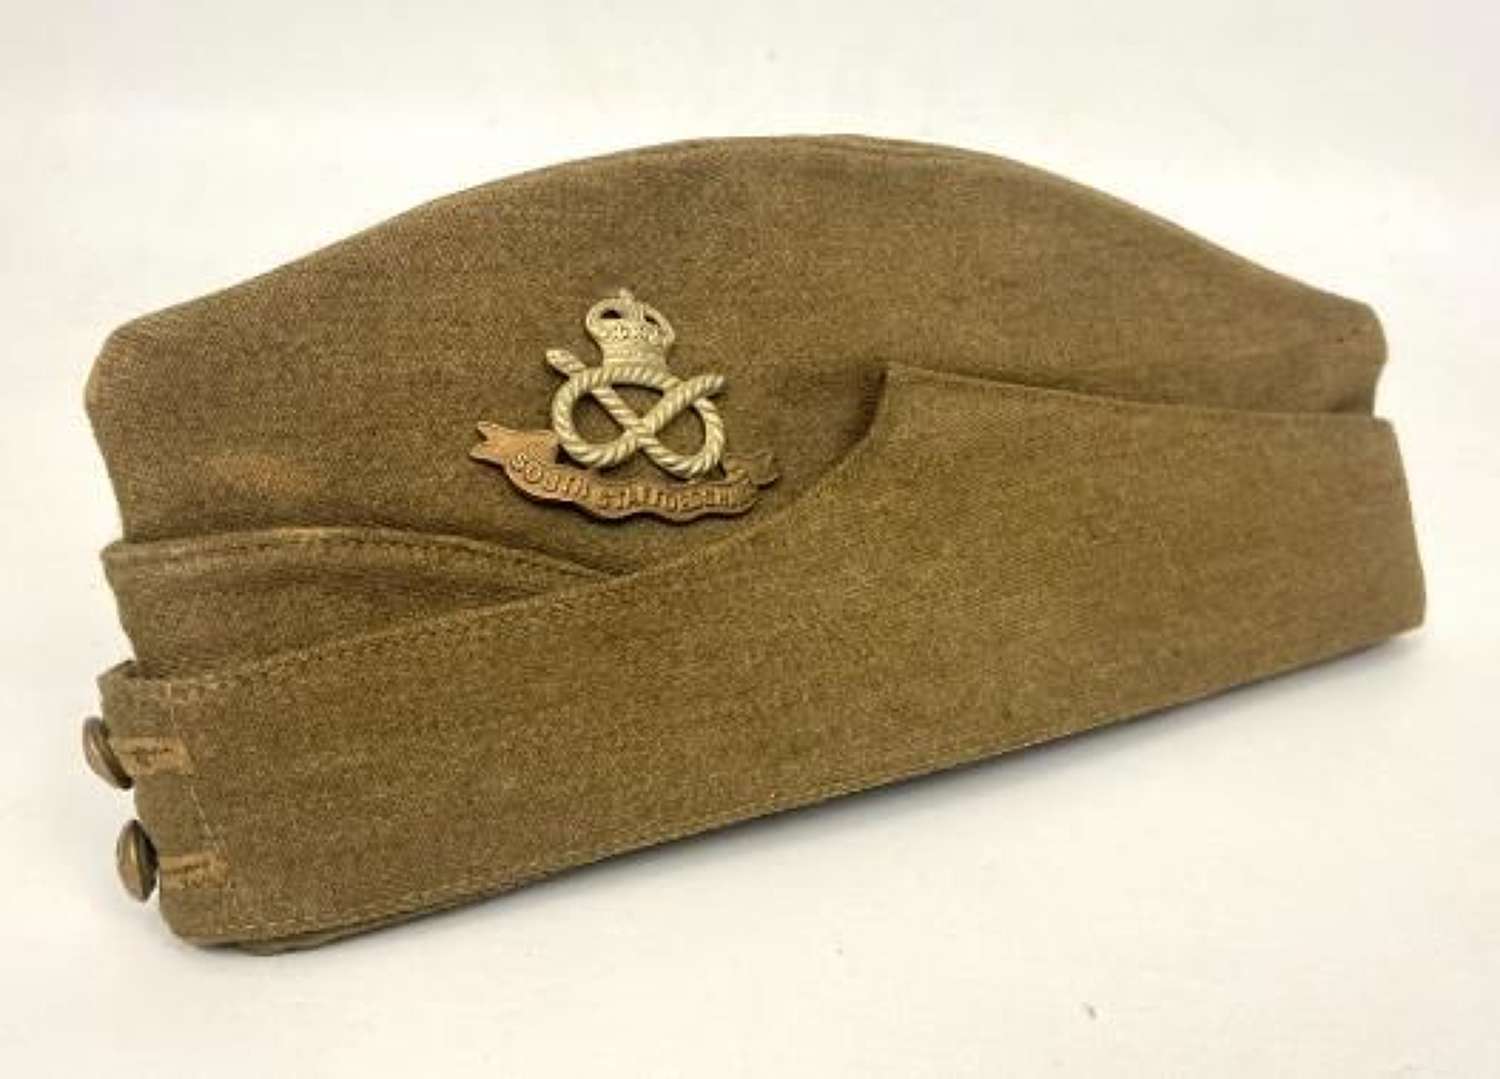
Officer's #1 Dress Cap was same design, but usually in branch service colors, or the Regiment's colors, would have metal badge front left [top] corner.


Italian woolen caps - bright red wool, look like watch caps.
Afrika Corps caps - when captured.
RTR: black beret, silver badge
- 11 Hussars: brown beret with cherry red band
Field Artillery FA: diamond divided in half, left red, right black.
SD Cap. Officer, MPs, etc might wear. Big brass badge in center, could be gold thread on black cloth. Brown chin strap.Visor NOT leather, but cloth.

SHIRT/ SWEATER

Pullover. Issued in green, drab colors, very popular, often worn layered with other items.
KD shirt would have medium-brown plastic buttons [obvious contrast with shirt color]

JACKET / COAT 
BD Blouse would be worn in cool weather, much like a jacket, with shirt underneath.
Sleeveless Leather Jerkin, i.e. vest, would be brown leather with woolly interior.
TROUSERS / SHORTS / OVERALLS

BD, Serge = Battle Dress, Serge, this was a pair of khaki overalls in a wool serge fabric, looser fitting but sturdy, and used for fatigue duties and as a layer in cold weather.
Denim fatigues. Overalls for field service, loose and easy to work in, used for fatigue duties, but also as a layer in medium climates, e.g. a pullover might be worn over them, OR the denim fatigue shirt might be worn over the pullover to protect it! COLOR was a khaki to green, with variations, so a greenish ochre with a touch of sand shade may look right. Early war denim could be a brown "tobacco" color that would fade to a reddish brown almost pink. Replicas are on line to view. Image below seems likely:

Related image
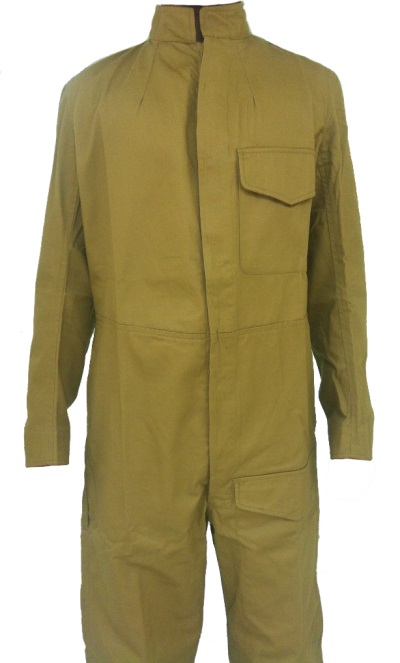
https://onlinemilitaria.net/products/5375-UK-British-Khaki-Drill-Tanker-Overalls/

SOCKS / LEGGINGS

Socks. Lt. olive wool, 
Anklets. Cheap leather, just above boot to protect lower trouser leg from terrain.
Puttees. Often wrapped just above boot with the brighter string tying them on. Or, the puttees were fully worn and usually a different drab color to the socks, e.g. brown puttees over olive socks with tan ties - contrast varied so it's up to you.
Colored flash was sometimes used, and not just for highland uniforms [this is the little bit of cloth showing from under the folded-over top of the sock, Scottish style.

SHOES

Boots. Black "ammo" boots far most common - heel had metal U on it, like a horseshoe! Officers might have brown boots, or possibly:
Chukkas, a brown suede shoe, often worn in desert.
PT shoes, i.e. sneakers, were issued and sometimes worn on duty, e.g. handling gunpowder, gunners, etc, to prevent sparks & explosions. Perhaps white with tan sole?

DISTINCTIVES, e.g. ranks, units, etc

Red/Green identity discs, i.e. dogtags. One red, one green, for ALL Soldiers.
RAMC orderlie: white wrap around bicep w' Red Cross.
MP. Red SD cap with black arm band "MP" in red.
RTR: white tank on a black parallelogram. 
SLIP ON RANK TABS: Generally, tons of variety, made locally, cheap and small.
Color. Could be BD, KD, other drab colors worn with any shirt, e.g. BD slide on KD shirt. 
Orange stripe at end for South Africans - other colors for other Commonwealth Units?
ID cloth hanging from epaulette, tied around upper arm.

Important Note - Dates for Brit Battle Insignia as follows:
- Division ID signs / number on vehicles in 1940, sometimes sides of vics, too
- Metal Rank, shoulder titles and trade badges worn during transition [against regs]
- colored rank and proficiency badges from SD worn on BD
- Division permitted wearing of regimental flashes in regt colors
Jan '40 - officer's ranks enhanced with cloth in arm of service color
- all ranks got same on sleeve w' regiment flashes
Fall '40 - Division and other formations added
1941 - new formations arriving in ME theater brought theirs from UK.

Usual arrangement on the sleeves:
Regimental Title [name, usually white on red WHITE half circle]
TOP = Division
Middle = Arm of service colors [horizontal strip of cloth, below], 
Next Middle = Regimental flash 
[sometimes AoS below this instead of above it]
Bottom Middle = Rank Chevrons [if any]
Lower Sleeve = Wound Strips
Service Chevrons


Arm-of-Service Strip. 2" long by 1/4" wide [a line in 15mm] was worn under any divisional patch, but occasionally incorrectly worn under brigade and other patches. Colors are:
- Infantry = scarlet [1=Sr. BGD, 2=Intermdt BGD, 3=Jr.]
- Rifle Regts = green
- Royal Armoured Corps = yellow-red
- Royal Artillery = red-blue
- Royal Engineers = blue-red
- Royal Signals = blue-white
- Recon Regt = green-yellow
- Royal Army Medical Corps = cherry [purple]
- Royal Electrical and Mechanical Engineers = blue-yellow-red
- Military Police = red
- Royal Army Service Corps = yellow-blue
* These colors would be under the metal officer's rank, appearing like a colored border
*These colors could be in form of diamond or square and have superimposed upon them the division symbol [if simple enough to work], which could also be a slip-on as well.
* Whole thing might only be worn on left sleeve...?

8th Army patch white shield with gold cross, on drill fabric.
Good Conduct Chevrons worn on lower left sleeve just above cuff ONLY by ranks below CPL. Look identical to chevrons of CPL, SGT, etc, but point UP not DOWN. You got one for each 6 years of good service.
Badges - mostly white laurels with acronym above - look like a white flower from distance. Bunch are explained [HERE]. worn on lower left sleeve above good conduct chevron.
Ribbons were sometimes worn above left breast pocket [like nowadays].
- India GS ribbon = olive with dk. blue center
- The Military Medal = blue, white center w'three thin red vertical lines
- The Military Cross = white w' olive center
- 1939-1945 Star = blue, red, sky blue bands
- Africa Star = yellow w'red center
- Italy Star = 
- US Bronze Star = Red w'narrow blue band center w' white edges [same today]

RANKS - the first image is larger, but the second seems more thorough.
Officer's "PIPS", the diamond etc could have the branch of service color in cloth under them, appears to be a band of e.g. red [infantry], yellow [armor] around the pip.

Image result for ranks of the british army in ww2

http://ww2live.com/en/content/ranks-british-army-during-second-world-war


Regt. NCO had a brass sleeve badge on red backing [brassy dot] above chevrons.
FIELD SIGNS:

- Large white cross taped to backpack to guide following Soldiers [so CPL? SGT?]

GEAR
Pattern 1937 web gear, AKA '37 gear. Could be lt. green shade of "blanco", and also came in darker Khaki Green shade [ochre, perhaps, like the above denim fatigues. Total disregard for the pattern within units, ie one unit could have '37 or preceding 1908 web gear. This gear was prioritized to the BEF going to France, so didn't reach MET until 1941-ish. Brass would be allowed to dull [not polished], normally not whitened except for commandos, MPs, some officers [staff, one would think]. 
Pattern 1908 web gear, AKA '08 gear. Didn't have pouch large enough for all personnel in the Section to carry magazines for Bren LMG as newly required.

WEAPONS


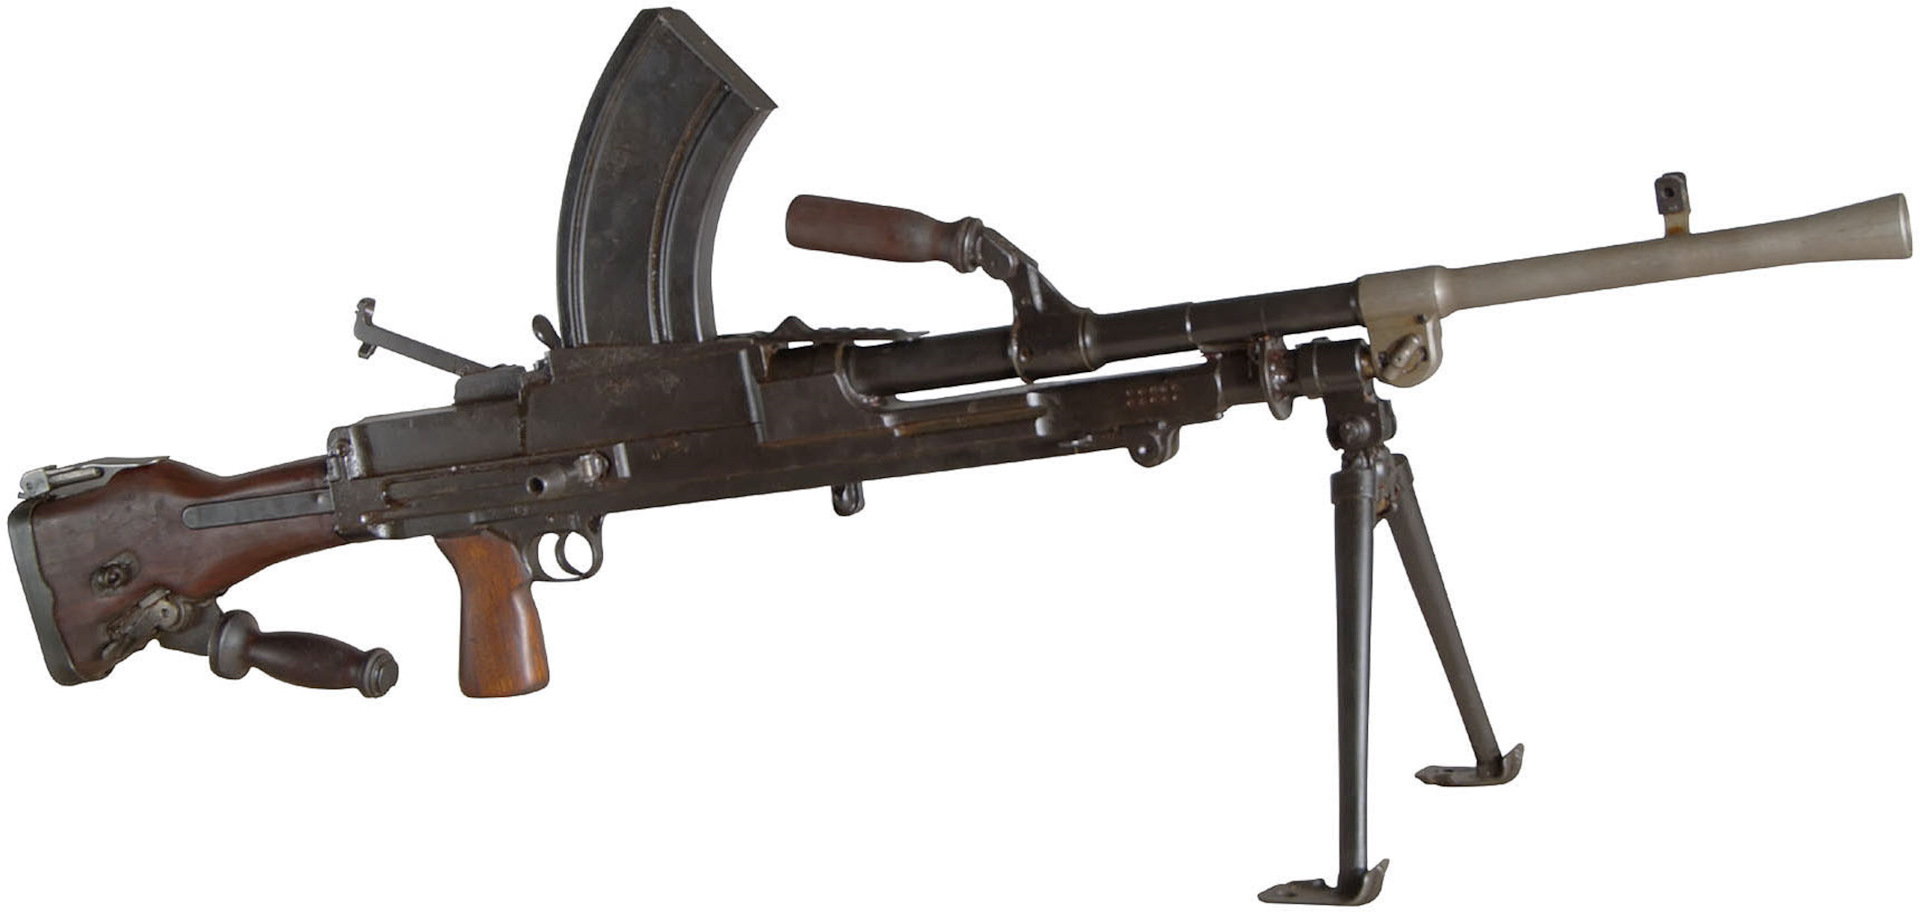
Bren LMG, great pics here: http://guns.wikia.com/wiki/Bren_light_machine_gun

Image result for ww2 bren light machine gun

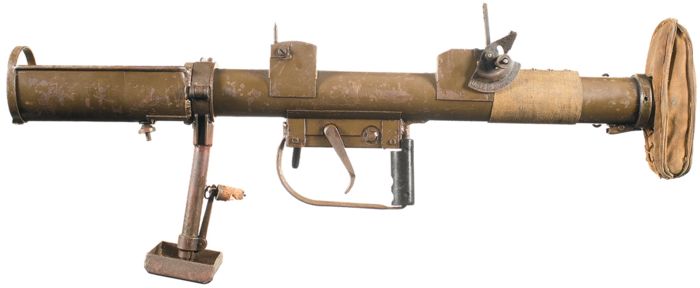
PIAT, pics: https://modernfirearms.net/en/grenade-launchers/united-kingdom-grenade-launchers/piat-eng/

PIAT

Boys ATR, pics: http://www.alloutdoor.com/2017/10/12/watch-british-boys-anti-tank-rifle/

(Image: Rock Island Auction Company)

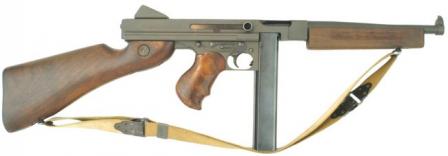
Thompson SMG, pics: https://modernfirearms.net/en/submachine-guns/u-s-a-submachine-guns/thompson-eng/

Thompson M1A1 submachine gun with 30-round magazine.

M3 "Grease Gun", pics: from here [CLICK]


SMLE "Lee Enfield" pics: 

https://www.royalgunpowdermills.com/armoury_db.php?mode=2&cat=Bolt+Action+Rifles+of+the+20th+Century&item=82 Rifle, Short Magazine, Lee Enfield, MK III

Webley Revolver pics: http://oldbritishguns.com/439-war-finish-webley

http://www.warrelics.eu/forum/world-firearms/pair-wwii-british-revovers-26629/


22nd Armoured Brigade

Uniform badge: http://www.hillmilitarymedals.co.uk/product/tactical-recognition-flash-badge-22nd-armoured-brigade-trf-badge/
BRITISH ARMY 22ND ARMOURED BRIGADE FORMATION BADGE WW2


4th Armoured Brigade - Honey Stuarts


BRITISH ARMOR

Tank Number might be black, or white on black, etc
Tank Name matched Squadron letter usually woman's name but could be attribute, e.g. C-SQDN would have tanks named "Carey" or "Courage" etc. Might be brown letters.

British Armour Decals - Positions, nice diagram: http://www.angelfire.com/pro/bison/72019.html


Malakand Field Force Prep, p.4: the Colors of Khaki

"Haven't seen any Fuzzy-Wuzzy's, have you Nigal?"
The British regiments made an uncertain change into khaki uniforms in the years preceding the Boer War, with the topee helmet as tropical headgear.  Highland regiments in Natal devised aprons to conceal coloured kilts and sporrans.  By the end of the war the uniform of choice was a slouch hat, drab tunic and trousers.  The danger of shiny buttons and too ostentatious emblems of rank was emphasised in several engagements with disproportionately high officer casualties.

There's a wide variety of khaki tones. The origins are from British soldiers in India dying their summer whites ["India Whites" to US Army] using tea, coffee, mud, curry powder, or colored inks, etc to get the khaki [dust-colored] color. So there is a huge variety of color tones, including: Lavender to blue, dark to light grey, and brown to tan to sand to off-white  [Osprey's "The British Army on Campaign (3), 1856-1881" p.23]. 


In 1885 a color-fast version of the khaki was implemented in the entire Army in India [so British and Native soldiers alike] which undoubtedly brought more uniformity to the uniform...no pun intended [Osprey's "The British Army on Campaign (4), 1882-1902" p.24].


A few examples are below, including actual museum pieces [with dummies], replicas [with re-enactors], and color plates from Barthrop's "The Frontier Ablaze" [which is a wonderful book, btw]. As these were from Pinterest, it's hard to trace the sources - if you've any to add, just put them in Comments below, Thanks! 


For comparison: The smooth cotton  frock on the left was worn by Captain William Murray-Threipland 3rd Battalion, Grenadier Guards, Sudan 1898, South Africa 1899-1901. A stark contrast to the late war appearance of the officers serge (and kit) on the right. Threipland later became the first Commanding Officer of the Welsh Guards, upon their formation in 1915. (Photo: James Holt collection)


Highland Light Infantry, Officers Regimental Doublet and McKenzie tartan breeches,   Grenadier Guards Officer’s serge frock. This serge frock bears evidence of a rough campaign life with its numerous field repairs and staining. The sleeves are lined in a lightweight flannel for additional warmth. He wears the pattern 1888 Valise braces and belt with Mk.3 ammo pouches.Lt. Milne-Homes 1899 pattern serge frock, tailored to a cutaway front. Note the varying shades of serge material used in its construction. Also displayed are his greatcoat carrier, his puttees, and his leather gaiters. (James Holt collection)


Related image

These two both Barthrop.
Related image


Related image

1900, 1910, 1914 khaki in Osprey's "Indian Army Regiments".

So, all well and good. We've reproductions, we've museum pieces, and artistic interpretations, but what does this come down to for the Wargamer and Painter?


AIP sells its figs in groups of 20 Infantry that are typically ten poses, so two of each. They could quite realistically represent detachments from several regiments who are foraging, patrolling, etc, so even in a skirmish setting could have uniform variations. 


This brings in the issue of game scale, as in how many people each figure represents, and what size formation the figure group / Unit represents, as it will affect game mechanics. For example, most wargames use a 1:20 ratio and will have a 480 fig battalion that looks like a platoon, but moves like a regiment in mechanics, altho the weapon ranges will usually be exaggerated so that it seems like a company of Soldiers.


My intent is to do skirmishing, so either 1:1 or up to 1:5, where a "unit" of ten is 10-50 men. This will provide a hot spot for the Soldiers to do their thing up close and personal. Think of it as "The Sword and the Flame" style, but with much simpler mechanics and no bathtubbing.


So for the first Unit, I've ten primed and ready figs from the Box 5423, "British Army on Campaign, Northwest Frontier 1985-1902, British Infantry" one of each pose:

 
https://www.armiesinplastic.com/northwest-frontier.html

Have to say, this is JUST what the little fellas look like - love it!


So it's time to think of some varying color palettes for each "Unit" of Soldiers, whether they are in Units of 10, 20, 40, whatever. My rule for actual painting colors is:

- visible to the eye and a couple of feet,
- strong contrasts to show color variations in articles of clothing / gear,
- look right to scale [usually means brighter than in real life]
- easy to work with [so water-based whenever possible]
- ability to stand up to the Miracle Dip in various shades
This has produced servicable and - sometimes - complimented miniatures that have been pleasing over the years.

What might that look like with this first batch?


First, I did some paint samples against the - large - bases, which of course are primed the same as the figure - plus they are quite large. 

  • Left fig has a light grey at 6 and the khaki I'm using for my15mm British Desert Rats at 3 - it is GW Commano Khaki, but I've mixed other stuff from Vallejo in it.
  • Right fig has Vellejo Lt. Brown at 12, an anonymous Polly-S brown at 3, Vallejo Dark Sand at 6, Butternut at 7, and Buff at 9.
Notice how the Vallejo Dark Sand almost disappears - it's a very near match to the primer.


There's also a sampling of the blue for the blue serve trousers - obviously, a white prime on them isn't the way to go. But I prefer the one on the left.
At this point, I'm leaning to a Vallejo Dark Sand coat, khaki puttees, and lt grey or off-white straps. I may give the officer a buff coat - just to show his custom tayloring - and the butternut actually looks like a good flesh color...


Well, that's all for now - off to Cold Wars to sell off a bunch of stuff and check out the occasional game!

Friday, March 9, 2018

Desert Rats Progress: P.1 Scots Guards, RHA, more

It's seems like we've been waiting YEARS to get this operation moving!

https://upload.wikimedia.org/wikipedia/commons/c/ce/The_British_Army_in_North_Africa_1941_E6804.jpg
yes, well, that's because it HAS been years...

So this project has been brewing for a while - well, years, actually. And now I'm committed to making it happen; as written up here [click] it is one of my top three [3] projects. 

It only makes _complete_ sense, as I've a pretty big, mostly finished, nicely painted Italian desert army that I've been using for years. And that has some more platoons I'd like to finish for it, also. Well, truth be told...LOTS of platoons! And I always paint more enthusiastically when I know I'm going to be using the figures soon.

This project is a Beda Fomm matchup, Italians v. 22nd Armoured Brigade at Beda Fomm during Operation Crusader, late 1941. Ever since reading "Brazen Chariots" 35 years ago I've been interested in this campaign, so it's a long time coming to game it in greater detail. It'll be great, as it allows me to field both sides with up to 4 players, easily, so I can do more demo games and host people with eye-catching stuff.

The Crusaders are mostly done, but need all the last touches. Still, they are "enough" to use on the table for now. But there's no British Infantry at all, and I've been substituting Italians for a few years now, which is definitely wrong. So progressing is happening daily...

Altogether there's about 60 Infantry, 28 Artillerists, 4 25pdr guns + limbers, 13 bailed-out tank crews. This will come to about 8 Artillery stands [4 guns/limbers, 1 staff and 1 command and 2 FO teams] 6 bailed tank crew stands, 20 Infantry stands [4 Bren LMK, 3 ATR, 1 PIAT, 1 x 2" mortar, 11 SMLE rifle stands]. In the "Up the Blue!" rules, these 34 stands are about 11-12 Units, when pushed to the limit. My normal choice would be:

  • 2 x 25pdr Dual-purpose Gun batteries,
  • 6 x Infantry platoons
  • several status markers

But it is great to be using rules where 3 stands / vehicles is the only essential guideline, and everything else can be history, character and flavor! In a pinch, I can field two full Motor Platoon companies of three platoons each, plus a battery of 25pdrs, and toss in two tank troops, and I've two 6-unit forces on the table. I can also switch them to Crusader Armoured Squadrons, just by swapping in more Tank platoons for the Infantry platoons.

I've lots more [lots and lots more...] including Bofers AA, AA and ATG Portees, 2pdr ATGs, Armoured Cars, etc. Very shortly I'll also be able to field some nice Jock Column Forces. 

Getting Ready. I cleaned and arranged by painting table - first time in a year at least. I then gathered all the tones I might need to not only paint them "as written" but to paint them in lighter tones that also contrasted with surrounding colors so as to be noticeable on the fig from a couple feet away - if it's not noticeable, why paint it??

Gear. I also went through all the brushes - the ones above are the best of the lot. The others are pretty beat up, but will be useful for stippling, camo schemes, etc, so I'm not tossing them...yet. Water and a small paint palette above, a bit of broken plastic just above the "Army Painter" logo to bottom right - I use this to dampen the brush and keep it wet but with the same color as I paint one aspect of all 63 figs in one sit-down session.

Mounted on popsicle sticks - same figures on the same stick. I then go down the file of soldiers painting something that adds variety down the file, e.g. a flesh tone, so that all the poses are not painted identically to each other. This builds variety among the batch of figs, and give opportunities to mix'n match since the row of figs are all the same, or almost the same. This combo of working either across the stick or down the sticks is  easy for me to track who gets what paint and what type of fig they are. I've NEVER been able to do the Battlefront thing where you mount the figs on stands and then paint them like that!


Handling the sticks while painting the khaki backpacks is easy, makes the brush strokes repetitive and fast, and the groups of same figs together speeds up comprehension of the sculpt, e.g. what am I looking at with this little bump, line, etc here on the fig??


FLESH: Mixing the tones up a bit...Vallejo Light Brown [70.929], Sand Yellow [?] and Off White [70.820] - haven't used it this batch, but 70.981 Orange Brown also looks like it would mix into the pallet well. I put a drop or two next to each other, and as I feel inspired, I mix them and draw from the pools of color to hit up the flesh tones of these guys - I like variety since everyone doesn't tan the same way [some just burn] and others are exposed less, etc. Very happy with how these look on the figs! They have some variety but it's not distracting.


The only downside to this is remembering the color combos, but posting them will help!

Going down the line with the black boots.


you can see some of the color experiments I've been making here and there.

Organizing by gear also helps. Below, the groups are [top-bottom] Rifles, support weapons, officers with pistols, SMGs, walking sticks and tea cups [yes, really], and radio FO teams. It's MUCH easier to paint all the Bren LMGs at once, all the Boys ATRs at once, etc.


So altho these figs are taking longer than I originally thought, getting into the groove if it is helping a lot, and I think future painting projects will go much easier and faster. After not being in the painting chair much for a long time, it was hard to get started again, I have to say. But now that progress is being made, it's much easier - I'd say I'm over the hump!

As always, comments and suggestions welcome, especially ideas for things to paint on these guys!

Monday, March 5, 2018

One-Hour Wargames #4 AAR: French v. Germans

"We are coming to CHAR-B you!"

yes, another opportunity for really really poor puns.

An exciting trip to the Fall of France in 1940 [not to be confused with all the other "falls of France"] with Gary and his lovely French army v. my nicely painted Peter Pig Luftwaffe Feldkompanie [may not be 100% period, but they're generic Infanterie from a distance].

I wanted to put the French on the attack and see Gary's cool tanks on the table. I also wanted to give Gary a straightforward scenario that didn't have much of a learning curve. #4 Take the High Ground from "One-Hour Wargames" is perfect, as it has a simple 6 on 2 hill Attack with the Defender getting 4 Units on Turn 2. Winner has "exclusive occupation of the hill at the end of the game" which is Turn 15. Terrain below:


And our interpretation on a lovely mat at FLGS [view from Scenario West], with French lined up on right and Germans lined up on left, but for two platoons holding the hill in center.


French platoons - Attacker
Char B
H-35
Panhard-Schneider P-16 AC
3x Infantry
*Artillery - Light Battery, Medium Battery

Panhards entering the board Turn 1.


Char B-1s about to enter. Dice are behind FO to record artillery fire missions and availability.


German Platoons - Defender

Pz IVc
PaK36 ATG [subbed by my Lt. AA]
8cm Mortars
3x Infantry
*Artillery - Medium Battery

Turn 1. View from the defense angle...one Infantry platoon behind crest [with one stand observing at crest...can't be Targeted] and on front slope the ATGs [my lovingly painted Lt. AA battery - came out just great! This is its gaming debut! What could go wrong??]. Gemans go "Ready" with both Platoons. Entire French Force enters from Board edge. German ATGs take a "Ready" shot on H-35s since there's numerous French Units that can see them, now. Below, Panhard ACs sneaking up the right to get view of lurking, dug-in Germans...


Turn 2. After getting spotted and slammed by French Artillery, the Germans then lose Initiative, and the French take the First Action Phase.
And they blast the ATGs with everything they have to predictable result...This is the usual "first battle for prized painted Unit" syndrome - they had to die quickly and ungloriously. I could've hid them on the reverse slope like the infantry, but I felt they'd just get flanked and blown away, anyway. Still, they would've lasted longer than Turn 2 that way...Panhard ACs move up very close to dug-in Germans on hill and can now spot them, altho they take some Hits from the Infantry firing off a "Ready" status.
German Turn 2 sees four Units enter the board. I pushed one Infantry and the Mortars up the left, and one Infantry and the PzIV up the right to hold the objective. My thinking was that the Mortars would fire from the far corner, sighting down the valley with the road, and the Infantry could occupy the Woods, threatening the French right flank and even the Hill objective - it's only 6" away from the woods. 

Turn 3. Artillery pounds the German Infantry reinforcements and on the hill, and the French Infantry moving into attack positions [Infantry on the move in the open are going to take some Hits from Artillery...]. Panhards and German Infantry exchange close-range Fire. 

Then, French blow their Initiative roll, and the Germans seize it back! This is great, because my reinforcements get a second move before French can react. I dig in the Mortars and Infantry who got pounded, hoping to rally them [or at least protect them]. My MkIVs move up and blast the Panhard ACs off the table! In hindsight, the Panhards should've kept their distance, with their own armor running interference with the German armor. My tanks are now also threatening the attacking infantry who have noticed their tanks are not nearby...

On their Turn 3 2nd Action Phase, the French push infantry up the front and the Char-Bs swing around and get very close to the Germans holding the hill - close range, outflanked, have Hits, doesn't look good, but there is tank support nearby. Heck, there's Infantry support nearby, also, and they are looking at the Char B's tails...

Turn 4. Germans have made it to the cover of the woods thanks to their Initiative. They are now threatening the H-35s flank, and protecting the Mortars [who've dug-

Turn 7. Despite some losses, the French have cleared the hill. The Char-Bs were attacked on the rear by the Dug-in Germans, and have been playing cat-and-mouse with the MkIVs, but the maneuvering hasn't kept the Germans from needing to re-take the hill.

Turn 8. German response is to take out the Char-Bs. The German Infantry at left attacked the H-35s from the cover of the woods, driving them off with 5 Hits [none Permanent] but their attempt to advance and threaten the French on the hill resulted in loads of Artillery pounding them to 6 Hits - 2 Permanent [so Red Hit dice]. Both sides now have a solid Armor Unit, and two damaged Infantry Units at the hill. The French still have strong Artillery support, and the Germans still have their on-table Mortars.

And Turn 9 has some Artillery peppering away and then...the French seize the Initiative!

The French pound the PzIVs with Artillery, and then when they're at 6 Hits, the Infantry finish them off, rolling 2/2 on Hits [needing a 5+, Red dice below]. Clearly, the two Tromblon VB Grenade Launcher guys on the stand in pic were right on target today! The Germans respond by moving their "better" Infantry onto the hill, preparing to Dig-in on the objective and work for the draw.


The weak Units on the hill exchanged jabs for a few turns, getting Dug-in, rallying, shooting, etc. The French tanks closed in on the rear of the German position, and wiped out the last German platoon on the hill. The French seized the Initiative on Turn 12, faced with nothing but a very damaged German platoon and the Mortars still in the fight.

Turn 15. The Germans took their badly weakened platoon with 2 Permanent Hits [but rallied down to the minimum of 3 at this point] and advanced on the hill, and dug-in while the French wiped out the other platoon. They got revenge when the French tanks attacked them and were in turn driven off the table due to German mortar fire [some amazing dice rolling there]. In the end, the French and Germans had two weakened platoons on the Hill, and a last weak effort to drive the Germans off it failed. Below, the Germans have a stand on the hill to left, and the French are on the heights, attacking down [shot is blurry due to tears in the German journalist's eyes at the bravery and sacrifice of the Landsers].
Game over!

Whew! That was a brutal, ongoing fight in doubt until the very end. When the French had a Tank platoon and an infantry platoon, and the Germans were only left with their Mortars and a very weak Infantry platoon, I thought it was over. However, the Germans were able to contest the hill largely due to the survival of platoons elsewhere, who then counter-attacked and beat back the French.

I think the French armor edge would allow them to fiercely assault the hill and overwhelm them with firepower quickly. After securing the hill and eliminating two Units, the French are free to stand defensive [which suits their Tanks better] and concentrate on eliminating Units. As it stood, they got spread out and Jerry was able to knock out more French Units first, which put them at a disadvantage for the second half of the game.

As the German, I was able to disperse the French by presenting them with numerous threats most of the turns. This resulted in a successful counter-attack that contested the objective.

If there's a tactic to walk away from this game with, it's stay focused on winning the objective and destroying Units!

Overall, a balanced scenario, with balanced play, and balanced dice, and a tie - I'm fine with that.

In terms of the rules, we discussed a couple of changes, but the only one that we both liked was that Units that fail to activate due to being suppressed can rally or dig-in which felt very realistic given the nature of Infantry and crewed weapons training.

We didn't have much trouble remembering the key points, despite some chatting and socializing, and talking history. I'm sure we made a few rules errors somewhere, but even I am getting used to this version of the rules, and it was Gary's first time with them since the big Totensonntag game, which had different rules.

One thing I HAVE TO DO is remember to bring my camera and take pics! Or I can convince Steve to show up and take pics for me...