Showing posts with label First Battle Series GDW. Show all posts

Saturday, March 6, 2021

First Battle Series: Playtesting a Turn Sequence

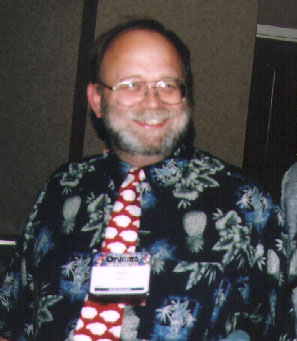
 Frank Chadwick!                     from Frank_Chadwick.jpg (297×341) (wikimedia.org)

Game designer and dedicated follower of fashion...

The scenario is a great little scrap with no special rules needed, and almost entirely takes place around a town, with a wadi and road being the only other terrain. It is from the Jump Start rules, and there is a more detailed and slightly larger scenario in the Main Rulebook. I played it several times trying different options and getting a firmer grip on the rules. This was a play test where I don't think I made any major mistakes for either side, and the French definitely had a matured plan.

The French force, the 2nd Desert Light Company - attacking to break the British supply line that runs along the road, so taking village 12A - Sukhna - will cut British supply route for their invasion of Vichy Syria in 1940. Includes two platoons of P-178 armored cars, three Lt. Infantry platoons, an MMG platoon, a Commander [command team, so a half-platoon or squad it seems], and their associated soft transport.

The British Force, a detachment of the Arab Legion - trying to hold Sukhna until reinforcements arrive [not in this scenario, however, only in the larger Main Rulebook scenario]. A commander, four platoons of Lt. Infantry, their associated soft transport, a platoon of Marmon-Harrington armored cars.  Not much, but they aren't being attacked by a lot.

Scenario Start. The British infantry occupy the 2-hex town, with the AC in reserve and the trucks behind the town [I'm trying to have a bit of realism here - it is possible with the rules to abuse the presence of transport in a hex. Trucks were a lifeline for a unit, so I am saying that if they are destroyed or captured, they give victory points to the other side]. French are formed up about a Turn away on the road. The Arrow markers are used to show a unit is in Firing Positions [FP]. 

An FP = Overwatch, so, eligible for Opportunity Fire during the opposing movement phase.  This is important as these rules have two chances to Fire - once in your turn, and once in the opposing turn during the movement phase.  If you move, you give up Opportunity Fire [call Reaction Fire] in the opposing move phase.  So during the game turn as a whole, your Firepower is halved if you move.  Not unusual game mechanic, but simple and elegantly done here.

All British Units are ready to Reaction Fire when the French come within range. They are also Concealed in the town, and can't be targeted by Direct Fire [DF] but could still be shelled by Indirect Fire [IF]. I get that, but I still don't like it as an artillery sheaf is about 100x100m, and these hexes are 200x200m, or 4 times the size of the sheaf...if you are just speculating and firing blind, your chance of a hit should be quartered, realistically, unless you drop four salvoes or something. Anyway...

Turn 1. French skip the Prep Fire Phase [called First Fire] and go to Movement. They advance down the road, preparing to dismount outside of effective British infantry range, and also set up a base of fire in the Wadi [blue line] which acts as an entrenchment giving good cover, same as a Town [+3].
As I've now played the scenario several times...the French aren't dumb enough to rush right into Effective Range [for Lt Infantry, 1 hex].  They park at what is long range for the Lt Infantry, 2 hexes. The choice for the Brits is to fire at long range at the relatively weak targets of the Trucks [a 1-4 attack] or wait for the Infantry to dismount and approach to within effective range of 1 hex [a 1-3 attack, but next turn]. Also, once the British Fire they may be fired upon by the French MMG and the two AC platoons. In response, the British also have the M-H AC platoon behind the town. This is the tactical problem that is now jammed into about a 4x4" piece of game board. It feels a bit cramped, actually.

What a "what the ho and cheerio!" the Brits fire, at 1-4, a 10% chance of a hit, which they don't achieve. Also, their fire is too weak to harm the passengers, either. You can't add up firepower in this game to improve the odds on the CRT, you only make additional sequential shots.

Turn 1, French Move Phase continues...
The AC platoon takes a long range shot at the French ACs, and rolls better but still misses due to the range and the "L" light gun they have. A pity...

The French infantry dismount, ending the Move Phase. No French Units may Fire in the Advancing Fire Phase [called Final Fire Phase] as they all moved. There is no move and fire in the basic rules - only some with special rules for gadgets like stablized guns.

The British Turn 1 begins with the AC firing at the P-178 ACs and missing. The infantry fire on the dismounted French infantry - they roll quite poorly and miss! The AC moves up to put the French within its effective range of 3 hexes, which is outside the French effective range of 2 Hexes.

During the Move Phase, the British infantry resume Fighting Positions and may Fire during the French Move Phase.  The AC platoon cannot as it moved up.
You may Fire then Move in this game, OR, not Fire, not Move, then Fire in the Final Fire Phase instead - and at units which revealed themselves by Reaction Firing. Makes overwatch easy to plan.

Turn 2 heats up quickly, as the French lay down some effective Prep Fire. they get some great rolls with the MMG and the ACs, and Pin both British platoons! Pinned units lose their FP and cannot Reaction Fire. This opens up the opportunity for Assault Movement by all units. Assaults allow defenders and attackers to fire during the phasing player's movement, albeit at reduced effect. The other French infantry fire but roll poorly.

French Turn 2 Move Phase, the trucks fall back out of range, while the AC take up an FP to overwatch. The French Infantry assault the Arab Legion in the town!

It should be noted here that I use the Blood and Thunder "Same Hex Combat" rules, which are better than the SoW Assault rules. They allow all combat units to enter an enemy hex, whereupon the defenders may Reaction Fire [at half effect if not in an FP] and then the attackers may fire at half effect. Overall, feels more realistic as this is a sizable 200m x 200m attack going on, and there is plenty of activity with as many as 8 platoons altogether allowed to participate!

British defensive fire is poor - pinned, they've only a 30% chance of pinning the French. French assaulting Fire is good, and they get another Pin result, destroying one Arab platoon. If you pin a pinned unit, it is destroyed - and if you damage a damaged vehicle unit, it is destroyed. Simple.
French Turn 2 move phase continues - the Base of Fire moves down the Wadi to engage the next hex, hopefully pinning the Arabs and preventing them from helping their friends engaged in Close Combat in the North side of town.
British try some Reaction Fire, but don't roll well enough. The French turn ends.

British Turn 2. Prep Fire manages to Pin one French platoon in the North of town, everything else misses. 

British Turn 2 Move Phase. The French AC shoot at the MH but miss.
British don't move, so take up FP instead. Note that this doesn't include the Pinned Brits fighting in the North hex of the town - Pinned units do not take up FP and cannot Reaction Fire [Op Fire]. The French infantry that is NOT Pinned Fires but misses [the other can't fire].
British Move Phase ends with both their Infantry un-Pinning.
As the British Fired everyone already, their turn is done - no one to Fire in the Final Fire Phase.

French Turn 3. Prep Fire goes pretty well. The Pin one Brit platoon in the North and South hexes of town, and Damage the British Armored Car platoon. Both lose their FP and cannot Reaction Fire during the French Move Phase.

French Turn 2 Move Phase. Their AC close to effective range of 2 Hexes, and the rest of the French do not move and take up FP. Brits have two Infantry platoons that may Reaction Fire, one in each hex of the town, but don't achieve anything.

By now, you should have a feel for a turn: Starts with Fire, then a move phase where enemy units in Fighting Positions may Fire, then finally friendly units may Fire if they have not yet Fired and didn't move. This doesn't happen if you have spotted all enemy units as you're going to shoot them in Prep Fire before they can Fire at you during the Move Phase!

British Turn 3. They manage to eliminate the Pinned Lt Infantry platoon. During the Move Phase, the Pinned infantry recover. They cannot Fire as Recovering counts as a Move.

French Turn 4. Prep Fire goes very well, Pinning both Brits in the North of Town, and the Commander in the South hex, and destroying the MH Armored Car platoon. The French AC move closer to increase their firepower against the South hex of town, while the North Hex Infantry assume FPs. The Commander and MMG also assume FPs, but I forgot to mark it.

British Turn 4. They manage to damage a P-178 platoon, but not much else, and their units recover from being Pinned. French Reaction Fire....
...kills one Infantry platoon in the North town hex. This hurts, as the Brits are now down to two Infantry platoons [one in each town hex] and the Commander in the South hex. 

So far the French plan has worked well! They established a base of fire, pinned Brit Units and assaulted into the town, then their fire support shifted to pinning the British in the South hex and destroying their AC, resulting in a gradual attriting of the British force.

British Turn 4. Prep fire doesn't accomplish anything. There's not much else to do, as they do not need to reposition.

French Turn 5. They move the commander into the north part of town, and assume FP with everyone else. Nothing else accomplished.

French and Brit turn 6. The French clear the North part of town and pin the commander in the south. The Brits manage to destroy one AC platoon and the other is pinned!  Still, they are in deep trouble...

French and Brit turn 7. The French Assault into the South part of town with the Damaged Armored Car platoon helping!  They lose the AC but otherwise nothing happens.

Turn 8. The Brit CDR recovered but now the Lt Infantry platoon is Pinned.

French Turn 9. They eliminate the Brit Lt Infantry and take no losses...
...then move the MMG platoon into the North of Town. Brit commander doesn't achieve anything.

French Turn 10. They get two Hits on the Brit CDR, who is double-pinned and dead...
...so the town is clear, the British supply line is cut, and the French win!

Whew! A French victory, finally!

I'd say that the level of abstraction misses a few details that some gamers will like, and can result in some predictable shoot-outs with neither side gaining much until that lucky roll shows up - a natural 1, or 2 perhaps, that pins or destroys a unit.

That being said, the Turn Sequence does make it pretty manageable to plan your "Shoot - Move - Shoot" turn out, but if you get interrupted it can be hard to remember who has done what. The hexes are tight fits resulting in large stacks that have to be spread out elsewhere on the game table to make it easier to track things. One does have a good feel for the difference between Assault / Close Range and Effective range using the Blood & Thunder rules which show a more mature system. If Infantry want to do something decisive, they need to bring heavy firepower to bear, pin the enemy, then Assault the hex.

Time is pretty quick in a small scenario, about an hour or so. I can see it taking two hours if there is more support like Artillery, or a bigger scenario. I don't think armor will last very long once engaged, so probably not an issue.

However, there is overall a lot of splitting the difference, and it generally makes attrition the path to victory for one side. At a counter/unit = 1 Platoon level game, that is OK. 

The rules are pretty simple but not simplistic, and the Turn Sequence commits units to Prep Fire [and possibly moving] or Moving, or Firing at enemy Units that reveal themselves by Reaction Firing during one's Move Phase. This makes for good practical and doctrinal "feel" and the mechanics minimize most aspects of "gaminess" the worst being manipulating the presence of soft vehicles in a hex.

The use of a CRT and mechanics that demand halving and doubling results in a fair amount of math. That could put some people off, altho a halving and a doubling cancel out resulting in zero math. Still, addition and subtraction is preferable to multiplying and dividing, IMHO.

My main issue is that the use of tight fitting hexes results in a fight taking place in a pretty small area of the board with stacks of 4-6 counters a side possible [2 Vic, 2 non-vic, and a marker counter or two] and teetering everywhere. the game would have benefitted TREMENDOUSLY by making the - very cheap, thin - map boards much larger so that the hexes could be twice the diameter resulting in 4x more space, or enough space for each side to have two stacks of combat units of 2-3 counters. This is something one can solve, by blowing up the key combat areas like a town and playing them next to the main map.

Overall, I think the system works for the company to battalion level of play it aspires to give. However, it is not very dynamic once you have maneuvered into position - it basically becomes one shot after another until something gives. There will then be an occasional maneuver decision to make. That may well be realistic with weaker units and minimal support from armor and artillery. Speaking of which...

This was a small scenario with no Artillery. Indirect Fire guns will certainly present more options for the attacker and help develop a plan of attack by pinning enemy units. Armor will obviously present itself as a maneuverable but risky unit, as it is most effective up close but then it is most vulnerable. At a longer distance, it is only effective against other armor units.

So the summary is that this system seems to offer attrition-oriented combat within a Turn Sequence that keeps both players engaged, while offering enough maneuver to keep you thinking, but not so much that it gets unrealistic. The concealment rules seem like they will need to be fleshed out a bit, but are realistic enough for a game with this level of detail. I never felt that the core mechanics were unrealistic or jarringly a-historical. While there is some gaminess possible, solutions are readily available like making soft transport part of the enemy victory points.

Overall, I feel like this is a good game system without a lot of rule problems if you have B&T on hand to answer your questions. Both TY and SoW benefit from additional rules explanations that came later in B&T.

I'm still uncertain I prefer this structured turn sequence to my own simpler, more fluid one. But I am giving it a thorough try!

Friday, February 19, 2021

Modern 1980s War Games: The Structured Turn Sequence

    Will it be "Fire then Move" Gentlemen...
 www.asisbiz.com/Battles/Barbarossa/images/German-Tank-column-on-the-move-Russia-01.jpg

    ...or Move then Fire?? 

While it is simple and addictive, I don't like the "Alpha Strike" aspect of Ogre / GEV. It is true that the technology envisioned in the game allows for constant movement and firing, much like the modern M1 Abrams has - but better one would think as it is 2085. Therefore much of the vehicular combat would be more like a naval engagement, with constant movement while firing on the move. However, in terms of game play, you get to move and fire without taking any fire. In terms of the technology, one would assume that if nothing else there would be a simultaneous combat between the moving player and the units he attacks, and sometimes one will miss on the CRT while the other hits, which takes into account one side hitting the other first.

Modern warfare does have a certain element of Alpha to it, no doubt, but the Alpha Strike has to do with combat effectiveness, the combination of training and technology. It isn't caused by a turn sequence that allows you to move and shoot before the defense shoots back. The general consensus would be that defenders are lying in wait and can shoot back first. Of course, if they are otherwise engaged by a unit - and their attention is focused there - or they are focused on movement, they may not be ready to shoot first.  

So, altho we can't always give the defender a shoot-first, we should always give them a shoot-first possibility, IMHO. This represents the defending unit has spent time preparing for an enemy advance, and will generally be ready for it. In my modern combat games, I call this "Ready" and it functions like a "saved" Action that is spent later. It's not a new concept, but the game that inspired me the most would be Andy Chamber's "Starship Troopers" published by Mongoose Publishing..

It's the same old problem: Move OR Shoot?  Move AND Shoot?  Shoot AND Move? 
When does the opponent get to shoot?  IGO-UGO or integrated turn? Or, splice the turn sequence by activity type, like like so many 1980s classics by John Hill, Frank Chadwick, et al. Well, does it make it easier to play with the old 80s style turn sequences?  My thought is so, but let's talk about that...

                    Just looking at this pic gets my blood up to play this game again!

ORIGINAL "SQUAD LEADER" (1977-ish) has a classic example of this highly structured, segmented by activity type of Turn Sequence, comprising 2 player turns of about 5 minutes with the following phases:
1. Rally Phase [also, artillery requests begin here]
2. Prep Fire Phase [also, artillery requests from last turn arrive]
3. Movement Phase
4. Defensive Fire Phase [also, artillery requests from last turn arrive]
5. Advancing Fire Phase
6. Rout Phase
7. Advance Phase
8. Close Combat Phase [also, artillery requests continue]
Eight Phases!  These  phases regulate your plans to, essentially:
PREPARE your troops, lay down preparatory fire to suppress the enemy, move [receive defensive fire], fire any units which moved - or have not moved or fired yet, ALL units of BOTH sides that have been 'broken' by fire run away to cover, and then the phasing player advances any of his units one hex including into an enemy hex - if that occurs, there is close combat. 
Your opponent then gets to be the Phasing Player and has the same sequence to do the same back to you.

It is essentially an "IGO-UGO" turn with an integrated move/shoot sequence [that incorporates Defensive Fire] followed by Close Combat.

FRANK CHADWICK modern game Turn Sequences
Main reason this fellow gets a section of his own is that I have a number of his games, and his 80s Turn Sequence evolves in various ways over the 30-year span of the rules - interesting!

1981. 15mm Traveller Miniatures: "Striker"
This one is actually a lot like "Squad Leader" but it is not as well explained. While much briefer, the rules are not as clear as SL, IMHO. The scale is 1mm=1m [or 1/1000] and represents 30seconds of activity. The turn sequence is:
  1. Command PhaseBoth sides decide command functions for their Leaders – Lead, Order, Rally - and issue any orders, or request IF Fire Missions for next Turn [or later].
  2. P1 Move Phase. P1 moves his units [P2 OpFires DF units that didn’t Move last Turn ].
  3. P1 Fire Phase
    • P2 Fires. P2 IF arrives; P2 then Fires DF Units that didn’t Move last turn. 
    • P1 Fires DF Units.
  4. Melee Phase
  5. P2 Move Phase. P2 moves his units [P1 OpFires DF units that didn’t Move last Turn ].
  6. P2 Fire Phase
    • P1 Fires. P1 IF arrives; P1 then Fires DF Units that didn’t move last Turn.
    • P2 Fires DF Units.
  7. Melee Phase
  8. Panic Morale Check Phase. Both player’s Units check for Panic as needed.
I like how the turn starts with leader actions that will shape the turn.  Aside from that, it is an IGO-UGO move-shoot-melee sequence, with shared Command, Melee and Morale Check phases.

1987. First Battle modern era: "Team Yankee"
I really like this board game, altho I have not played it thoroughly.  It is certainly an enjoyable intro to modern combat, which is more than most modern combat games can say!  Nice balance of realism and playability. I have a few posts of it here [click]. It turned out to be the first of a series of games off the same design, and they ended up being name the First Battle system. For a nice overview and review of the system, go to BoardgameGeek here [click]. A hex is 200m and a full game turn is about 5 minutes [not defined].

Game Turns [GT] consist of two Player Turns [PT] with Artillery at the beginning and end. 
Artillery Fire Mission Requests. [P1 and P2]
Player Turns
P1 Prep Fire.
P1 Movement with 2P Reaction Fire [RF; 2P RF units sacrificed their move in e].
P1 Advancing Fire.
P2 Prep Fire.
P2 Movement with 1P Reaction Fire [1P RF units sacrificed their move in b].
P2 Advancing Fire.
Artillery Fire Mission[s] Arrive. [P1 and P2]
One interesting twist on this Turn Sequence is that the side given "Initiative" by the scenario - usually the attacker - can choose to be Player 1 or Player 2 each turn. This can allow him to go twice in a row. Altho he must grant the same to the opponent first, deciding on the timing can make up for it. An advanced rule adds a simple command control rule at the start of each player turn but it isn't a "phase".

1991. First Battle modern era: "Battle for Basra"
This free game takes the "Team Yankee" design and bumps it up to a counter being a company instead of a single vehicle or team. Also, the Turn Sequence gets a little twist, giving the US a Move-Shoot-Move turn, but the Iraqis a Shoot-Move turn. This gives the US two gears - forward and shoot, and shoot and retreat - while the Iraqis are confined to reverse gear - shoot and retreat. There's zero chance of a counter-attack with them, pretty much. While a very interesting exercise in Turn Sequence design, I found it too easy to beat up the Iraqis and opted to use the TY sequence instead!


1991. First Battle moderns - WWII to the Gulf War: "The Sands of War"
This has the same Turn Sequence from TY, but adds an actual Command Phase at the start of each player turn. The CC rules are also fleshed out, and units out of Command Control are basically halved in effectiveness. I assume the rules for the 1990 Battlefield Europe are almost identical.

The Sands of War ups the TY design to one counter is a platoon [instead of one vic or a team], and a turn is 15 minutes. I think that's a bit long - feels more like 5-10 minutes. This game starts with WWII 1940 scenarios and takes the player through several more middle east wars including the Irab-Isreali Wars, Iran-Iraq War and ends with the Gulf War in 1991. Perfect vehicle to study not only weapon systems from 1940-1990 but the rule mechanics for them! 


1991. First Battle WWII: "Blood and Thunder"
This is the full maturation of this set of rules, far as I can tell. The rules are almost identical to TSoW but the assault / same-hex combat rules are thought out in much more detail - I like them a bit better, altho they add a bit more math, they are much more reasonable.


2012. "Command Decision: Test of Battle"
This is actually a miniatures game, and seems to be the last word in this lengthy series of Command Decision rules.  Here, the Turn Sequence renames a few things and puts the Command Phase at the...end?  Unusual!
  1. Artillery Phase: artillery requests and results
  2. Movement: 
    • Prep Fire is declared sequentially then resolved simultaneously.
    • Side A then Side B moves.
  3. Opportunity Fire: DF and IF are both resolved simultaneously.
  4. General Fire: Remaining Fire is resolved simultaneously.
  5. Command & Morale: Order and Overwatch markers are placed. Morale checks are resolved.
Overall, it is the same sequence, except that Prep Fire doesn't have its own phase, and is incorporated into Movement. Opportunity Fire is then not incorporated into movement but part of a second / final / advancing Fire Phase, which wraps up the Fires. With a Game Turn of 30 minutes and one vic a platoon, all fire is simultaneous due to the long amount of combat possible [intermittently]. Would be interesting to hear his thoughts on this sequence!  Overall, it is a turn 60 times longer than Striker, with many possible outcomes at the operational level.

The main question for me is: 
"Do these structured Turn Sequences make it easier for me to remember what to do and when?"

Some additional thoughts on the Turn Sequence
1) It needs to allow a logical plan to flow in one turn, UNLESS it is imperative or realistic for the opponent to react part way thru the plan, e.g. OpFire. Most of these sequences seem like they will aid you in doing so, altho they can also restrict your reactions because they are less fluid. Overall, I think they not only help a new player to "organize his thoughts and plan" but show a plan developing on the battlefield.
2) In Modern Combat, the logical plan is "Fire, then Maneuver". The intent of the Fire is to suppress the defense - preferably entirely - and allow the Maneuvering force to approach unscathed to make its attack, preferably on the flank or rear. This means that the logical sequence for a modern fight has to be:
Artillery, Preparatory Direct Fire, Movement, [Defense Fire], Advancing Fire [at reduced effect]. All of these follow this pattern with Direct Fire, but the artillery is in various spots, often in a following turn. Easy to house-rule and fiddle with since the Artillery is in a designated phase.

I found Team Yankee and Basra smooth enough in the several games I played here [CLICK]. However, I've put more thought and research into modern combat since then, so it is definitely time for another playtest - but this time with my newly acquired "The Sands of War"!


Saturday, March 21, 2020

Back on the Net...liking it and not!

With the combination of government mandates and fearful friends and acquaintances, there's not much live gaming going on. Tempting as it is to push it, I'm hoping that with only 0.0000375 of my state's population having the bug, in another week the situation will - still - not be statistically significant and we can get back to a  more normal pace.

So, while I'm back blogging and checking out blogs, I would prefer to be gaming live - I miss you guys, *sniff *.
:)

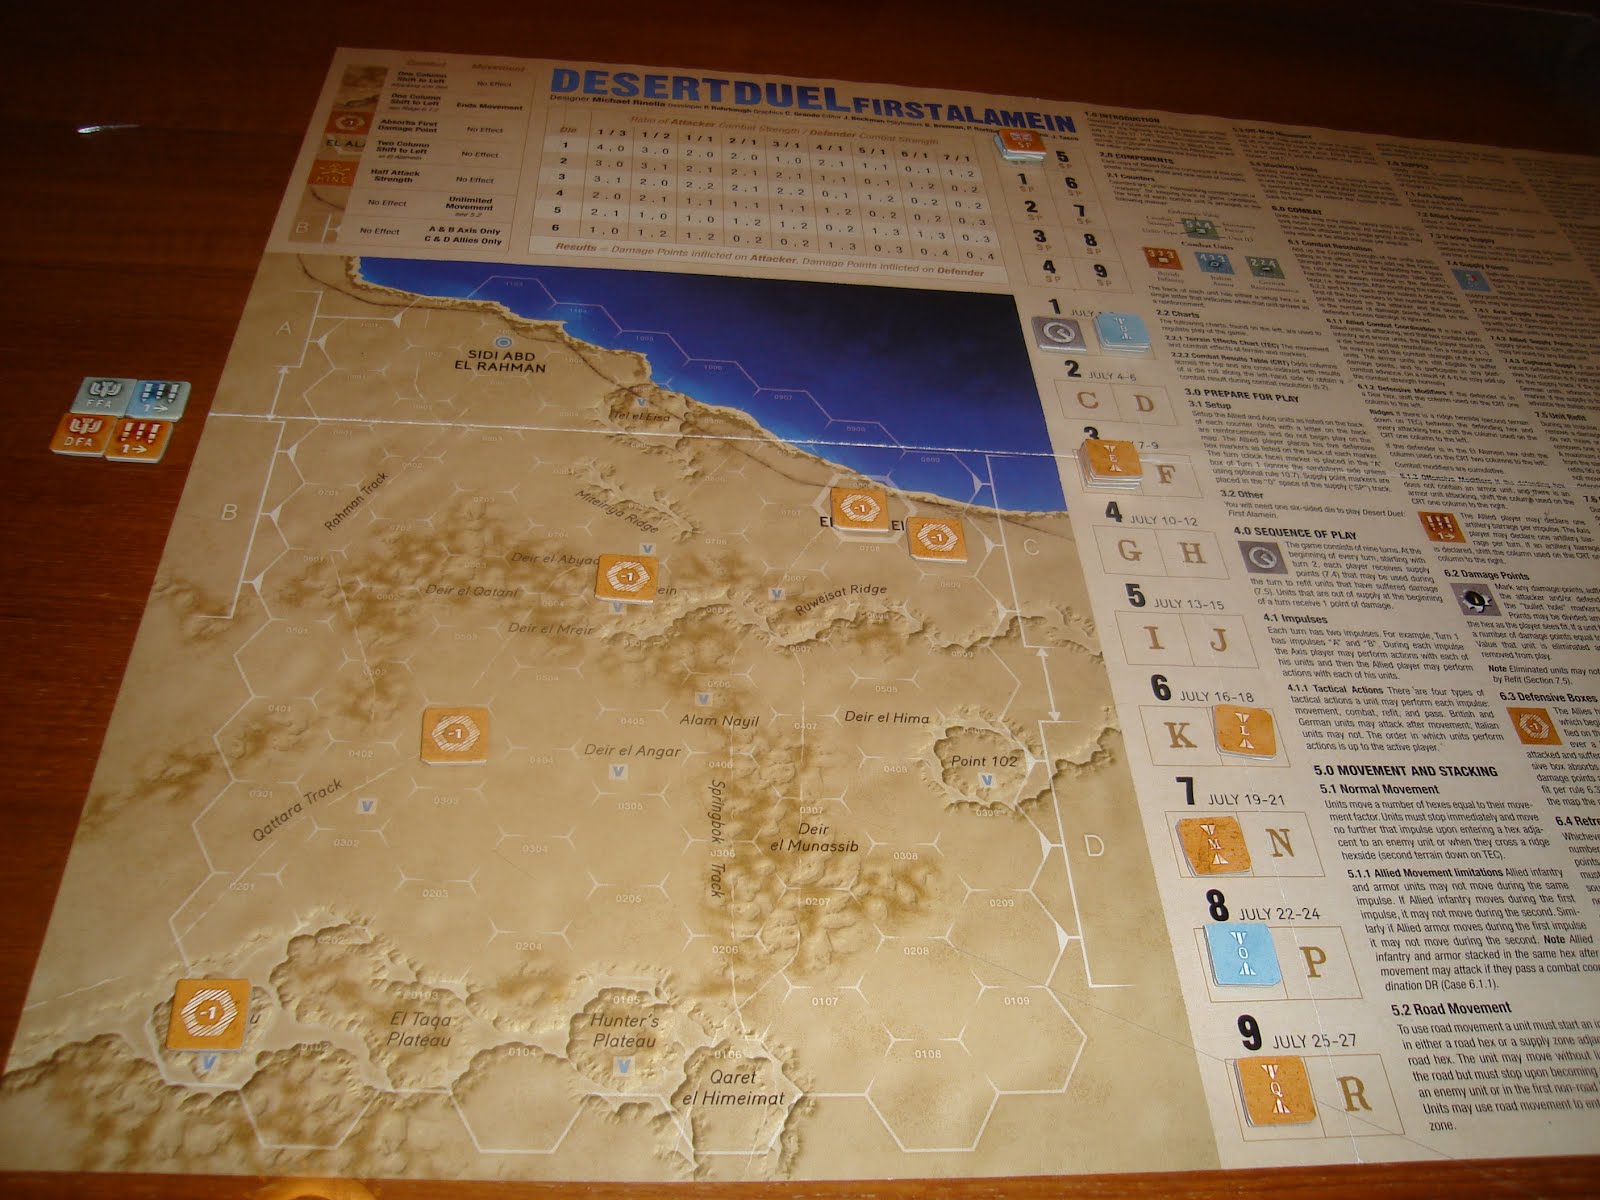
Meanwhile, I have wrapped up Army education and done some spring cleaning [of which more to do...]. In terms of gaming, I took a couple down from a shelf to run thru. The first is one of an embarrassingly large collection of British in North Africa WWII games. As it is one of the shortest, "Desert Duel: First Alamein" by LPS Games got its first go.  Detailed reviews [HERE] at BoardgameGeek.

I found it pretty easy to set up, and the components are pretty good - the map I rather liked, the counters were "OK".

Conveniently, the rules are to the right, part of the map. British setup has a series of boxes on the battlefield, too far apart for good mutual support [as in real life...didn't learn anything from Gazala debacle]. Below, the Germans in blue to Northwest, British in a sort of orange sand color East and South. Reinforcements fit on the turn track.

When you start getting into it, the mechanics are a mix of the usual and a few interesting bits and pieces. It is not a revolutionary design. Most units have a strength of 2-4 and attrit by losing a point or two in combat. There's a sort of quality roll that affects things [higher quality units last better]. The use of a mandatory retreat mechanic combined with a zoc rule that blocks retreats makes this feel much like other games - block with a zoc and destroy the stack.

However, this is hard to do at times - your own stacks are vulnerable when you spread out, and after destroying a stack you are scattered around the desert and can get enveloped yourself. I made several notes about changes to make based upon reading Niall Barr's "Pendulum of War" including limiting British movement somewhat. Then, got very distracted by Army education and had to eventually clean up the stalled game that was gathering dust. It and others will get investigated as I return to the desert with miniatures - soon - and look for the perfect board game to use as a campaign system.

Just last few days, I had a real hankering to return to the modern era - Army education does that to my gaming habits. I have been really eager to continue my investigation of the "First Battle" series of boardgames by Frank Chadwick, most of which are GDW from the 1980s or so. My first one is the wonderful "Team Yankee" on which I've already posted HERE, and which I plan to continue playing. It is a 1 counter = 1 vic or squad level game.

But I had a hankering to try another one, a gateway game to the series that was a convention giveaway. "Battle for Basra" is a bit stripped down, and each counter is a company instead of a single tank [!]. The higher level of play has a few changes to the TY mechanics. First, it manipulates the turn sequence to give extra advantages to the US player instead of just making all their counters "super awesome" as a mechanic. The turn sequence is:
US Shoot
US Move
US Shoot [again!]
Iraqi Shoot
Iraqi Move
In essence, all US forces can Shoot - Move - Shoot in their turn, while the Iraqis can only Shoot - Move. This seriously degrades Iraqi combat potential as they can't maneuver and attack at all. They are forced to sit and await the US onslaught, and then survivors [if any] get to fire back and retreat. Second, the turn sequence has no interaction like in TY - there is no opportunity fire at all, and all units can shoot in the proper phase without it impacting their move and vice-versa. This means all US units can Shoot up the defense, close in and finish it off at point blank range with no return fire - ever. Looks pretty grim, but here goes!

I opted for a defense in depth, putting all the infantry in a wadi that confined the US to the NW board corner. Backing them up are the T55s and BMPs w' ATGMs - they have great range and are almost a threat to the Abrams! A highway under construction [HUC] is the next line of defense, full of the rest of the infantry. The US force of Bradley's and Abrams enters in the small space and right off the bat has to blast away to get some more room! The key US decision is how to crack the defense - fast and dirty by advancing into point blank range, or carefully peeling the onion apart?


Just to try it out, I went in close, but not into the same hex. At a range of 1 hex, the infantry are nothing to fear while the Abrams attack value is doubled for under half range.

I lost a couple of Bradley platoons due to hot die rolling by the Iraqis.

Turn 2, the Abrams dashed thru the gaps, enveloped the T55s and their BMPs, and...

...ate them for breakfast and lunch!


Turn 3, the US armor crashed into the infantry holding the HUC, and ripped them apart - lots of 5-1 attacks. The Iraqi reinforcements then entered [rolled each turn for the turn number or less, classic old mechanic] and deployed.


These were then eaten for dessert! With a few BTR platoons left on the table, I called it a day for the Iraqis.


Turn Sequence mechanics...some thoughts.

The novel use of two different turn sequences for a game is a great idea - it takes into account the outstanding ability of the US forces to fire and maneuver, and do it much faster than the Iraqis. The Iraqi turn sequence, however, confined them to one tactic - wait, shoot, then scoot. Not only do they have weaker gear, but they have half the opportunity to fire, or none at all if they maneuver into range. For a company level game, that is harsh [even if realistic given the history]. I can live with them only shooting once, but I think they should be able to shoot-move, or move-shoot.

In the end, I decided to use the TY sequence of play:
A Shoots
A Moves [B opportunity fires]
A Shoots
B Shoots 
B Moves [A op fires]
B Shoots
Catch is you can only fire in one of the shoot phases, and Op Fire [in opposing turn] if you didn't move. So you can shoot in the first or last phase, then gain the Op fire and shoot again in the enemy player turn for double the shooting - but you can't maneuver, you are committed to lots of shooting - elegent! The contrast tactic is to shoot then maneuver into cover - it halves your rate of fire and a fast-moving attacker can close in on you, but you don't take much return fire.

In TY, missiles can't move and shoot at all - it is a very tactical level of play. At this higher company level I imagine they are taking turns maneuvering then loosing missiles, so I did permit it.

This time it was much harder for the U.S. I imagine them greatly fatigued from a rapid advance and running low on ammo, so relative performance is a bit closer [just...a bit]. With a possibility of moving and shooting, all the Iraqi armor had a threat range of 10-11 hexes and set up farther away. Below, I divided the Abrams and Bradley's up and sent them in close - I promptly lost two Bradley's to excellent Iraqi rolls of a '1'! A third took a temporary "Damaged" result. Yikes!


I re-thought that, and tried again, this time I held off with the Bradleys. With a defense of only '4' [the Abrams is a...14!] they need to hang back and use their 20-mike-mike to soften things up a bit. Forgot to turn the Bradley counters back over, but you get the idea. Meanwhile, the Abrams pile onto the Iraqi left flank, looking for a break-through!

And unsurprisingly, they get it!

They take a tiny bit of heat in return thanks to some great dice by the desperate Iraqi forces - two Abrams are "Damaged". Note: I also decided to give the bottom of the combat chart a minimum D result on a '1' - even if the attacker can't get 1-4 odds. I figure being shot at is stressful and wears people down, at least. I did not use the "two 'D'  and you're destroyed result for those units, however. I figure they just don't have the firepower to damage the Abrams. Thus, the "D" is more like a "Disorganized" result.


Turn 1, Iraqis move up, getting their BMP's in range with their ATGMs. They completely miss however, needing a 1-2.


US Turn 2 ends with a huge whole in the Iraqi left. On Iraqi 2, the right fist Iraqi armor knock out an Abrams with an ATGM! 

Encouraged, the Iraqi tanks advance and D one Abrams, followed up by their BMPs


U.S. Turn 3, the first fire phase counterpunch from the US ATGMs is super nasty, and most of the T55s are knocked out, along with two BMPs from the center.

Turn 3 Iraqi reinforcements arrive and move up the road. I decide to use the triangular fortification to hide behind, while moving up the slower BTRs.

Turns 4 and 5, the US trashes most of the Iraqi armor with their tanks and ATGMs and start maneuvering out of the corner in which they've been confined. The Iraqi armor shifts south to hide out of LoS behind the triangular fortrification.


Turn 6, the US rapidly advances down the center road and begins attriting the infantry in the HUC. A counter attack by Iraqi T72s is heroically executed...

...and they knock out two Abrams!  What!!!???

Their joy is short-lived, as they are all destroyed.

With nothing but weak armor destined to die to the US ATGMs, and the infantry going to get chewed up by the last tank platoon and mortars, I called it quits - but it was a much more exciting game.

So, the turn sequence...it's critical to not only shape tactics but  to make the game dynamic. Clearly, more to be said about this in another post on the First Battle series. Am particularly interested in "Blood & Thunder", an East Front WWII version that represents the culminating development of the rules, far as I can tell. And...I acquired a mint copy at a great price through Boardgame Geek!