Showing posts with label 6d6 Rules. Show all posts

Sunday, October 6, 2024

"Up the Blue! WWII" Revisited & OHW #14 Static Defence

"Ciao! We are preparing to see off those pesky 'Limeys'...

...and then have a very fine dinner!"


Did a couple of playtests with the 2020 draft of these rules... the last time I seriously worked on them! I blame the CHI-FLU years entirely, as lots of things just got forgotten about, including all my WWII figures, projects and rule sets. 

D--n CHICOMs...!

Anyway, here we are today, with two playtest using One-Hour Wargames #14 "Static Defence" under the belt, and some work streamlining, simplifiying, clarifying all going well.  I can't really complain that I haven't had enough time to look at the rules with a fresh eye! The scenario has equal attacking and defending forces of six Units each. However, the Red defender has to keep two units on each objective, the town and the hill.  There are two Units that are free to move around. The attacking Blue player has the option to attack either objective. The main difference between the two objectives is that the Town acts as Cover for a defending Unit within it, while the hill is only helpful if the defender is a Tank Unit, as it can go Hull Down. In both cases the casualties are halved in the original rules.

Below, the British force. I'm almost ashamed to display them, but time is limited and I'm forced to use my partially painted Crusaders, aka "Cruds" and two units of Blackshirt Italians as the Motor Infantry. There's three platoons of regular old Cruds and one of Close Support Cruds, that function in the game as a Tank platoon in all respects except that it Fires as a Mortar.

Below, the Italian force, for which I should express some modest embarrassment at having to use gun platoons from my continental Italian company, as I still haven't finished the Bersaglieri gun platoons. But anyway, two tank platoons, two Infantry platoons, an ATG platoon and a Mortar platoon. A nice balanced force able to meet multiple threats.
I then did a first playtest and had a bunch of ideas for improvements, mostly subtle but still important. I didn't take any pics of that fight.

Below, the end of the second playtest, using a somewhat re-drafted 2020 set of rules. This was a debacle for the Italian defenders, largely due to bad die rolling and a couple of bad decisions. The British got a tank platoon on the hill for a win, AND contested the town with a platoon of Motor Infantry. 
The Italians contested it with a platoon of Tanks. Still, both Units had 6 Hits and the supporting Cruds 5 Hits, so anything may have happened on the next player turn with the town. Most likely, both Units would have been eliminated and the Cruds would have occupied the town and gotten their first bath in a few weeks!


A number of small but complicating mechanics were removed. I made the hard choices instead of splicing hairs, mostly by using one modifier with several single conditions, i.e. if you're firing on the move OR firing at long range, you are penalized once, instead of adding the two together. Also, I found easier ways to incorporate things that I feel *really* matter, and most of all I obeyed Neil Thomas' design goal to only stress the big things - most of the little things are adjusted by soldiers and largely cancel out based upon the relative Quality of the opponents.

I was very pleased with the changes, which after aggressive decisions and clean re-writes not only kept the basic rules at 5 pages, but I was able to go from 11 to 12-font Ariel, since I had cleared out a few things!

Finally it was time to unveil the rules in a full post. 

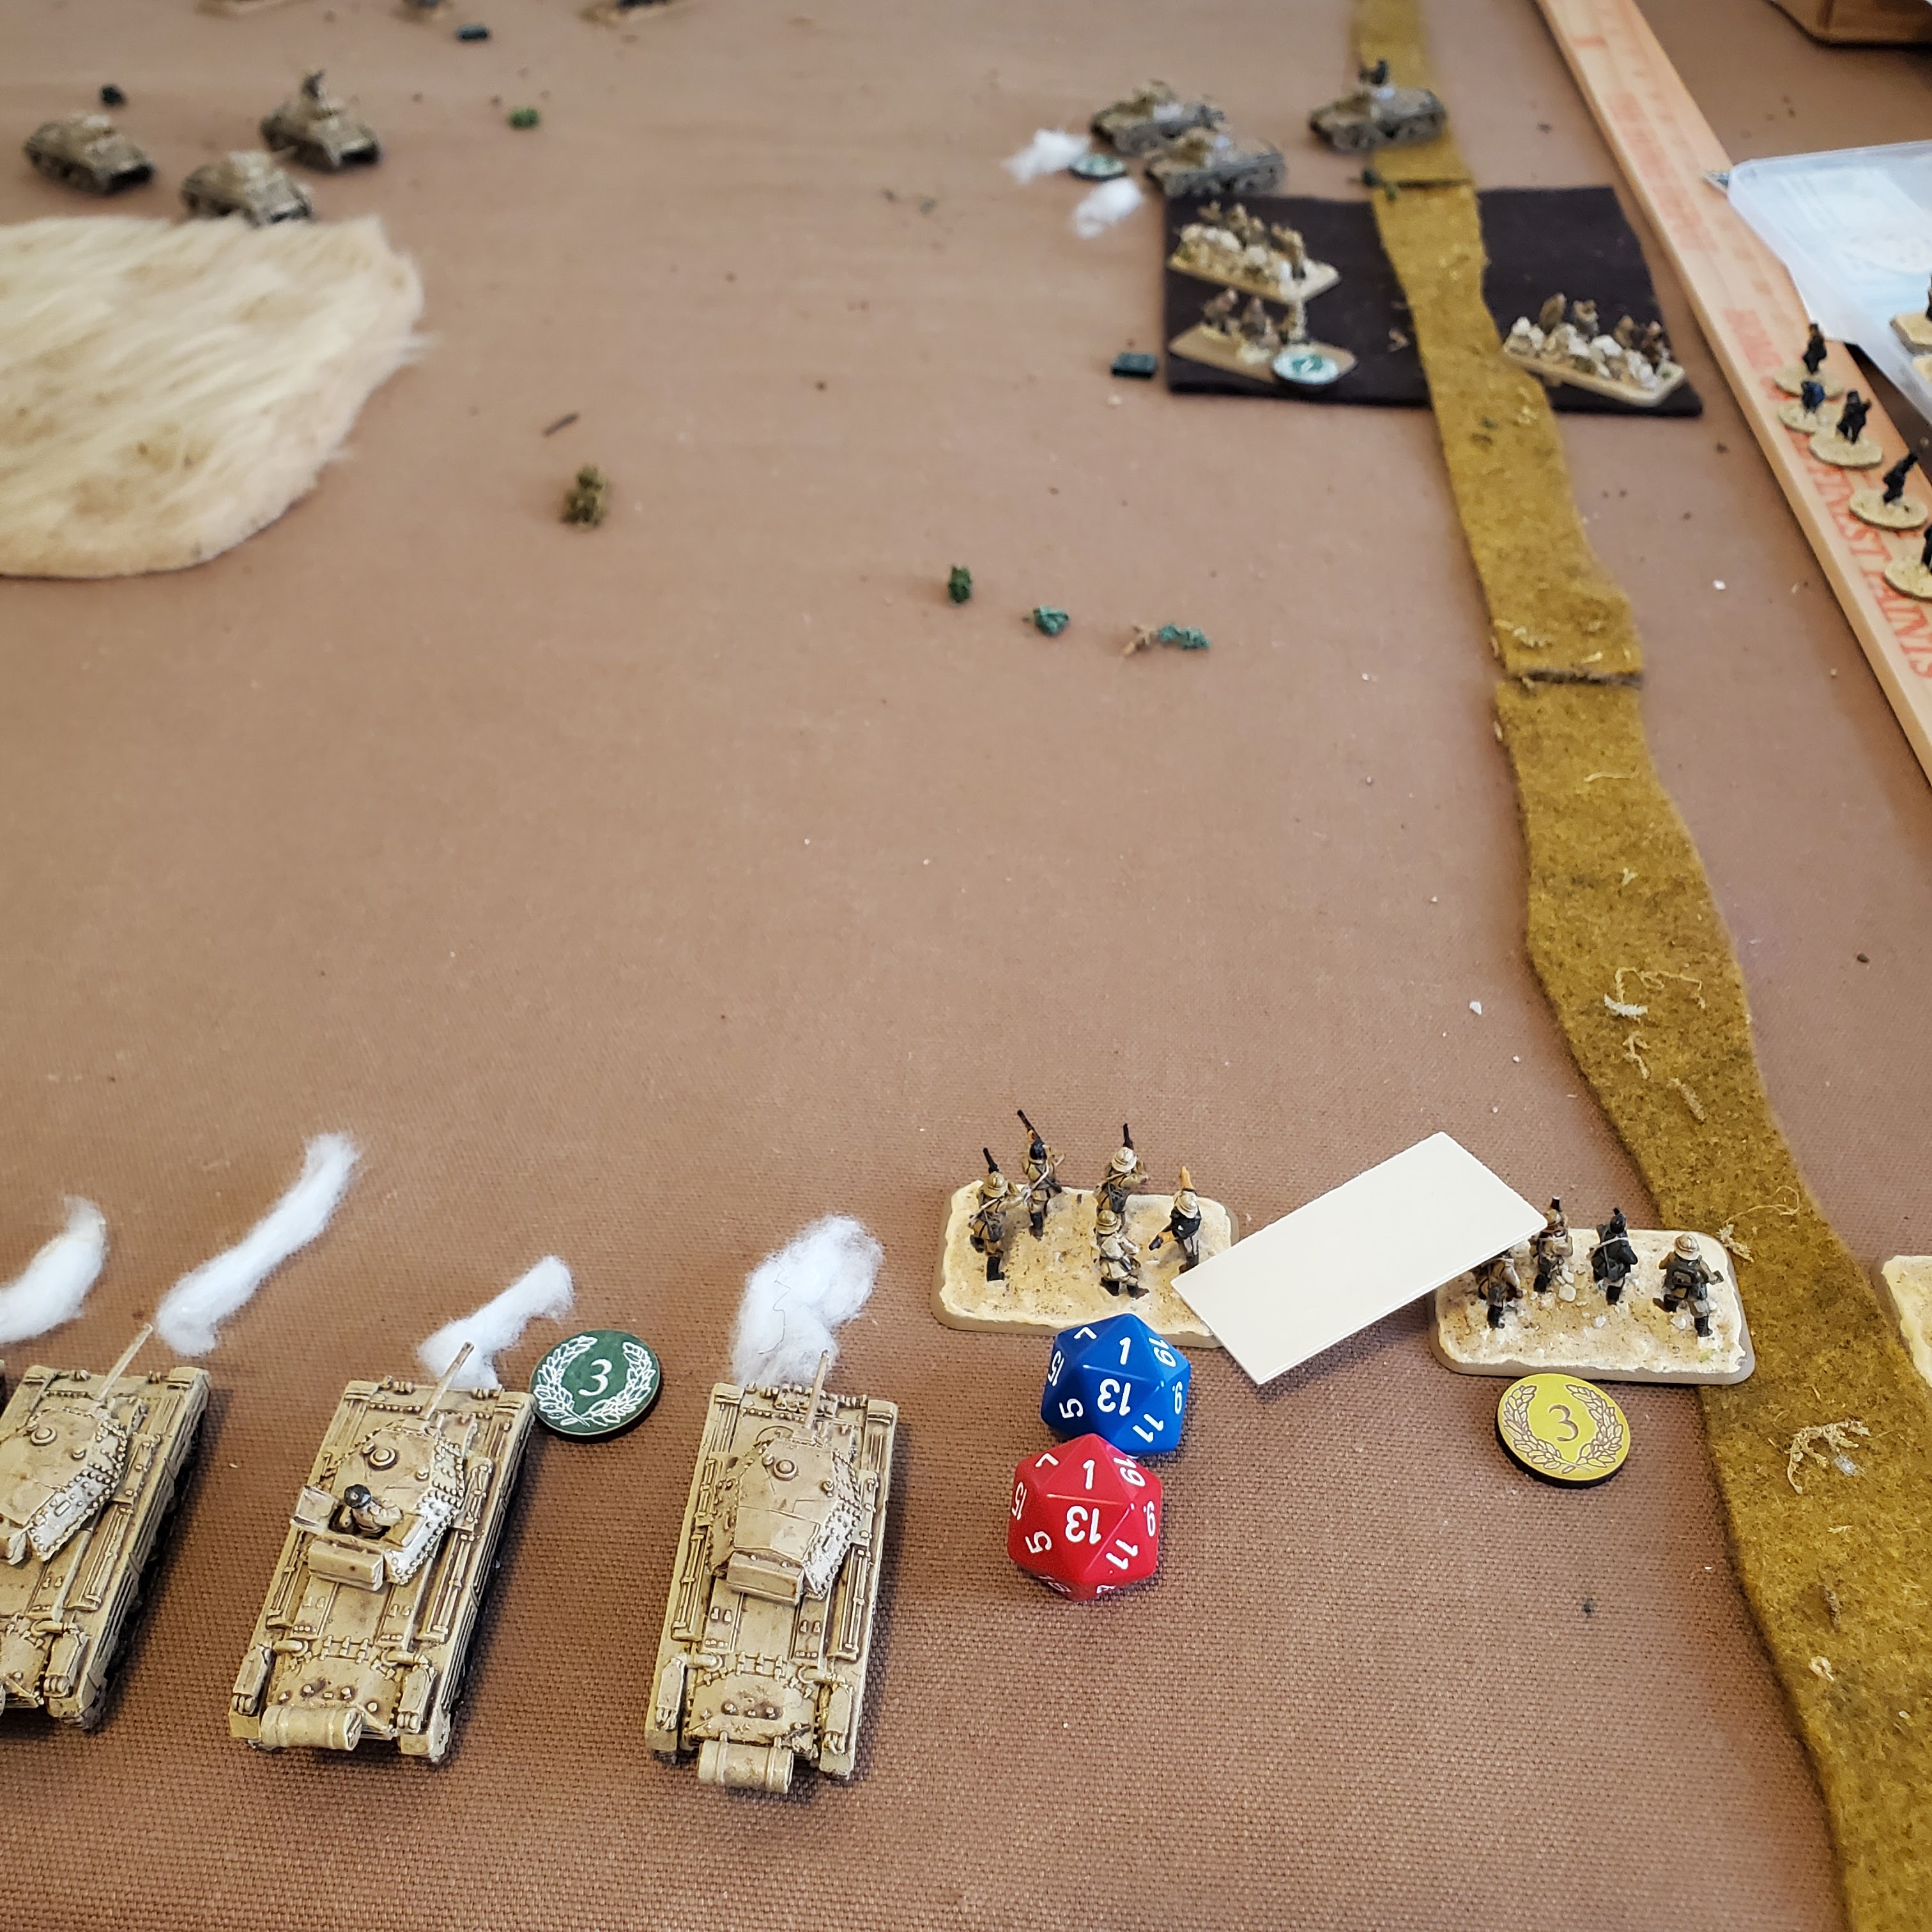
Below, the end of Turn 1.  
Italians have Mortars behind the crest of the hill with the command team spotting at the crest [can't be spotted themselves]. In front, an Infantry platoon is Dug-in, and also Ready [on overwatch]. Some ATGs are in the center rear, facing the likely avenue of approach to the left. below them are a Tank platoon with another behind the town; in the town the other Infantry platoon.
The British had an interesting deployment: altho halve of each force is on either side of center, most of their force on the right is already engaged - two Tank platoons and an Infantry platoon. The CS Cruds are center-left with Line of Sight [LoS] to both objectives, a powerful asset in either case. One Infantry platoon is racing forward to the heavy brush dead ahead, with the final Tank platoon moving rapidly up the left to prevent reinforcements from shifting towards the town. Altho they are fighting to the right, the British can still shift to the left quite quickly if needed, as they have trucks and tanks.  The Italians are playing the same game with their ATGs, which can Fire into the open spaces on either side of the center brush [it acts like a wood, basically].

Turn 1 ended with some solid hits on the right-most Italian and British Tanks, and the Italian Mortars thrashing the British Infantry by Ranging-in and dumping a well-placed barrage on the British moving in the open desert.
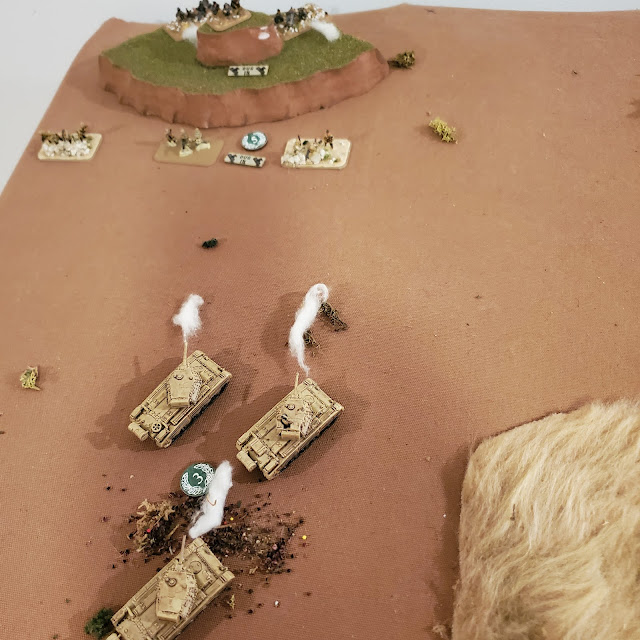
Above: the white 100m x 50m card is the sheaf for the Mortar barrage.

Turn 2 ended with the Italian Tanks behind the town almost being wiped out at 6 / 7 Hits, while the British Infantry on the right were forced to Rally as their fellows dashed up the middle to gain a fire position in the heavy brush at center.
The Italian Mortars only got a hit and the British rallied it off. The left Crusader platoon used a Tactical Move to approach the Dug-in Bersaglieri at the hill.

At the objective, the Bersaglieri are in good shape, while their Tank support has moved behind the town to Rally in future turns sheltered by the other Tank platoon and the ATG's. Those will prevent the British from dashing up the open space near the town, as there'd be some serious damage, most likely.

Turn 3 was a "Respite" as there was a net tie on the Initiative roll. Everyone benefited from having a chance to rally, and all the dust was removed.

Some good Rallying by the British has them ready for action again!

Turn 4, the Italians seized the Initiative and chose to keep it. 

Turn 4 saw the left Crusader platoon engage the Bersaglieri at the hill objective. They *just* managed to stay out of LoS of the ATGs, and they outrange the infantry a bit, altho the Fire isn't decisive as they are Dug-in.  At the town objective, the British advance everyone and put a lot of Fire on the Infantry in the town and the center Tank unit. 
For the Italians, their center Tanks fought back, along with the Infantry, and the Mortars provided some more Hits on the advancing British Infantry. The other Tank platoon rallied quite well and was almost in perfect shape after their near-brush with death early in the fight!

Below, the British Infantry are almost done with 5 / 7 Hits, while the Cruds next to them are at 4 / 7 Hits.  Fortunately, for Turn 5, the British seize the Initiative!

On the left, the Cruds advanced to attack the rear of the Italian Tanks, and scored three Hits on the move! They were met with weak Fire from the ATGs on overwatch.
The Bersaglieri missed, and the British continued to Fire upon the defenders to some effect while moving forward one Crud platoon.
Then, the second Crud platoon advanced and knocked out the Tanks huddled behind the heavy brush, eliminating that platoon! The British Infantry were able to advance out of the Mortar barrage, which failed to Range-in on their new position farther forwards. 

Thanks to the Mortars, the Tanks and the weakened Infantry, they were able to push the Bersaglieri in the town to 7 Hits, and they withdrew from the field in good order, leaving the Tanks to hold the town.
"Give'em hot lead Lads!" shouts the grizzled sergeant leading the Rifles. And they do, and the town is now empty!  But can they exploit this opportunity?

Turn 6, and the forward advance of the Motor Infantry is halted for them to Rally and reorganize a bit, and they are again Hit with Mortar Fire.  

The end of Turn 6 sees the British mostly in a cautious advance, while the Italian Tanks occupy the town, driving carefully down the road. While they are able to see the Brit Infantry and vice-versa, none of the Brit tanks can see them, not having a good view down the road. They will need to re-position and support the Infantry's drive into the town.

Turn 7 is another Respite. This mostly helps the British, who have a few Units with Hits, while the remaining Italians are in good shape altho outnumbered 6-4.

Turns 8-9 see the British dashing after the objective!  They speed Tank and Infantry platoons forwards [altho the Infantry roll a '1' and only advance a few inches]. 
The British keep the pressure up but tank some Hits along the way, and both the lead Crud and Motor platoons are nearly spent at 5 /7 and 6 / 7 Hits - can they seize the objective before they are destroyed? 

Turn 9, on the left, the Cruds put the pressure on the Bersaglieri by the hill, with the help of the CS Cruds - getting them to 5 / 7 Hits. If they can destroy that platoon, there is still time for the hill to be seized if the Town objective doesn't work out.
Turn 9, at the town, the Brit Motor Platoon finds it's speed and rolls a '6' to dash into the town!  They are now in Close Range of the Italian Tanks. This is a big help as the other two platoons failed their Quality Tests and had to Rally.

Turn 10, the Italians seize Initiative from the Brits!  They choose to retain it, as they will, overall, be able to give a better fight for the town.

On the left, the ATGs and the Bersaglieri manage to knock out the Crud platoon, mostly thanks to the ATGs rolling for perfect Hits and the Bersaglieri getting that last 7th Hit before the Cruds could rally in their Turn. Avanti Savoia!

In and around the town, a furious close fight ensues, with Mortars landing, tanks firing at Close Range, the infantry fighting from the buildings [not pictured].

British Turn 10, the Motor Platoon dashes forwards, passing their Quality Test to assault the Tanks. Both the other platoons have to Rally, so they're on their own!

End of British Turn 10, and the town is still up for grabs, with a single Italian Tank platoon holding off four British platoons, two of which are close to spent.
A series of Close Combats leave the Italian Tanks 1 Hit from departing the field, while the surrounding British are all battered.
The Mortars wipe out one Motor Platoon! But the Tanks are forced to Rally - not entirely a bad thing, as they were at 6 / 7 Hits, and are now at 4.
In the Close Combat Phase, the British go first [as the Reacting Side], and get no less than 4 for 4 Hits, wiping out the Tanks entirely [with a Hit to spare]!
The cheering Riflemen loot the Italian tanks for food and souvenirs, and catch a breather.  The supporting British platoons see the shattered remnants of the Italian carri platoon drive off in a cloud of dust.

Well, that was a dramatic finish!

My combat system, like that in OHW, does allow one to completely miss and has a similar attrition mechanic scaled down to 7 Hits from 15, using 3 dice per Unit [which can decrease to 2 or 1 depending on serious losses].  So altho it works differently, it has about the same elements of predictability with the math.  Occasionally, you get a spectacular miss or hit, but normally Units are inflicting 1-2 Hits, and it takes a few turns [or a lot of firepower] to destroy a Unit quickly.

In this case, the added danger of Close Combat that was initiated by the British Motor Rifles allowed them to up the intensity of the fight and drive the Italian Tanks from the town with just a little help from the nearby Cruds.

This playtest went very well, and I am very pleased with where the rules are. They are a lot more nuanced than the One-Hour Wargames rules that inspired them, but I have managed to stay focused on history, likely outcomes, and make the player's decisions in the scenario the most important factors.

Here, the British chose the closer town as the main objective, and used one Crud platoon very well to keep three platoons busy by posing a genuine threat to the hill objective. This effort was greatly aided by the Close Support Cruds, thanks to their long reach and real danger to ATGs and Infantry [Tanks...not so much].

With no armor to try and take the town back, the Italians faced a slow movement across the open ground North of the heavy brush with the Infantry, and the ATGs would almost certainly have been knocked out by the CS Cruds. The British would be able to sit in place and Rally off a few Hits, preparing for the Bersaglieri counter-attack, and it would not have gone well.  Ergo, the Italians had to concede.

One thing I might have done is put the Italian ATGs closer to the town, ready to fire down the open space between it and the brush. This would have put additional pressure on the advancing Brits, but may have resulted in the Bersaglieri at the hill objective being forced from the field.  Hard to say.

Next, some more blind playtesting is in the works.  LMK if you want to participate in the comments below, giving me an email to contact you.

Until then, I'll be looking for you, "Up the Blue!"! 

Thursday, April 29, 2021

Jumonville Glen in 54mm


"Toupees made to order -  Satisfaction Guaranteed!"
The battle of Jumonville Glen, now a park in SW Pennsylvania, is a classic ambush. The real battle appears to have been pretty lop-sided considering the result and casualties, which was the French force taking almost all the casualties and surrendering.  As a military OP, it was very successful, and a first success for a young officer named George Washington, who would go on to be better known in later years.

There's a bunch of articles on it, due to George Washington's involvement, but beware - some only adhere to the present academic and journalistic standard of our time, which is halfway between gossip and rumor, and Fake News, sprinkled with some facts.  Fortunately, the Wikipedia article surmounts that standard and addresses the particulars pretty well [CLICK]. There is also a good post here - Jumonville Glen Battlefield Post - that has additional information.  Enough said!

As a wargame post, the main concern here is how to game an encounter where one side had total victory.  They key is to recognize that altho that was the historical result it was not a sure thing.  The French could have had better and / or more sentries out, could have scouted better, or taken routine precautions to avoid the disaster that happened.  Presenting the full array of possibilities to both sides and allowing the Wargamer to make his own decisions is the best game plan.

Ergo, we set up the battle per the below diagram, which seemed accurate enough:

From here [CLICK].

Table was about 5 x 10 with the hills camp nestled in the valley between the steep hills and open forest.  The scale was 54mm plastics from Armies in Plastic [CLICK] and the hills were purchased while the trees were a mix of railroad and aquarium pieces, some in 54mm large and others were smaller. The smaller trees were provided by the host and denote scrub and bushes, which count as Area Terrain denoted by the circular dark green felt bits on which they stood - the trees themselves only served as a marker. Robb K provided lovely painted figs and the terrain including tents.  Results are below, with a view from the "North" of the above diagram:
Above, the French defend their camp from a motley collection of frontiersmen sniping from the woods and rocks.

The French set up in the general area of the camp, but had some choices to "weight" the area where they placed them. They also had options to put out sentries who would automatically fire when the enemy became visible. The trade-off was that there was a good chance that the sentries would be overwhelmed and killed, so that had to be taken into account.

The colonist under GW and their Indian Allies under Tanacharison "The Half King" - a ferocious character, it seems [click] - chose to mainly approach from the diagram "Northwest" and "Northeast" corners, using the Indians under Terrible T to close the bag from diagram "South".  This put them in close mutual support, which is a good idea considering that they only outnumber the French by about 52 to 35, and splitting up for an encirclement invites being defeated in detail.  The main problem was that if the entire French force ran against the Indians, they would heavily outnumber them and the Indians were not closely supported.

RULES
The rules used were a modified version of Neil Thomas' Skirmish Rules from "Wargaming: An Introduction". These provide simple, effective mechanics as a basic platform for any gunpowder era conflict.  I have also used them for medieval fantasy encounters including Chaos v. Empire and the Lord of the Rings [HERE]. 

I find them pretty smooth but I still streamlined them a bit and wrote up a new set based upon the RAW that decreased the weapons to FIW only, and I eliminated the wounding mechanic - if you hit and target failed to save they took a wound, period.  They took two wounds if their save was a natural '1'. I do like their mechanics for cover and saves also, which make it easy for players to decide on how they are deploying their figures in relation to desired cover - the best way to stay alive!

Another key change was that each side made an Initiative roll, with the winner able to go first. However, as this is a skirmish game, command and control has a lot of friction in real life at this level.  I took this into account by using some interesting dice from another game, that have 0, 1, 2, 3, 4 & 5 on the 6-sided cube. 

Each player on the side taking a player "impulse" rolled the die and that was the number of figures they could activate.  On a "0", only a leader could activate [each player only had 1-2 so careful decisions had to be made!] but they could also activate some figures with them using a "Lead" action. The net result is an IGO-UGO turn sequence that varies the number of figs you can activate in any given impulse.  If you roll low and have a bunch of unactivated figs left after your opponent is finished, you can just activate them all.  The tactical tension is that it is usually better to shoot first, and move second!  Ah, decisions...decisions...

As for the battle, after a quick explanation of the rules, the players were off and running!

Diagram East, groups of British colonists pressure the French, who are very thin on the ground. At top center in red, i s a group of about 8 led by GW who have just assaulted a small group of French regulars.

Below, a closeup of GW's successful assault on a couple of Frenchies holding a key wood position on the edge of the camp. At top right is the main part of the French force.

Below, the French are fighting for their camp, which provides some concealment from enemy fire but the tents are not bulletproof. The Indian commander sits at the far end of the table, and a few of his Indians may be seens near him.

Below, another view from the colonist militia positions. GW to top left, French above them. Using Concealment and Cover properly was the key to success.

Way off on diagram South, Terrible T's Indians whooped it up and frightened the Frogs into believing there were many more Redskins about - the occasional shot kept the sentries under pressure for a while, but as an escape route, it was pretty open.

View from Diagram Southeast.  Terrible T has concentrated some of his men who are now enough of a threat to have Jumonville send three more precious regulars to hold them off. They are dreading a close action provoked by the Indians - they have such lovely, long hair!

But eventually Terrible T saw his moment. He managed, with a bit of difficulty, to finally get an overwhelming group of seven Braves to nearly encircle the three Frenchmen. The defensive fire has no effect - jitters?
Two of the French succumb quickly, but the third is much more determined!  He holds off the Indians, including a Green Goblin warrior!

Meanwhile, back at the camp, the French have concentrated a large force of about 14 Soldiers to try and gain local superiority. The bodies of ambushed French lay near the colonist militia who are crowded into a small wood.
But, the force directly led by GW has successfully assaulted and is now into the East side of the camp, slowly confining the French at the top. Indians are visible at the top left of the pic.
Amazingly, the lone Frenchman - clearly a desperate and wily fighter, breaks free from the crowd of Indians and makes a run for it!  However, the Indians were prepared for a runner, and their overwatch element snipes and pins him.

Back at the camp, the French advance and assault the militia hiding in the small woods. The attack doesn't go well, partially because of strong defensive Fire which pins some of the French. They make contact with about 10 French against 6 militia.

In the end, it was not enough to break free. However, the French did better than their real-life counterparts.  If anything, the missed opportunity may have been to take the entire force against the Indians and try to break out in that direction. This would have provoked a running battle but may have resulted in more French escaping the noose. Hard to say, and worth another go!

The rules worked well, with very few questions and only a couple of changes needed for future games. They are a painless set of traditional mechanics that are easy to pick up for any experienced gamer, resulting in the players being able to focus on the battle instead of the rules. Careful playtesting and use of the terrain as visual cues for terrain mechanics also made it run smoothly. As these are not in the rules, I made them up myself and was glad to see them work well.

I can strongly recommend these skirmish rules as a great platform to modify for your own tastes and purposes as all the mechanics are obvious an intuitive. They are not always dynamic as written, but it's easy to make them a bit more exciting with simple changes.

Monday, December 23, 2019

Latest WWII Rules: Up the Blue! and OHW scenario #17

Well, I suppose you're all off to play "Up the Blue!" eh?
https://y.yarn.co/f7361559-904d-4435-89bc-55ed94b25a7e_screenshot.jpg

Well, it's been loads of work I never thought I'd do when I decided to flesh out Neil Thomas' "One-Hour Wargames" WWII rules - which were probably the sparsest feeling of the bunch. But I think it has been worth it. I've probably learned more about wargaming in the last few years since I bought that dang book than in the previous 35 put together.

Starting goals were to put in all the essentials that are always left out of all the OHW rules, like Line of Sight, summarized here [CLICK] for convenience.  You can't play the game easily without these mechanics: you will either have to argue about them every game, or, if you are a very British gentleman, discuss to satisfaction or roll-off!

I also wanted to reduce the "gameyness" that is inevitable when players have total control of all Units at all times, and a 1,000 foot high vantage point of the battle. Great example is that you shoot at a unit that is almost dead, but you roll badly. You want this unit dead! You shoot another unit at it, and continue until it is dead. This Total Firepower Control is not seen until the modern era. 

This project began with wanting to address these key issues, but eventually expanded into additional mechanics that added a lot more realism and challenge at a modest cost in additional complexity.

This draft is dated December 7th, 2019, and I hope they will NOT live in infamy! They have been playtested, tweaked and re-drafted like crazy, with long-time gamers, newbies and incounted solo outings - since they play so quick, even a game taking notes and photos ends in under two hours.

The full design goals :
  1. play out in under an hour with familiar players.
  2. put the mission and tactics first, gear and game mechanics second.
  3. present players with realistic choices for a company commander.
  4. allow platoons to make some targeting and survival decisions on their own, regardless of player desires.
  5. the better player should win 3-4 of every 5 games; if player skill is equal, the dice will decide.
  6. speculative and test range qualities of military gear get tossed; gear plays as doctrine, training and history reveal.
  7. game mechanics are traditional; it's the combination that produces the right flow and feel.
  8. new players with game experience quickly understand the game mechanics and principles, but there's plenty of nuance for experienced gamers.
  9. all of which needs to be strongly shaped by history, lest we inadvertently find ourselves playing a fantasy game!
Well, let's see how well these goals were met. And if you would like to test for yourself, contact my hotmail, brasidas19003.

One-Hour Wargames Scenario #17 
Red Italians run into the Blue British in the desert during Operation Crusader, fall of 1941. They want to use a low rise as a point of observation and move to seize it, but find themselves opposed; they call for reinforcements and the situation escalates. 

Each deploys one platoon on table 6" in from their base line, Red first on North side, followed by Blue in the South.

Red gets the first Player Turn.

Each side gets one reinforcing platoon entering at their base line on the roll of 4+ each turn - players are free to pick, it seems [but it would be interesting to roll random, or write ahead of time, eh?]. 

Winner must be in exclusive possession of the hill by Turn 15.

Forces available
Italians: Compagnia Bersaglieri, Regulars
3 Infantry platoons, Bersaglieri
2 Tank platoons, M13/40 Carri - Veterans
1 ATG platoon, 47mm elefante

British: Armoured Squadron, Regulars
1 Motor Infantry Platoon, Rifle Brigade
4 Tank platoons, Crusader Troops
1 Mortar platoon, Close Support Crusader. This small platoon has two tanks with 3" howitzers instead of tank guns, and the 2iC crusader tank. Accordingly, it fires as a field mortar.

It should be noted that this is the FIFTH time I've played the scenario with the same forces - I tried various opening deployments and plans for both sides and with very different mid-games being the result:
- Turns 1-5 are focused on gaining a position advantage. This is usually focused on fire lanes around the hill, and more intensely on occupying your side of the hill with a big ?? about holding a position on the hill crest; while the crest allows you to see into the oppositions entire rear, they can all see you and you tend to become a Fire magnet!
- Turns 6-10 there's loads of fighting; trying to concentrate firepower, eliminate a couple Units, set up for end game.
- Turns 11-15 are focused upon a bloody confrontation at the hill, since the dance clock is running out. 

Below, is the end result couple games ago:
Note: large base to right is just on the table for a bit of color. At center upon the objective is an Italian infantry platoon dug in on far side, with hull-down British crusaders on the near side, both somewhat battered at this point. It was a draw as both are upon the hill.

Below, end of last game: Italians mob the hill with infantry and drive the Crusader troops back or destroy them. BUT, a last-minute end run with the final Crud platoon was made possible when it rolled an '11' for 16" of movement, so...what the heck, they dashed onto the hill. Italians then missed loads of dice to destroy them needing only ONE HIT! so they ended up with a draw.


Considering the available forces, I again chose to deploy Italian ATGs first. In a shoot-out with tanks, they inflict hits at a 2-1 ratio if Dug-in and will dominate the table out to their 24" range and the hill crest. If moved against, they will also get the first shot if they are Ready [having saved their Action from their turn]. 

Given the scenario description, I decide they have been hastily unlimbered by their trucks upon sighting the British armor approaching, and are neither Dug-in, nor Ready. I deploy them in a wide line to minimize the possibility of being successfully smoked by the British Mortars.
The British oppose them with their Mortars, the CS Support Crusaders. They are mobile and can begin shelling the ATGs beyond their 24" range, firing to 48" [the entire table and more]. It won't be decisive if the ATGs Dig-in since Field Mortars merely harass but can't destroy a Dug-in Unit. Still it challenges them the best way possible. The other choice was actually the Rifles platoon - they need the time to get to the hill, Dig-in, and hold it. However,  they are outranged by the ATGs and Tanks, and Tanks are more mobile; I didn't want to lose my only infantry if the Cruds showed up late.

Turn 1. At start, Italians get IN and are presently outranged by the CS Cruds who can inflict slow but steady damage upon them. The ATGs can't hurt them unless they drag their Portable guns closer...

Which they do...but only roll 2" for movement, dangit! The cruds easily hit twice, which is both their Fire dice. Both fail to roll high enough for reinforcements.


Turn 2 [ignore what the dice say...] Italians get a Carri platoon which rolls a 9" Maneuver Move while losing some inches as they are "Slow" tanks. The ATGs move within 24" of the CS Cruds while taking another two hits, four total. Brits also get reinforced, their Cruds shelter from the ATGs behind the hill but threaten the Carri. Still, the Italians have an advantage.


Turn 3, Italians retain IN. They Dig-in the ATGs, and put some Hits on the Cruds, but get slammed in return, taking a Permanent Hit from the Cruds and one quite fortunate Hit from the CS Cruds 3" howitzer. This really throws a wrench into the Italian plans to develop the battle...


Turn 4, Italians keep IN. They get reinforced, and I chose another Carri platoon as the first was getting beat up! They speed onto the table while the other Carri Rally off a Hit, failing their Quality Test for the second Hit.The ATGs rallied off a couple Hits, getting one freebie and passing a check for the other. At 4+ Hits, Units count as Suppressed and must check Quality to see I f they are free to act. If they fail, they have to Rally or Dig-in as the platoon struggles for survival on the modern battlefield. British also get no reinforcements but destroy the rallying Carri platoon with help from the CS Cruds. Definitely takes some pressure off.


Turn 4 redux [I forgot to turn over the turn dice!]. Italians get no reinforcements but retain IN. Their ATGs strike hard at the CS Cruds, inflicting a Permanent Hit supported by two more from the Carri, for 5 Hits. In return, the Cruds hit like snipers 3/3 damaging another Carri platoon while the Motor Infantry race onto the board in their carriers [these count as a transport upgrade for the Unit, and will be removed as soon as the passengers dismount].


Turn 5. Italians fire with modest results - ATGs missed completely. Brits move the CS Cruds left to preserve them as the Motor Platoon advances to the objective.


Turn 6. The Brits seize the IN from the Italians, beating their roll by 3. They can take it or conceded to them, but choose to take it and the first Player Turn. Effectively, they get two Player Turns in a row. May seem extreme to some, but as this is a fairly attritional combat system, with opportunities to rally, it mostly forces a change of plans to the other side. Here, it helps the Brits re-position but not much else.


Brit Fire is weak, but they bring on a reinforcing Crud Troop and dismount their Motor Platoon on the objective. It is looking good - they've massed firepower in the tank contest, and their only infantry are just where they need to be!
Italians rally their Carri, inflict a Hit on the Motor Infantry with the ATGs and dash their reinforcing Bersaglieri to the objective, hoping to contest it before the Brits are Dug-in.

Turn 7. A Respite occurs as the modified IN roll-off was a tie. Every Unit may Dig-in or Rally. Carri and ATGs rally for Italians, British CS and Cruds all also pass Rally tests, while the Motor Platoon Digs-in on the objective. The turn then ends as the Soldiers all catch a breather. Brits make tea.

Turn 8. No one has IN after a Respite, and you can't have two in a row. Italians edge out Brits and take IN back. They dismount their infantry and advance, get a reinforcing infantry, and lay down some Fire, pressuring the near Crud troop.


British Turn 8 starts poorly as they fail reinforcement roll and bolo their tank fire. The CS Cruds are stable thanks to the Respite so they advance to the hill. The Motor Platoon rolls 3/3 Hits and gives a Permanent Hit to the Bersaglieri advancing upon them! Sort of makes up for the Crud problem since they are at the objective.


Turn 9. Italians keep IN, advance more infantry onto table and at the objective while Digging-in the hurt platoon. Carri wipe out the near Cruds facing them while the ATGs hit 2/2. Overall, a solid turn that really helped them out.
Brits also reinforce, bringing Crud Troop on table. They shift CS Cruds left, not wanting them to crest the hill and get destroyed - they'd be Hull Down, but there's a lot of Italian Fire power over that crest!

Turn 10. Speaking of Italian Firepower... they wipe out the Motor Platoon! This shows the danger of cresting that hill! They retreat the Carri hoping to Rally them later. The new Crud Troop is too much Fire for them and their ATGs will make the Cruds think twice about advancing into LoS.
Brits get final reinforcing Crud Troop. All Cruds advance - Tally Ho and away we go!
 
Turn 11. Italians keep IN, and seize the hill with two Infantry platoons - who take the crest position! Optimistic or foolish? We'll see! Their ATGs go "Ready" which is basically an overwatch mechanic - it allows them to Fire in the opposing Action Phase. They now have three Infantry platoons on or near the objective, with Tanks and ATGs supporting, albeit not all in good shape. Has the tide turned??
Brits advance all Cruds forward, and into Close Range of the Italian infantry on the hill crest! They also shell them with the CS Cruds. But will it be enough to challenge their position? The Italian ATGs take their "Ready" Fire and put two Hits onto the closer Crud troop.


Turn 12. Maneuvering is over, and everyone settles in for a knife fight! Italians dig-in or take shots. Their Infantry on the hill punish the Crud platoon for getting too close, putting 5 Hits upon it. In return, they lose the Carri platoon to long range fire from the right flank Cruds.


Turn 13...another Respite.

Brits miss both Quality rolls for an additional Hit to rally off, so settle for modest Hit reductions. Italians are looking strong.


Turn 14. Italians seize IN...again.

Still, one can always roll like this! No Hits on Cruds during the Italian Close range shooting phase.  Instead of giving a bonus for Close Range shooting, I make it a distinct, free-Fire Phase. It has interesting tactical effects while keeping the Fire mechanics simpler. As you can then Fire during the Action Phase, it is essentially twice as effective if you choose to Fire again, but gives more options than just Firing as you could Rally, Dig-in, Move, etc, instead of Firing.


During their Action Phase, one Bersaglieri miss extraordinarily, while the other rolls perfectly, not only inflicting another Permanent Hit but... 


...putting the Cruds to 7 Hits and destroyed.

We should call that "the hill crest of death"!

Turn 14. As the clock runs out, the Italians inflict some punishing Fire upon the Brits, removing one Crud Troop, pushing a second to 5/7 Hits, and holding out fairly well. The Brits push the CS Cruds into "touch" to gain a dice and put a hit onto one Infantry platoon. They also put some Hits onto the ATGs, but not enought to threaten their destruction.

Turn 14...redux. Yes, I failed to turn over the dice. This is actually turn 16 or so...Italian Infantry drive off the CS cruds, the ATGs a Crud platoon, there will soon be little left to challenge them at this rate.

Turn "15" ish. Well, the Italians cleared the area around them of Perfidious Albions, and there's no way for them to be challenged. The remaining Cruds roll great and threaten the ATGs with destruction, except that...the game ends.
well, really, the game ended a couple turns ago, but I finally managed to remember and record this turn! Brits have no way to move onto the hill and contest it, rolling too low to fully get on and challenge it meaningfully. Game over!


Well, twas a 17-turn game, but the result would be the same either way since the Italians have been holding the hill and dominating the Crud troops for a few turns.

Should be noted that this scrape would fight entirely different if the British had an infantry force, but I haven't quite finished painting them [altho recent progress has been made, thankfully and my painting contest CLICK will hopefully inspire all to make progress on their forces, also]. Infantry v. Infantry will develop a turn or two slower, and where to commit forces becomes the critical decisions.

Very happy with these rules!

They satisfy the original goal of fleshing out OHW WWII, but with added friction and simple mechanics, BOTH Fire and Maneuver are much more realistic. Critical to this is the mechanics for Line of Sight, scale/range, Suppression and Target Priority. These last two keep players at the Company Command level; you move and fight platoons, which obey until they are Suppressed or enemy closes in at which time they make their own decisions for Targeting, Rallying and Digging-in.

Some of you may recall that I stopped posting the rules in full around March of 2018 - the last full set was from 2016 [CLICK]. It was then I really felt that the rules had come along so well that they would be worth selling. Inspired by Mr. Nordic Weasel and his approach, I will be offering these in an inexpensive format at a cheap price at some unknown point, through some unknown medium, but likely direct or Wargamevault.com

The purpose will be to continue the final phase of development which will greatly benefit from the participation of others, and allow many new questions to be asked. So do check in and state your interest. 

Happy Christmastide and you can get start 2020 by going...Up the Blue!

Merry Christmas to you and yours!