Sunday, July 21, 2019

Terminator Genisys: Rise of the Resistance - Mission 3

Another month, another mission...


After a hiatus that has been longer than I thought, Mr. Winkie pushed me to get another game of "Terminator Genysis: Rise of the Resistance" set up. It was the right time, as we are getting behind - I bought our copy of "Fall of Skynet" recently as I found a great discount at Gamenerdz and I couldn't resist the new missions and the new figures [all the figs have been excellent, with no flash at all and great sculpting details]. Anyway, we played mission #2 of RotR but I didn't document it so we are on to Mission #3...and it's a doozy!

This one has the usual layout and terrain. Also as usual, it takes a while to set up the game; to figure out the scenario and get started I'd say takes at least 30 minutes. This scenario is a rescue mission - there are four cells at 1, 5, 7, and 11 o'clock with the red "?" markers. We are starting from the extended rectangular at 3 o'clock, and just behind us is the red "F" marker that shows the safe evac zone for both the prisoners and us. As a scenario, this has great fluff appeal and I am hoping that some of the prisoners will be able to fight, also!


And this is my character...Alex the Hacker [who I believe is a minor character in TG film. His interesting abilities are that he can break into doors easily and also occasionally redirect Skynet reinforcements to other entrances - this may no kill them, but it can at times put them so far out of the action that it is as good.

He is armed with a Mk.iii Plasma Rifle [from previous mission] and has the Team Leader Class which gives him a more ability to interact with allies like prisoners and resistance fighters - likely to meet them here. He has some HE rounds and a medkit. The former gives a turn of whoop-ass shooting, and the latter heals all wounds for a character.

Going in on the rescue OP with me is "Ah-nold" in Guardian mode. He has a nasty hand to hand attack [3 dice applied to any two adjacent baddies] and is very resilient.

He is armed a sniper rifle and a grenade launcher, has HE rounds also, and is a munitions specialist which allows him to dig up some extra munitions when he has time.

A few turns into the game the Guardian [gold base] has been dominating the center with his sniper rifle, playing whack-a-mole with 'bots who enter thru the red entrances at top left. Meanwhile, I [blue base] have liberated one resistance fighter from the bottom right cell, and he's ready to fight.


Next turn, Ah-nold shifts North to establish a fire base into the top two cells which I just hacked open. Altho he's attacked, he knocks two HKs together and takes'em out! I send the Resistance Fighter with him as we change direction.


I pop open the other cell door and the "C" Waypoint is revealed, and it is NOT a prisoner, instead it is...a T-1000! 
Mr. Winkie reacts to the news of having a liquid steel monster stalking us. And we have no weapons that can destroy it, just slow it down or stun it.

"I have been waiting to kill you, Alex" he says and rises up from his liquid metal disguise as a prisoner and morphs back into his usual shape...a beat cop! Worse, I have a T-800 pops in from the 5/6 entrance right by me - outflanked!

The T-1000 is pretty nasty - it can't be destroyed, moves 5, 2 attacks, and has 6 hits which are tracked on a "Stagger Card". The more hits it has the slower it goes. The worst is -3 move and -1 attack, leaving it with a move of 2 and 1 attack. Next hit it becomes "Stunned" and loses its turn, at which you roll a d6 and he regains that many hits [stands back up] and you have to repeat the process again, and again, and again...unless you happen to have a big vat of molten steel nearby you can stagger it into!

I decide to destroy the T-800 and clear my escape route, but I miss. The T-1000 closes in and knife-hands me, literally

Fortunately, I got some armor from a stray storage bin we raided earlier. Also, the T-1000 rolled a "fist" which allows me to re-roll all hits against me. I end up with one getting thru...

And it rips up my armor...
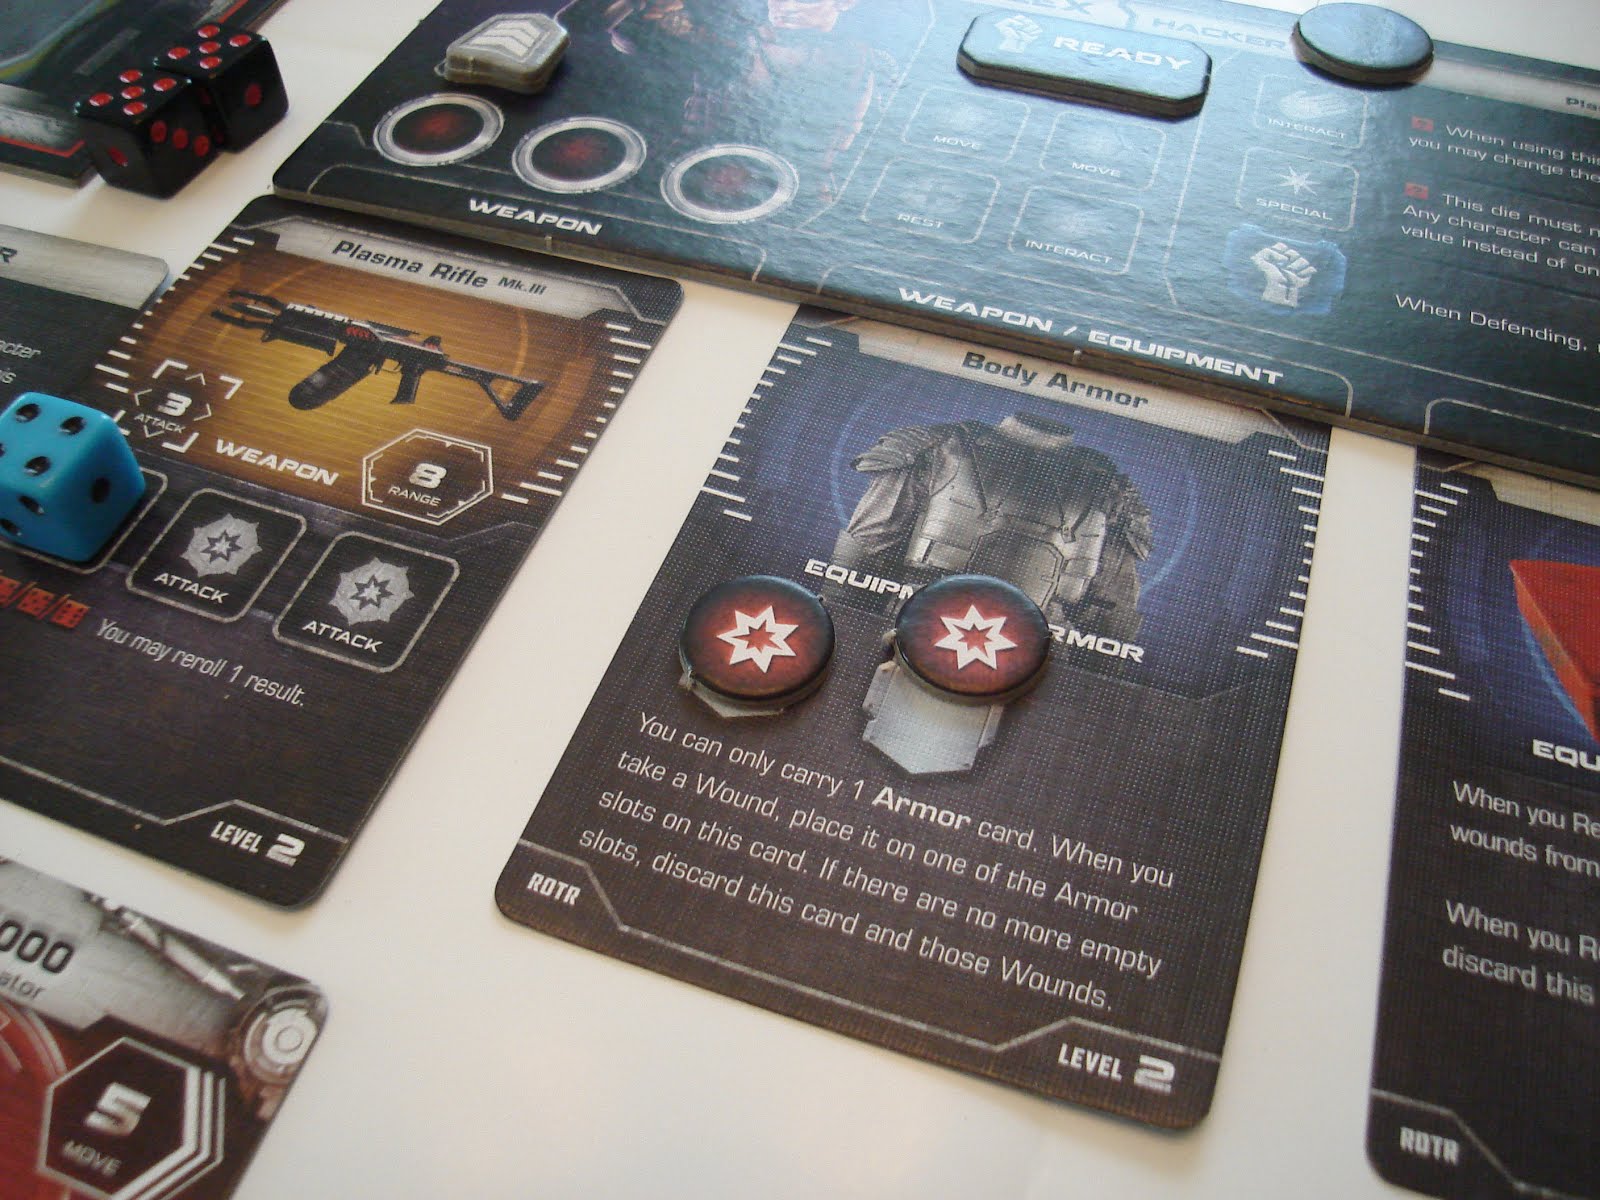
 
destroying it, but I don't take the hit.


Ah-nold shifts South, blasts the T800 with his sniper rifle, and I run like heck, as we both put in some damage on the T-1000 resulting in it being slowed down somewhat.


As the fight shifts North, we end up with many 'bot reinforcements piling in after us, led by the T-1000. These include the usual T-800 endoskeletons [threat range 10, attack 3], HK-8 Drones [threat range 10, attack 2 but they fly and dodge], and the new T-72 weapon platform [threat range 16, attack 2] which Mr. Winkie names "Devil Dogs".

For the sake of victory conditions, we sent the Resistance Fighter East towards the exit, somewhat out of the action, and closer to retrieval point.


I hack the door controls and liberate the prisoners. We get one more Resistance Fighter and a civilian prisoner. Two HK's and the T-1000 are hot on our trail, so Ah-nold gives them a wrapped present in the form of a grenade in their midst. The two HK's are blasted...

and the T-1000 goes down Stunned! Unfortunately, our Resistance Fighter takes a wound in the fighting, and we must get him out alive to win this game.


As another wave closes in, the T-1000 recovers all his damage and closes in - I get fortunate and waste him! I blast all 6 of his hits in one shot, putting him down, stunned. But there are many 'bots coming after us, and they are between us and the evac point - situation is critical!


So...the jam we are in is that we have to clear the exit of dangerous 'bots, push forward keeping ourselves closest to the enemy, and dash our rescued soldier and civilian out behind us, all with 4 dice each a turn. This is a very tricky balance to maintain, and it will take us about an hour in real time and several player turns to make progress.

Below, I made a tactical error in my eagerness to rescue the prisoners, and pushed them forwards. The 'bots always attack the closest, surviving opponent, so as they turn the corner and enter our area, they attacked the resistance Soldier first [who is down in the pic] then they're attacking me, then the civilian and finally Ah-nold.

HK and Endo come after our team, along with the T-1000! Coming round the corner are two more Endos and a long-range crawler [not powerful, but 12-hex range hard to evade].

Below, I use the med kit to get the Soldier back on his feet, and interpose Alex, Hacker, between him and the four 'bots. I also use a jammer to send a blue HK that was entering right behind us down to the more distant entry point '5/6'.

I end my actions by shooting up the T-1000 with 4 solid hits, slowing but not stopping it...

The T-1000 responds by walking up and knife-handing me for two hits - ouch! At this point I am half dead with a wave of enemy still in front...I need Ah-nold!


Mr. Winkie swings Ah-nold into action. He dashes past us and adjacent to BOTH the yellow HK and the T-1000, then destroys the HK and stuns the T-1000! I guess he grabbed the HK and busted it over the T-1000's head or something.

And the and of Ah-nold's turn, the T-1000 stands back up.

On my activation, I move up and make space for the prisoners to escape, but we really need to clear out the 'bots!

In one clip from my plasma assault rifle, I stun the T-1000 again, knocking him back and down.

I then turn and blast a blue Endo in front of us, and survive the fire of the remaining blue Endo 
[remember, at the end of a character's turn, the matching color enemies act, not all of them, so the yellows only attack after Ah-nold's activation, while the blues attack after mine]. 


Ahnold then hands me some HE rounds [which will cause an extra hit per target for the entire turn] to me, and walks up and tries to smash an HK and an Endo down, but misses.

I then start blasting away with my Mkiii plastma AR with HE rounds, and take out a blue endo blocking our path to freedom, I drop the T-1000 again, and a blue Devil Dog that appears behind us! 

End of my activation, the T-1000 only gets a '1' for its stun recovery so he'll be easy meat for us.


Ahnold then gets adjacent to the final HK and Endo blocking our route out and tries to punch them both down - unfortunately, he misses, so I use my Squad Leader Class card ability, and give him a re-roll, which results in 4 hits on both targets - they go down and the way is clear!! Ahnold then activates the Soldier who dashes into cover partway to the extract point. He can still fight, and may be useful.

The T-1000 is greatly slowed, so I activate the prisoner and he dashes to safety, also, moving twice with the '6' I assigned to the task. But there are a bunch of 'bots coming our way!


I then blast the T-1000 for 3 Hits, causing him to stagger away from me, then head to the exit and 5 bots...

Ahnold activates and gets some distance. He shoots down an Endo and an HK with his sniper gun. The T-1000 stands up and comes after me, but misses its plasma gun shot. The HK's succeed in getting some hits and pushing me to the edge of going down, but not over!


I invest in lots of shooting actions, taking out an HK and staggering the T-1000 away from me, stunned. I also activate the Soldier and Prisoner who make it to the extract point!


Ahnold then takes down an HK and I dash to freedom.


Ahnold then makes it to safety and I knock down the T-1000 again, then blast the last 'bots and scamper.


Game end - we've all made it, and everything 'bot is down, even the T-1000. Of course, he'll stand up but we will drive away first.


Whew! That was a tough mission, the toughest yet, and took a long time to play - about 3 hours. Of course, running into the T-1000 at the start and having to rescue two more prisoners with it chasing us meant we were ALWAYS having to invest in shooting it, moving, moving prisoners, shooting reinforcing 'bots, and making a few tactical movements along the way also, which slowed our methodical progress.

The two rules I changed were the Area rules which I converted into hex ranges [they just seemed awkward if simple] and adding an overwatch rule: If a character saves a shoot or move dice, then they can do so whenever a 'bot finishes an Action [move, shoot, etc]. This made the game feel WAAAAY more realistic, and as players pay for it by not acting on their turn, it doesn't seem unfair, either.

We really like the game - my son asked to play it today. I can easily see using the system for any modern combat genre, and converting it into the open table with inches. Most modern gear is present, and abstract elements like Electronic Warfare can be used with abstract mechanics like turn sequencing, reinforcement arrival, etc. 

The way it handles asymmetric warfare using limited components is just brilliant, if a bit unrealistic [only enemy matching your color activate after your turn]. Still, a similar effect is usually gained with a lot more complexity in many other games, especially miniature games. The only thing a bit hinky about it is that the color activations are predictable, which could be easily tweaked, but why bother??

This is a pretty straight up dungeon crawl, perhaps resembling Space Hulk more than D&D, and I strongly recommend the game to anyone interested in a balanced, exciting kill-team combat game that is mission focused, easy to handicap, and mixes well with beer and high-fives.

Interestingly, it succeeds in what John Lambshead wants for his One-Hour Skirmish Wargames rules, in that the action moves almost as quickly as in real life; so "video-game cinematic" in its pace, rather than an algebra test. 

Still, compared to OHSW it takes a longer to set up and take down, there is more rule complexity [helped by great player aids] and the more complex missions take longer than mission #1. With experienced players, it will still be fast. With newbies or younger players, the tactical discussions and rule explanations can slow things down.

Since the players cooperate against the machines, it is easy to bring in younger players and intro them to the hobby, and easy to set them up for success on most turns so they get the thrill of victory. They'll learn the agony of defeat in good time, I figure [click].

As for the components, I think they are excellent and look forward to eventually painting all of the figures up, hopefully using them on an open table with a more "table-top gaming" approach, including longer ranges, bigger spaces, line of sight and terrain rules.

Wednesday, July 10, 2019

Malakand Field Force Prep, p.5: More Colors, sticks, painting

As I have slooooowly made progress with this project, part has been working on colors. Painting anything this large requires a bit of thought, as the colors can be a bit darker as the figures are so big they'll appear a bit more true to life. Also, I have to remember to not take these little toy soldier types too seriously, as even neatly painted they'll still have that old-school feel and "realism" will be taking something of a back seat, anyway.

Below, the base coat for the British Khaki: Vallejo Dark Sand.


Roan for a horse? What do they say about red-headed girls...?

First camel - don't let his nose under your tent...

French officer, attached to Brits as a professional courtesy - but whose side is he on?

Serious preparations - first, I had to re-glue all the figures on the sticks. One may argue I don't need the sticks at all, but the individual plastic figs are very light and tend to fall over, which could lead to some flaking and such. So more for weight than difficulty handling.

Super Tacky Glue is dirt cheap and dries with a lot of flexibility. Elmers dries brittle and is very useful for temporary gluing that will be followed by removal - figs will pop right off a stick or base. However, it really doesn't want to stick to the bottom of these guys! So I removed them all very easily and reattached them with the Super Tacky.


So this is where the painting project is currently standing - must continue learning techniques for cleaning off or otherwise mitigating mold lines. Overall, I think these limey's are ready for a lot more paint!

Tuesday, July 9, 2019

One-Hour Skirmish Wargames by John Lambshead: Pre-playtest


After reading [and re-reading] Dale's excellent review at his blog [CLICK] I did get interested enough to want to really give the One-Hour Skirmish Wargames mechanics a try. In my first reading, Dale's description made it sound like luck played too strong a factor in the rules for me to like them - it seemed like luck was more important than tactics. 

However, my re-read gave me more thoughts, so while this is not a true playtest in that I don't yet own the rules, I am giving it a mechanical run-thru from the descriptions I've read from various blogs, ergo a "pre-playtest". It is a testimony to the simplicity of the rules that one can even attempt to do this!

Since Dale gives a thorough review, I will not repeat everything that he said, just an occasional highlight. OHSW are by the prolific John Lamshead who comments on them in his blog here [
CLICK] and should not be confused with Neil Thomas' book "One-Hour Wargames" altho they are in the same vein. 

For forces, I decided to pull out my much-neglected Star Wars Miniatures from Wizards of the Coast. The goal is to see how these rules play with a couple squads on the table wielding typical weapons of the modern era - rifles, pistols, SMGs, LMGs, etc, as I don't have a set of skirmish rules I like for modern era, or sci-fi for that matter. As Star Wars ground warfare is mostly very similar to the modern era, it is an easy parallel to make. It also might get me more motivated to paint up my lovely Empress Taliban figs, and get some US forces to oppose them!

Anyway, the forces will be two squads encountering each other in an unplanned patrol encounter. The Imperials are out on a "Sweep and Clear" [formerly "Search and Destroy"] mission, and the Rebel Scum are out winning the hearts and minds of the locals all on a back woods planet whose name is restricted.

The Rebel Commando Teams. To left, a Dressalian team of four with a team leader [TL], to right humans with a TL. At center, the head honcho, a squad leader [SL]. And of course their deck is RED, only fitting for the rebels, and the source of the saying among Loyal Imperial Citizens, "Better Dead than Red, Sir!" All are armed with blasters, and have no range limit on this small table.

Hear we have the local natives, some Arconan farmers with a Weequay laborer, and droids [Gonk Power Droid, R5 and Medical, here re-programmed to pick weeds]. They live in the hive hut behind them with the improvised heat stack torn from the wreckage of a Correlian cruiser. What part will they play in the story? Loyal Imperial Citizens? Or subversive fringe separatist smugglers? I don't even know yet! 

The Arcona are armed with blast pistols and limited to an 18" range, while the Weequay has a field knife but is a Brawler, so a bit more effective in Close Combat [CC].

Protecting Life, Property and Order in the Galaxy:
Two stormtrooper squads of five, each with a heavy weapon [to left] and a TL [to right - these don't count as leaders, however]. An SL and an officer, none other than Admiral Piett! Every once in a while the guy likes to get his hands dirty, it seems...our kind of leader! Of course, Imperial blue deck is theirs. They are all armed with blasters except the Admiral who has a personal blaster with a 12" range.

Table, Imperial view East: a series of low rises in an "n" shape, enclose some agricultural space and a ruin. Beyond, the settlement itself.

View North: Settlement to right, some agricultural space with a wild wood to lower right. The greenish patches are bog which would halve speed thru them. The low rises can be hid behind and count as Hard Cover, while the woods and agricultural areas are Soft Cover. Road has no effect on foot sloggers. The building can't be entered except by the natives, but counts as a 2-level hill. Ruins to left are Hard Cover.

Tools one doesn't need for this game [except for the measuring sticks and such] so it'll stay in the box!

John Williams courtesy of YouTube...
And we are ready! Set up was pretty minimal except for terrain which I can already tell will be very important in this, like all skirmish games. Even the SW figs were tossed into the same box ready to go from a playtest of 2HW "5150".

Rebel Setup. Dressalian Commando at top, human Commando split between center and bottom. Smugglers go about their business, growing a verdant crop of medicinal herbs even as the Rebel patrol passes thru their fields...

On the opposite side of the table, the Imperials set up squad one and leadership in center, with squad two on the right behind the hillock. 

TURN 1.
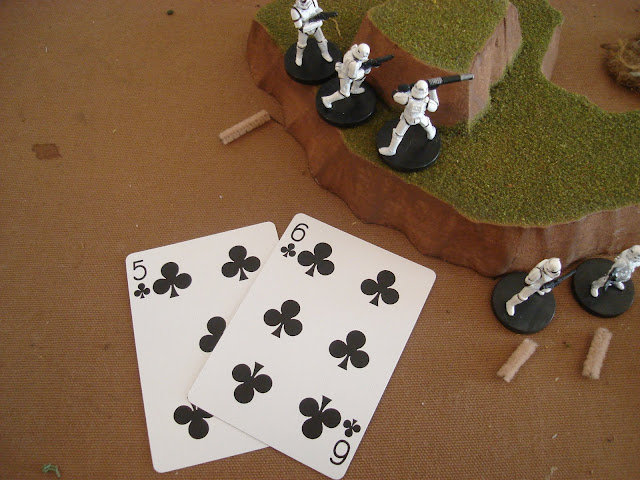
 Imperials win Initiative [IN] so will act first. In their Action Phase, they draw a Queen for 12 Action Points! This is enough Action Points [AP] to dash up all personnel and take positions in cover.
Rebel Action Phase. They draw a King! 13 AP are enough to consecutively move three Dressalians onto the roof of the settlement and each fire at the Imps [1AP to climb, 2AP to take position {2nd moves cost extra}, 1AP to Fire]. Their shot cards are a 4, a King and a 10 and put two Imps Down. Each Trooper draws 3 cards for Hard Cover: they can't beat the King at all, and the 10 was only tied, while the 4 was easily exceeded. This ends Rebel actions. As no Joker was drawn, the Turn continues.

Rebels seize IN with a 4 and go first this Action Phase.
If you go second in an Action Phase, and you win IN in the next Action Phase you will get to act twice in a row - this can be very powerful if you draw high cards twice, but amount to very little if you draw low cards twice!. I use this mechanic in my Spear to the Strife Medieval Rules and I like it - it just needs to be carefully balanced and not a game-ender

They do some shooting and moving. For shooting, they spend 2AP and fire off a 3 and a Jack. The Imps beat off both with a Jack and King, respectively.
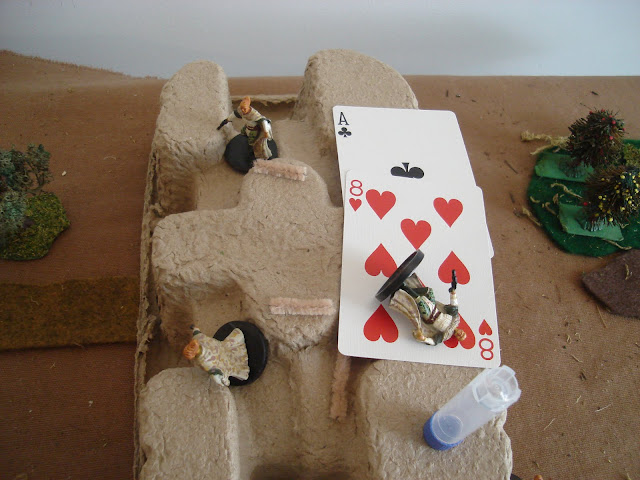
In their Action Phase 2, Imps draw an ACE [which is a '1'] and shoot one Trooper at a Dressalian on the roof with a '7', who is easily beat by a Jack. Not much accomplished.

For their Action Points, Rebels draw a Joker, ending Turn 1.
For the Turn End Phase, both Down Imps draw Black and "Black is Back" baby! [with apologies to AC-DC]
Rebs draw a Black and a Red, and "Red is Fled", so one Dressalian is removed.

OK, so that's what a turn looks like. There's a LOT of cards being turned, and not quite enough happens, IMHO. It is hard to finish a "thought" you might say. Turn 2 passed by quickly as a Joker was drawn almost immediately.

Turn 3, the Imps win IN. Both sides have 1 Casualty.
Cripes, another Joker must've come up. Or not much happened before said Joker. No one has decided to turn tail, and it is impossible with one casualty to do so, anyway. 

Turn 4, Rebs win IN. This turn quickly passes due to a Joker being drawn. So far the Action has been limited due to the large number of cards being drawn. As each player has a deck with two Jokers, and a Joker drawn for any reason immediately ends the turn, a Turn is more likely to be shortened by lots of shooting activity.

By End Phase of Turn 6, another Dressalian gets knocked off, but both sides stay in the fight. The Dressalians get an Ace [a morale failure] but their leaders allow more card draws and the next is a 9 which passes. Meanwhile the Imps easily pass on a '6' [emboldened by the righteousness of their cause, no doubt]. 

Turn 8, the shooting and sniping between Imperial 2nd Squad on the right and the Rebels has continued, with little to show except a couple more Fled. Each side now has 2, and both easily pass morale.

And here is the situation, end of Turn 8. Not much has happened, as Jokers have ended Turns with alarming frequency. This kills Action Phases as the card with your Action Points is negated and you lose any unused. Both sides have advanced a bit, but it is a 2-2 fight.

At this time, I make an executive decision to take one Joker out of each deck, halving the chance of a turn ending. Also, to only draw cards if necessary [so if an attack is defeated on the first card draw, I don't draw the second and third for Hard Cover]. This way more will happen in the Turn as there will be more Action Phases and more opportunities to proceed with some sort of a plan. On to the game...

Turn 9, Rebels win IN and draw a 10. They spend 9 to move up part of the human commando squad in an attempt to outflank the Imp cover.

Uncertain what happened here...honestly. But the Rebels made good work of it, anyway, winning IN it seems.

Looks like they drew a '5' and shot down two Imps whose cover was flanked, exposing them. The advantage is now with the Rebel Scum!

To make matters worse, the Imps draw an Ace and have...one AP. They spend it on the Imperial heavy weapons Trooper since he gets two shots for one AP.
Unfortunately, he is unable to capitalize on this and Turn 9 ends with things tied up at 2 casualties a piece. However, between their Army morale and leadership, they can't fail. 

A few turns later, the Rebel flank maneuver has been successful and their shooting spree has resulted in 4 Troopers Fled but 5 Rebels are also off the field. Both sides pass Force Morale easily.

Turn 12, Rebels get IN and take first Action Phase, and decide it is time to finish flanking the enemy. They pull a good card and decide to rush!
Unfortunately, not much comes of it thanks to great card draws by the Troopers whose position is flanked.

Finally, the Rebels win IN and continue their outflanking maneuver, but draw a Joker for the shot on the now exposed Imps.

On the Force Morale, the Imps fail with an Ace. The Rebels draw a Joker, which is ignored so the card will be drawn again.

So here's how Force Morale works. The Imps have an FM of '1' same as Rebels. They have 4 "fled", two are cancelled out by leaders and one by their FM of 1. They have to beat a '1', but they don't drawing an Ace [value '1'].

Rebels easily pass, needing a 2+ and drawing a '7'.

Wow, great little scrap-up! As the Imps were being flanked on both sides [barely] they decided it was time to withdraw and lick their wounds. Hopefully Lord Vader will choke out Adm. Piett and not any of them!

Taking out one Joker from each deck helped me enjoy the flow more. Turns were still a bit unpredictable, but one could get something DONE during them. Granted, I am not playing from the RAW, but just trying out the general mechanics. There may be some nuances in the system that I don't know yet without the rules before me.

Generally, I found myself thinking about key aspects of a small skirmish, mostly involving use of terrain; seizing and setting up in good terrain myself, while flanking or denying the same to the enemy. When the casualties mount, it is time to pull out as this is just a patrol, not the decisive effort.

As there were not a lot of little game mechanics and special rules to track, I was able to keep my head in the moment and eyes on the game, not a QRS or the rules. This also let me develop the game narrative in my head instead of being interrupted by the game mechanics constantly.

The system as played also ingeniously allows one to take the occasional chance and attempt a bold maneuver without it being - predictably - countered by an opponent unless they are attrited first. Think of DBA and only rolling a '1' when you really need a '6' and your Groups are broken up...then your opponent rolls a '6' and is really able to exploit your situation. Most games have predictable amounts of activity for all units on both sides each turn, which - combined with the gamers 1000 foot view - does make a realistic maneuver easy to counter.

This "chaotic" turn sequence [as JL describes it] contributes to the skirmish feel of the game. It also makes it feel almost as fast and exciting as a video game.

Overall, I can see this working well for modern warfare. It appears to need some work defining terrain [and plenty of it, the more interesting the better] as well as suitably detailed and realistic missions, but I plan to pull them out of my Small Tactics Smart Book, so no problem there.

Final verdict: I have ordered the book!

Expect a more thorough review of the RAW in the near future as mail speed and time allow.

"Until next time, Rebel Scum!"
Image result for storm trooper