After reading [and re-reading]
Dale's excellent review at his blog [CLICK]
I did get interested enough to want to really give the One-Hour Skirmish
Wargames mechanics a try. In my first reading, Dale's description made it sound
like luck played too strong a factor in the rules for me to like them - it
seemed like luck was more important than tactics.
However, my re-read gave me more thoughts, so while this is not a true playtest in that I don't yet own the rules, I am giving it a mechanical run-thru from the descriptions I've read from various blogs, ergo a "pre-playtest". It is a testimony to the simplicity of the rules that one can even attempt to do this!
Since Dale gives a thorough review, I will not repeat everything that he said, just an occasional highlight. OHSW are by the prolific John Lamshead who comments on them in his blog here [CLICK] and should not be confused with Neil Thomas' book "One-Hour Wargames" altho they are in the same vein.
For forces, I decided to pull out my much-neglected Star Wars Miniatures from Wizards of the Coast. The goal is to see how these rules play with a couple squads on the table wielding typical weapons of the modern era - rifles, pistols, SMGs, LMGs, etc, as I don't have a set of skirmish rules I like for modern era, or sci-fi for that matter. As Star Wars ground warfare is mostly very similar to the modern era, it is an easy parallel to make. It also might get me more motivated to paint up my lovely Empress Taliban figs, and get some US forces to oppose them!
Anyway, the forces will be two squads encountering each other in an unplanned patrol encounter. The Imperials are out on a "Sweep and Clear" [formerly "Search and Destroy"] mission, and the Rebel Scum are out winning the hearts and minds of the locals all on a back woods planet whose name is restricted.

The
Rebel Commando Teams. To left, a Dressalian team of four with a team leader
[TL], to right humans with a TL. At center, the head honcho, a squad leader
[SL]. And of course their deck is RED, only
fitting for the rebels, and the source of the saying among Loyal Imperial
Citizens, "Better Dead than Red, Sir!" All are armed
with blasters, and have no range limit on this small table.

Hear
we have the local natives, some Arconan farmers with a Weequay laborer, and
droids [Gonk Power Droid, R5 and Medical, here re-programmed to pick weeds].
They live in the hive hut behind them with the improvised heat stack torn from
the wreckage of a Correlian cruiser. What part will they play in the story?
Loyal Imperial Citizens? Or subversive fringe separatist smugglers? I don't
even know yet!
The Arcona are armed with blast pistols and limited to an 18" range, while the Weequay has a field knife but is a Brawler, so a bit more effective in Close Combat [CC].
Protecting Life, Property and Order in the Galaxy:

Two
stormtrooper squads of five, each with a heavy weapon [to left] and a TL [to
right - these don't count as leaders, however]. An SL and an officer, none
other than Admiral Piett! Every once in a while the guy likes to get
his hands dirty, it seems...our kind of leader! Of course, Imperial
blue deck is theirs. They are all armed with blasters except the
Admiral who has a personal blaster with a 12" range.
Table, Imperial view East: a series of low rises in an "n" shape, enclose some agricultural space and a ruin. Beyond, the settlement itself.

View North: Settlement to right, some agricultural space with a wild wood to lower right. The greenish patches are bog which would halve speed thru them. The low rises can be hid behind and count as Hard Cover, while the woods and agricultural areas are Soft Cover. Road has no effect on foot sloggers. The building can't be entered except by the natives, but counts as a 2-level hill. Ruins to left are Hard Cover.

Tools one doesn't need for this game [except for the measuring sticks and such] so it'll stay in the box!

John Williams courtesy of YouTube...

And
we are ready! Set up was pretty minimal except for terrain which I can already
tell will be very important in this, like all skirmish games. Even the SW figs
were tossed into the same box ready to go from a playtest of 2HW
"5150".
Rebel Setup. Dressalian Commando at top, human Commando split between center and bottom. Smugglers go about their business, growing a verdant crop of medicinal herbs even as the Rebel patrol passes thru their fields...

On the opposite side of the table, the Imperials set up squad one and leadership in center, with squad two on the right behind the hillock.
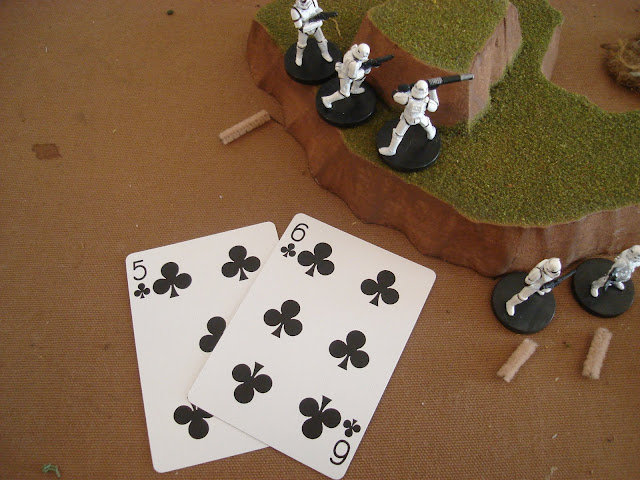
TURN 1. Imperials win Initiative [IN] so will act first. In their Action Phase, they draw a Queen for 12 Action Points! This is enough Action Points [AP] to dash up all personnel and take positions in cover.

Rebel Action Phase. They draw a King! 13 AP are
enough to consecutively move three Dressalians onto the roof of the settlement
and each fire at the Imps [1AP to climb, 2AP to take position {2nd moves
cost extra}, 1AP to Fire]. Their shot cards are a 4, a King and a 10 and put
two Imps Down. Each Trooper draws 3 cards for Hard Cover: they can't
beat the King at all, and the 10 was only tied, while the 4 was easily
exceeded. This ends Rebel actions. As no Joker was drawn, the Turn
continues.
Rebels seize IN with a 4 and go first this Action Phase.
If you go second in an Action Phase, and you win IN in the next
Action Phase you will get to act twice in a row - this can be very powerful if
you draw high cards twice, but amount to very little if you draw low cards
twice!. I use this mechanic in my Spear to the Strife Medieval Rules and I like
it - it just needs to be carefully balanced and not a game-ender.
They do some shooting and moving. For shooting, they spend 2AP and fire off a 3 and a Jack. The Imps beat off both with a Jack and King, respectively.

In
their Action Phase 2, Imps draw an ACE [which is a '1'] and shoot one Trooper
at a Dressalian on the roof with a '7', who is easily beat by a Jack. Not much
accomplished.

For their Action Points, Rebels draw a Joker, ending Turn 1.

For
the Turn End Phase, both Down Imps draw Black and "Black is Back"
baby! [with apologies to AC-DC]
Rebs
draw a Black and a Red, and "Red is Fled", so one Dressalian is
removed.
OK, so that's what a turn looks like. There's a LOT of cards being turned, and not quite enough happens, IMHO. It is hard to finish a "thought" you might say. Turn 2 passed by quickly as a Joker was drawn almost immediately.
Turn 3, the Imps win IN. Both sides have 1 Casualty.

Cripes,
another Joker must've come up. Or not much happened before said Joker. No one
has decided to turn tail, and it is impossible with one casualty to do so,
anyway.
Turn 4, Rebs win IN. This turn quickly passes due to a Joker being drawn. So far the Action has been limited due to the large number of cards being drawn. As each player has a deck with two Jokers, and a Joker drawn for any reason immediately ends the turn, a Turn is more likely to be shortened by lots of shooting activity.

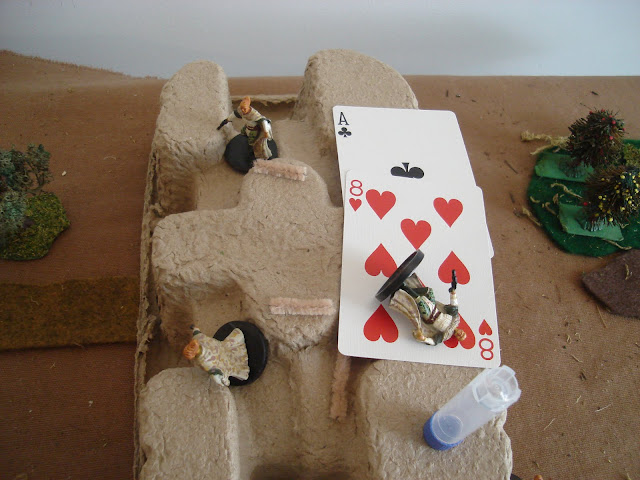
By End Phase of Turn 6, another Dressalian gets knocked off, but both sides stay in the fight. The Dressalians get an Ace [a morale failure] but their leaders allow more card draws and the next is a 9 which passes. Meanwhile the Imps easily pass on a '6' [emboldened by the righteousness of their cause, no doubt].

Turn 8, the shooting and sniping between Imperial 2nd Squad on the right and the Rebels has continued, with little to show except a couple more Fled. Each side now has 2, and both easily pass morale.

And
here is the situation, end of Turn 8. Not much has happened, as Jokers
have ended Turns with alarming frequency. This kills Action Phases as the card
with your Action Points is negated and you lose any unused. Both sides have
advanced a bit, but it is a 2-2 fight.

At this time, I make an executive decision to take one Joker out of each deck, halving the chance of a turn ending. Also, to only draw cards if necessary [so if an attack is defeated on the first card draw, I don't draw the second and third for Hard Cover]. This way more will happen in the Turn as there will be more Action Phases and more opportunities to proceed with some sort of a plan. On to the game...
Turn 9, Rebels win IN and draw a 10. They spend 9 to move up part of the human commando squad in an attempt to outflank the Imp cover.

Uncertain
what happened here...honestly. But the Rebels made good work of it, anyway,
winning IN it seems.

Looks
like they drew a '5' and shot down two Imps whose cover was flanked, exposing
them. The advantage is now with the Rebel Scum!

To make matters worse, the Imps draw an Ace and have...one AP. They
spend it on the Imperial heavy weapons Trooper since he gets two shots for one
AP.

Unfortunately,
he is unable to capitalize on this and Turn 9 ends with things tied up at 2
casualties a piece. However, between their Army morale and leadership, they
can't fail.

A few turns later, the Rebel flank maneuver has been successful and their shooting spree has resulted in 4 Troopers Fled but 5 Rebels are also off the field. Both sides pass Force Morale easily.

Turn 12, Rebels get IN and take first Action Phase, and decide it is time to finish flanking the enemy. They pull a good card and decide to rush!

Unfortunately,
not much comes of it thanks to great card draws by the Troopers whose position is flanked.

Finally, the Rebels win IN and continue their outflanking maneuver, but draw a Joker for
the shot on the now exposed Imps.
On
the Force Morale, the Imps fail with an Ace. The Rebels draw a Joker, which is
ignored so the card will be drawn again.

So here's how Force Morale works. The Imps have an FM of '1' same as Rebels. They have 4 "fled", two are cancelled out by leaders and one by their FM of 1. They have to beat a '1', but they don't drawing an Ace [value '1'].
Rebels easily pass, needing a 2+ and drawing a '7'.

Wow, great little scrap-up! As the Imps were being flanked on both sides [barely] they decided it was time to withdraw and lick their wounds. Hopefully Lord Vader will choke out Adm. Piett and not any of them!
Taking out one Joker from each deck helped me enjoy the flow more. Turns were still a bit unpredictable, but one could get something DONE during them. Granted, I am not playing from the RAW, but just trying out the general mechanics. There may be some nuances in the system that I don't know yet without the rules before me.
Generally, I found myself thinking about key aspects of a small skirmish, mostly involving use of terrain; seizing and setting up in good terrain myself, while flanking or denying the same to the enemy. When the casualties mount, it is time to pull out as this is just a patrol, not the decisive effort.
As there were not a lot of little game mechanics and special rules to track, I was able to keep my head in the moment and eyes on the game, not a QRS or the rules. This also let me develop the game narrative in my head instead of being interrupted by the game mechanics constantly.
The system as played also ingeniously allows one to take the occasional chance and attempt a bold maneuver without it being - predictably - countered by an opponent unless they are attrited first. Think of DBA and only rolling a '1' when you really need a '6' and your Groups are broken up...then your opponent rolls a '6' and is really able to exploit your situation. Most games have predictable amounts of activity for all units on both sides each turn, which - combined with the gamers 1000 foot view - does make a realistic maneuver easy to counter.
This "chaotic" turn sequence [as JL describes it] contributes to the skirmish feel of the game. It also makes it feel almost as fast and exciting as a video game.
Overall, I can see this working well for modern warfare. It appears to need some work defining terrain [and plenty of it, the more interesting the better] as well as suitably detailed and realistic missions, but I plan to pull them out of my Small Tactics Smart Book, so no problem there.
Final verdict: I have ordered the book!
Expect a more thorough review of the RAW in the near future as mail speed and time allow.
"Until next time, Rebel Scum!"

Sounds like a great game and very close to the RAW.
ReplyDeleteOHSW is possibly my favorite system for small-scale / 1:1 skirmish. In my experience, systems that claim to work for this level tend to either bog down in minutiae or are really suited for multi-squad/platoon level engagements, with a single squad or less being an after thought.
I like your idea to remove 1 of the Jokers from each deck - I will likely steal it! On the one hand, quick turns can make for an interesting narrative when the turns fly by and there's a fixed turn limit, on the other hand, sometimes you want to feel like you did something, anything, after taking the time to set up the table and figures!
Thanks for the visit, John.
ReplyDeleteI agree on both points - it's very rare that designers know when to offer less instead of more, and most "basic rules" are intended as an intro to the "real" rules. Games Workshop's Kill Team is a great example of a rule set that is lost in possibilities and minutia. I bet most players don't know how to play the game.
I found that two jokers per deck just resulted in lots of interrupted narrative - if I want that, I'll play while my kid is awake!
Anyway, I look forward to reading the book and giving the scenarios a try.
say John - have you tried the colonial era with these rules?
ReplyDeleteI have not, although they are on my list of rules to try for the period. The book includes rules for warriors and Gatling guns, with the requisite high blood pressure inducing possibility of the gun jamming. In addition, there's a Zulu scenario that includes some additional flavor - like recycling warrior casualties as reinforcements. I expect they'll give an enjoyable cinematic game.
DeleteOh and I know exactly what you mean about interrupted narrative and kids!
Delete