So, while I'm back blogging and checking out blogs, I would prefer to be gaming live - I miss you guys, *sniff *.
:)
Meanwhile, I have wrapped up Army education and done some spring cleaning [of which more to do...]. In terms of gaming, I took a couple down from a shelf to run thru. The first is one of an embarrassingly large collection of British in North Africa WWII games. As it is one of the shortest, "Desert Duel: First Alamein" by LPS Games got its first go. Detailed reviews [HERE] at BoardgameGeek.
I found it pretty easy to set up, and the components are pretty good - the map I rather liked, the counters were "OK".
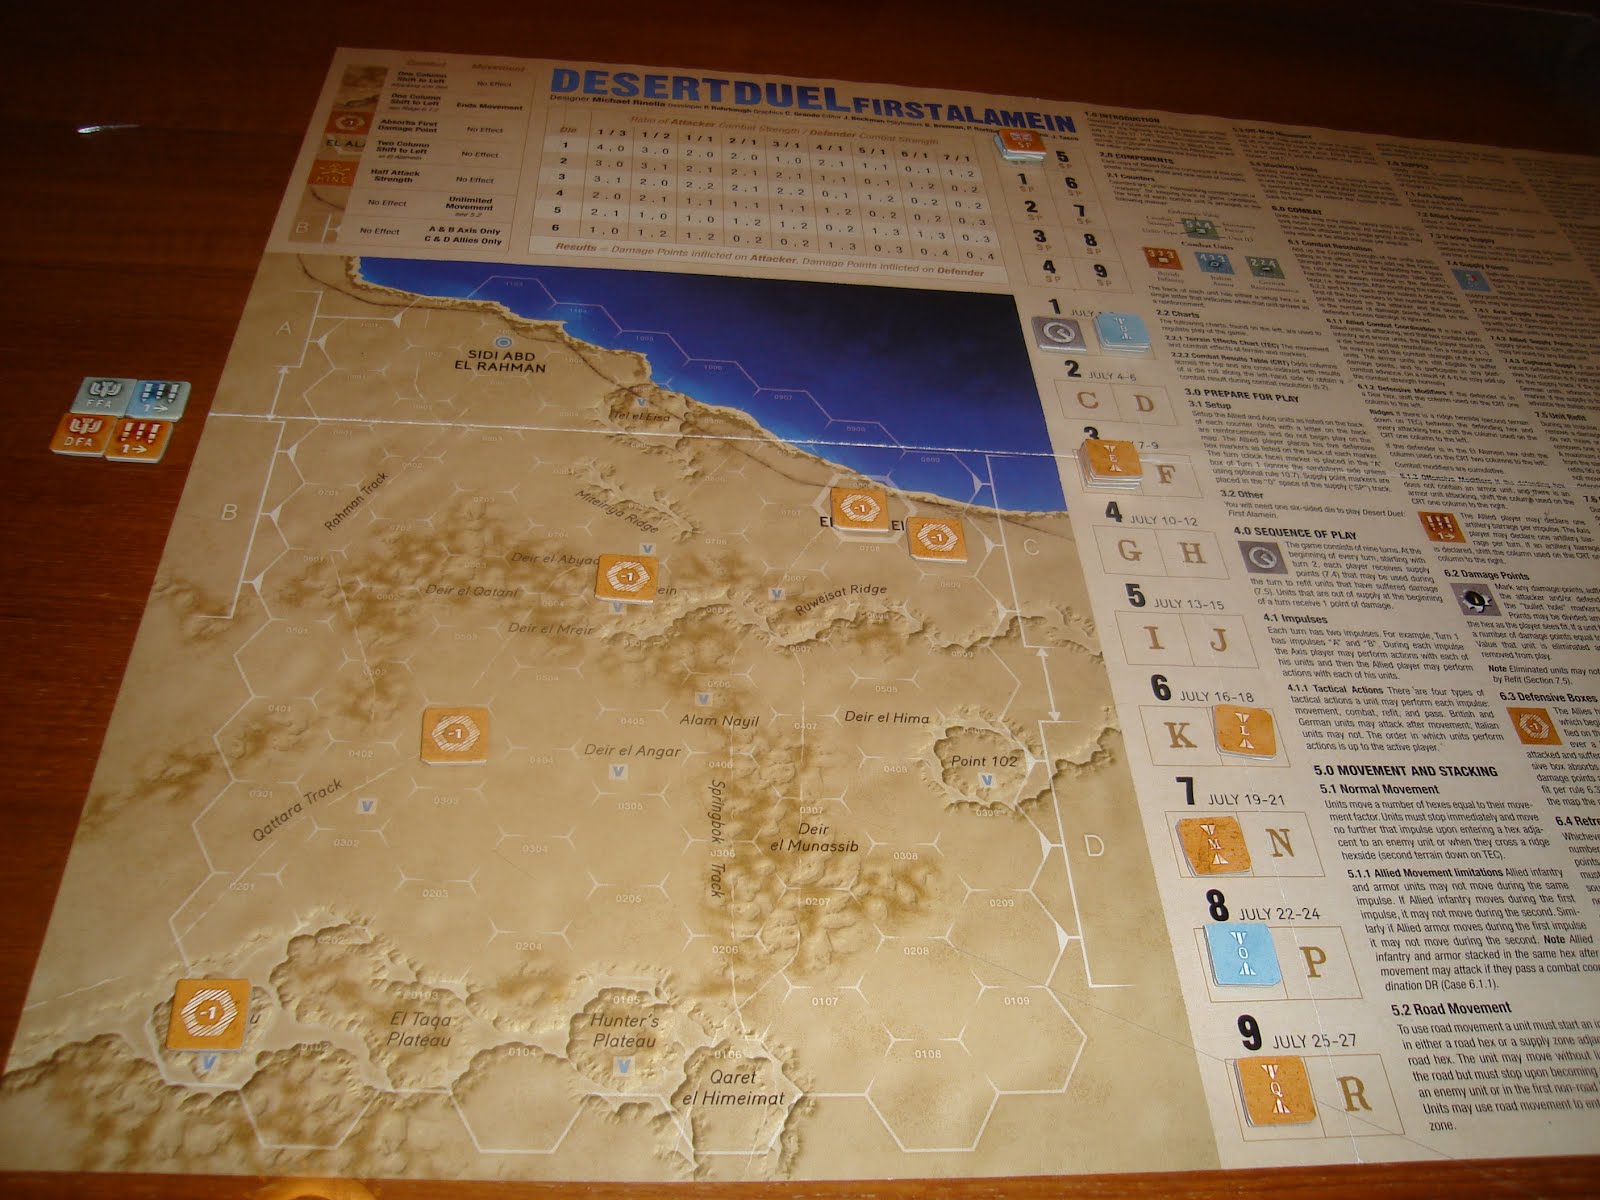
Conveniently, the rules are to the right, part of the map. British setup has a series of boxes on the battlefield, too far apart for good mutual support [as in real life...didn't learn anything from Gazala debacle]. Below, the Germans in blue to Northwest, British in a sort of orange sand color East and South. Reinforcements fit on the turn track.

When you start getting into it, the mechanics are a mix of the usual and a few interesting bits and pieces. It is not a revolutionary design. Most units have a strength of 2-4 and attrit by losing a point or two in combat. There's a sort of quality roll that affects things [higher quality units last better]. The use of a mandatory retreat mechanic combined with a zoc rule that blocks retreats makes this feel much like other games - block with a zoc and destroy the stack.

However, this is hard to do at times - your own stacks are vulnerable when you spread out, and after destroying a stack you are scattered around the desert and can get enveloped yourself. I made several notes about changes to make based upon reading Niall Barr's "Pendulum of War" including limiting British movement somewhat. Then, got very distracted by Army education and had to eventually clean up the stalled game that was gathering dust. It and others will get investigated as I return to the desert with miniatures - soon - and look for the perfect board game to use as a campaign system.
Just last few days, I had a real hankering to return to the modern era - Army education does that to my gaming habits. I have been really eager to continue my investigation of the "First Battle" series of boardgames by Frank Chadwick, most of which are GDW from the 1980s or so. My first one is the wonderful "Team Yankee" on which I've already posted HERE, and which I plan to continue playing. It is a 1 counter = 1 vic or squad level game.
But I had a hankering to try another one, a gateway game to the series that was a convention giveaway. "Battle for Basra" is a bit stripped down, and each counter is a company instead of a single tank [!]. The higher level of play has a few changes to the TY mechanics. First, it manipulates the turn sequence to give extra advantages to the US player instead of just making all their counters "super awesome" as a mechanic. The turn sequence is:
US Shoot
US Move
US Shoot [again!]
Iraqi Shoot
Iraqi Move
In essence, all US forces can Shoot - Move - Shoot in their turn, while the Iraqis can only Shoot - Move. This seriously degrades Iraqi combat potential as they can't maneuver and attack at all. They are forced to sit and await the US onslaught, and then survivors [if any] get to fire back and retreat. Second, the turn sequence has no interaction like in TY - there is no opportunity fire at all, and all units can shoot in the proper phase without it impacting their move and vice-versa. This means all US units can Shoot up the defense, close in and finish it off at point blank range with no return fire - ever. Looks pretty grim, but here goes!
I opted for a defense in depth, putting all the infantry in a wadi that confined the US to the NW board corner. Backing them up are the T55s and BMPs w' ATGMs - they have great range and are almost a threat to the Abrams! A highway under construction [HUC] is the next line of defense, full of the rest of the infantry. The US force of Bradley's and Abrams enters in the small space and right off the bat has to blast away to get some more room! The key US decision is how to crack the defense - fast and dirty by advancing into point blank range, or carefully peeling the onion apart?

Just to try it out, I went in close, but not into the same hex. At a range of 1 hex, the infantry are nothing to fear while the Abrams attack value is doubled for under half range.

I lost a couple of Bradley platoons due to hot die rolling by the Iraqis.
Turn 2, the Abrams dashed thru the gaps, enveloped the T55s and their BMPs, and...

...ate them for breakfast and lunch!

Turn 3, the US armor crashed into the infantry holding the HUC, and ripped them apart - lots of 5-1 attacks. The Iraqi reinforcements then entered [rolled each turn for the turn number or less, classic old mechanic] and deployed.

These were then eaten for dessert! With a few BTR platoons left on the table, I called it a day for the Iraqis.

Turn Sequence mechanics...some thoughts.
The novel use of two different turn sequences for a game is a great idea - it takes into account the outstanding ability of the US forces to fire and maneuver, and do it much faster than the Iraqis. The Iraqi turn sequence, however, confined them to one tactic - wait, shoot, then scoot. Not only do they have weaker gear, but they have half the opportunity to fire, or none at all if they maneuver into range. For a company level game, that is harsh [even if realistic given the history]. I can live with them only shooting once, but I think they should be able to shoot-move, or move-shoot.
In the end, I decided to use the TY sequence of play:
A Shoots
A Moves [B opportunity fires]
A Shoots
B Shoots
B Moves [A op fires]
B Shoots
Catch is you can only fire in one of the shoot phases, and Op Fire [in opposing turn] if you didn't move. So you can shoot in the first or last phase, then gain the Op fire and shoot again in the enemy player turn for double the shooting - but you can't maneuver, you are committed to lots of shooting - elegent! The contrast tactic is to shoot then maneuver into cover - it halves your rate of fire and a fast-moving attacker can close in on you, but you don't take much return fire.
In TY, missiles can't move and shoot at all - it is a very tactical level of play. At this higher company level I imagine they are taking turns maneuvering then loosing missiles, so I did permit it.
This time it was much harder for the U.S. I imagine them greatly fatigued from a rapid advance and running low on ammo, so relative performance is a bit closer [just...a bit]. With a possibility of moving and shooting, all the Iraqi armor had a threat range of 10-11 hexes and set up farther away. Below, I divided the Abrams and Bradley's up and sent them in close - I promptly lost two Bradley's to excellent Iraqi rolls of a '1'! A third took a temporary "Damaged" result. Yikes!

I re-thought that, and tried again, this time I held off with the Bradleys. With a defense of only '4' [the Abrams is a...14!] they need to hang back and use their 20-mike-mike to soften things up a bit. Forgot to turn the Bradley counters back over, but you get the idea. Meanwhile, the Abrams pile onto the Iraqi left flank, looking for a break-through!

And unsurprisingly, they get it!

They take a tiny bit of heat in return thanks to some great dice by the desperate Iraqi forces - two Abrams are "Damaged". Note: I also decided to give the bottom of the combat chart a minimum D result on a '1' - even if the attacker can't get 1-4 odds. I figure being shot at is stressful and wears people down, at least. I did not use the "two 'D' and you're destroyed result for those units, however. I figure they just don't have the firepower to damage the Abrams. Thus, the "D" is more like a "Disorganized" result.

Turn 1, Iraqis move up, getting their BMP's in range with their ATGMs. They completely miss however, needing a 1-2.

US Turn 2 ends with a huge whole in the Iraqi left. On Iraqi 2, the right fist Iraqi armor knock out an Abrams with an ATGM!

Encouraged, the Iraqi tanks advance and D one Abrams, followed up by their BMPs

U.S. Turn 3, the first fire phase counterpunch from the US ATGMs is super nasty, and most of the T55s are knocked out, along with two BMPs from the center.

Turn 3 Iraqi reinforcements arrive and move up the road. I decide to use the triangular fortification to hide behind, while moving up the slower BTRs.
Turns 4 and 5, the US trashes most of the Iraqi armor with their tanks and ATGMs and start maneuvering out of the corner in which they've been confined. The Iraqi armor shifts south to hide out of LoS behind the triangular fortrification.

Turn 6, the US rapidly advances down the center road and begins attriting the infantry in the HUC. A counter attack by Iraqi T72s is heroically executed...

...and they knock out two Abrams! What!!!???

Their joy is short-lived, as they are all destroyed.

With nothing but weak armor destined to die to the US ATGMs, and the infantry going to get chewed up by the last tank platoon and mortars, I called it quits - but it was a much more exciting game.
So, the turn sequence...it's critical to not only shape tactics but to make the game dynamic. Clearly, more to be said about this in another post on the First Battle series. Am particularly interested in "Blood & Thunder", an East Front WWII version that represents the culminating development of the rules, far as I can tell. And...I acquired a mint copy at a great price through Boardgame Geek!
No comments:
Post a Comment
Thanks for your comment! t will be posted after it's moderated.