Below, the project in all its glory.
*Russian Proxies w' T-74, BMP-1, BTR-50, &100 3rd World Infantry [50 heavy support].
*Opposing them, our gallant lads of the Stryker Brigade w' support: M1s, Strykers [MGS, AT [w'Hammerhead], IFV, Cav], M-ATV and 100 infantry [50 heavy support].

Ooh-yeah! These Strykers are just amazing sculpts - no buyer's remorse here!
Basically, I'm thinking of the future fictitious US / NATO intervention in Syria as a potential story line. So this is a "near future" force. Not quite "Imagi'nations" in that it's all real, but hey, it hasn't happened yet so who can say my camo or any other paint schemes are wrong?? Should be fun as well as provide lots of opportunities to learn things in my spare time that improve job performance - true National Guard approach!
First up, the T-74.
These tanks were picked b/c well, they were on sale for 40% off! And hey, I figure there's a T-74 or something like it somewhere beating around in Syria...plus, who can tell with 1/285 at gaming distance of about 3 feet?? What's important is that the shape and camo scheme make it obvious to the gamer what it is on the table. Some nice pics of Russkie tanks:
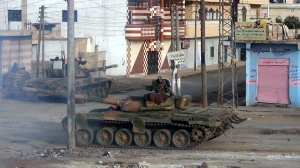
T-72 in Syrian town.

really nice pic! no idea what the red paint is for...

T-55 defending cutting-edge technology fortification? These are used as gun-tanks now, very interestingly, much like the German use of assault guns w'light armor in WWII. I will have to get some of them for just this purpose! It reminds us - an old tank is a good tank if the other side doesn't have any tanks! All above pics:
https://milinme.wordpress.com/2012/01/28/arab-revolts-revolutions-syria-5-tanks-in-towns/
The tanks are lovely, with lots of crisp details and quality metal. Probs are the packaging had the MG sprue banging around with the turrets, and two of the gun barrels were very bent. They did respond well to being straightened, but the packaging could be improved a lot to better protect the model - half the MG barrels have broken off. Fix will be fine piano wire, most likely. Basically, some foam would do the trick.

Also, no diagram of how the MGs fit on the tank - and the pic at their website doesn't have any MG at all!

http://www.ghqmodels.com/store/w28.html
Have to do some snooping around on the internet...
It was a little disappointing to discover a problematic mold line around the lower part of the turret, near the ring. I felt obligated to trim and clean them off. The turrets and MG sprues need to be handled carefully. Brace the fragile parts by laying them upon a finger while cleaning them up with a very soft toothbrush and dish-soapy water.


Post cleaning and a good rinsing off of the soapy water, the parts are set out to dry on a soft cloth to help absorb water. Old flannel shirts, etc is good:

Then the turrets need to be glued on - I see no point in having movable turrets, this is not a skirmish game and they will just fall off and get lost! Question is, how to glue them on? If they are all just facing forwards:

They look like they're in a parade and the barrels stick beyond the base and risk damage, bending, etc., especially during transport when the bases will be touching each other.
Also, I want my tanks to look like they're spoiling for a fight and doing their business, not observing a patriotic march thru Red Square! So, to the internet for info, a quick search for "Tank Formations" using Google Images comes up with this:

https://www.globalsecurity.org/military/library/policy/army/fm/3-21-71/appe.htm
And this:

http://www.steelbeasts.com/sbwiki/index.php/Formations
Note the varied direction that the barrels are pointing - indicates the zone that the gunner / commander is covering even as the driver moves forward in formation.
So how would this look on the bases?

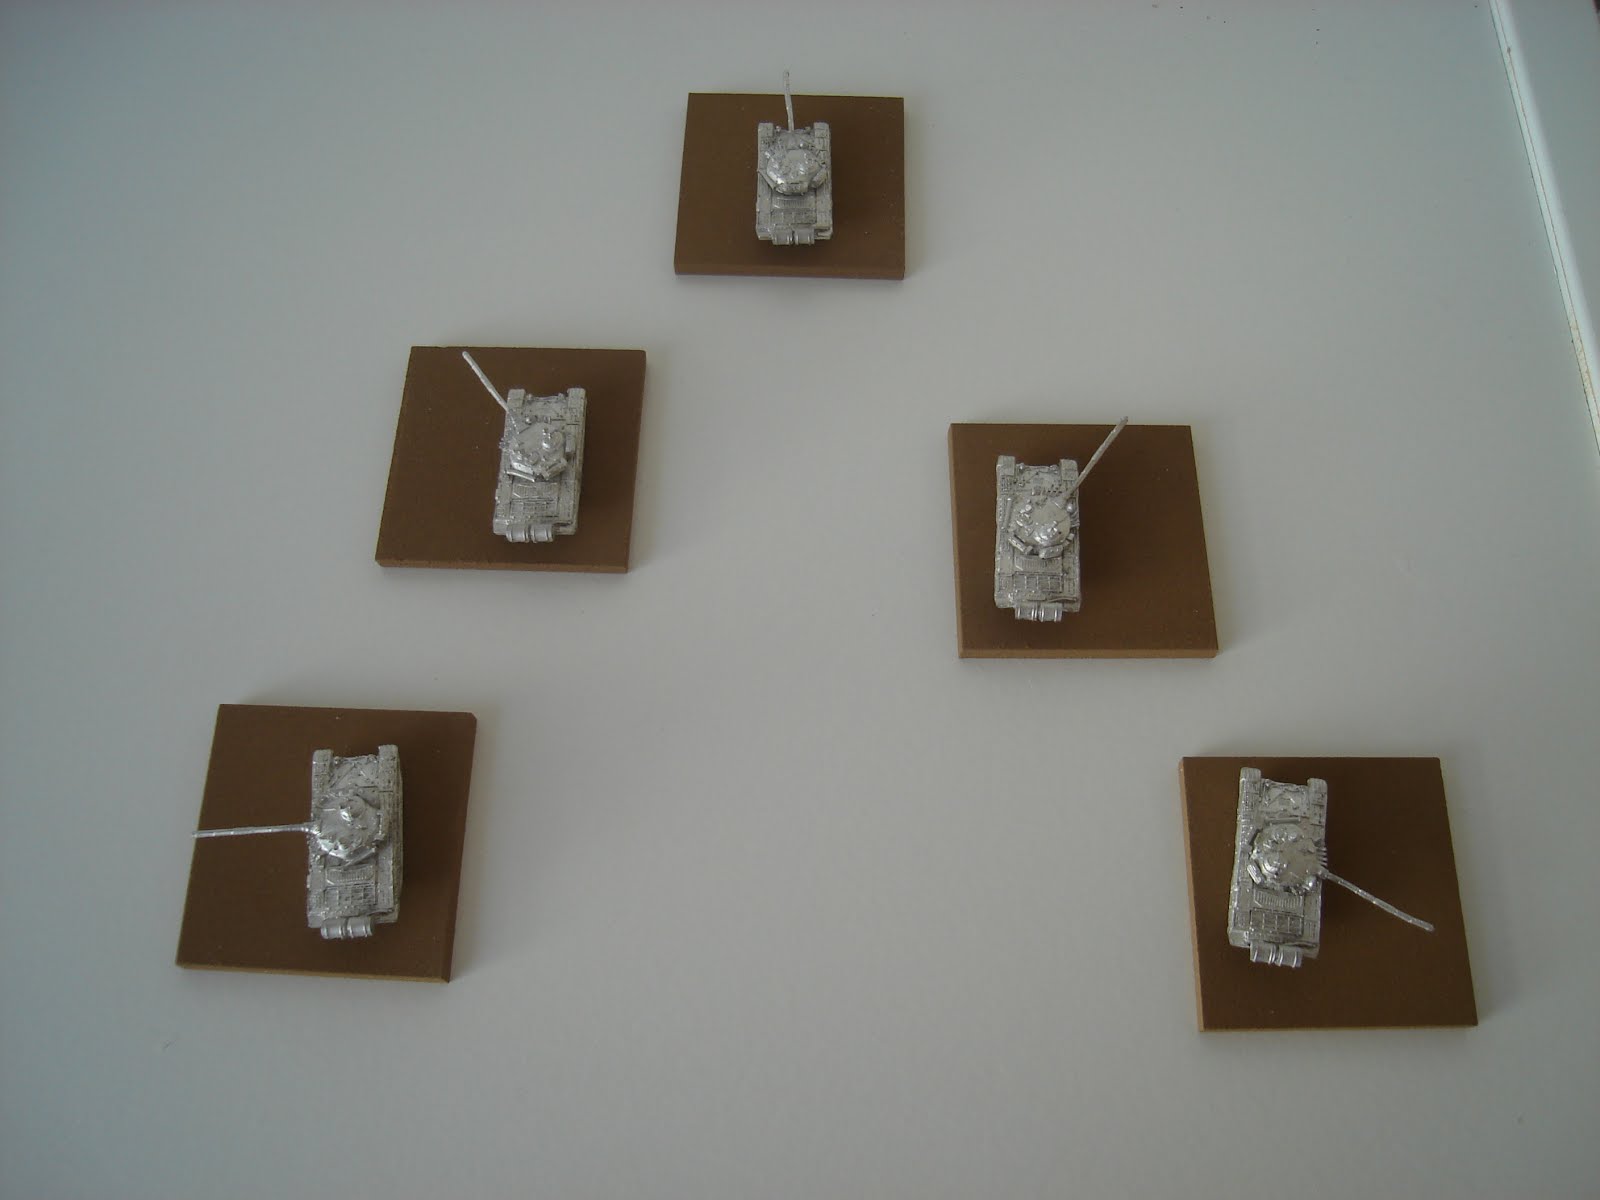
Perfect!
Also, it's good to have a low, handy box to keep such small models in while you're working with them - if a part falls off, you don't have to pick around on the carpet to find it, only to fail and then hear it click its way into the vacuum cleaner later on! And if it is a dark color, the metal bits will really stand out. Kept this from the recycling bin when my wife tossed it, knew it would be useful for some gaming purpose:

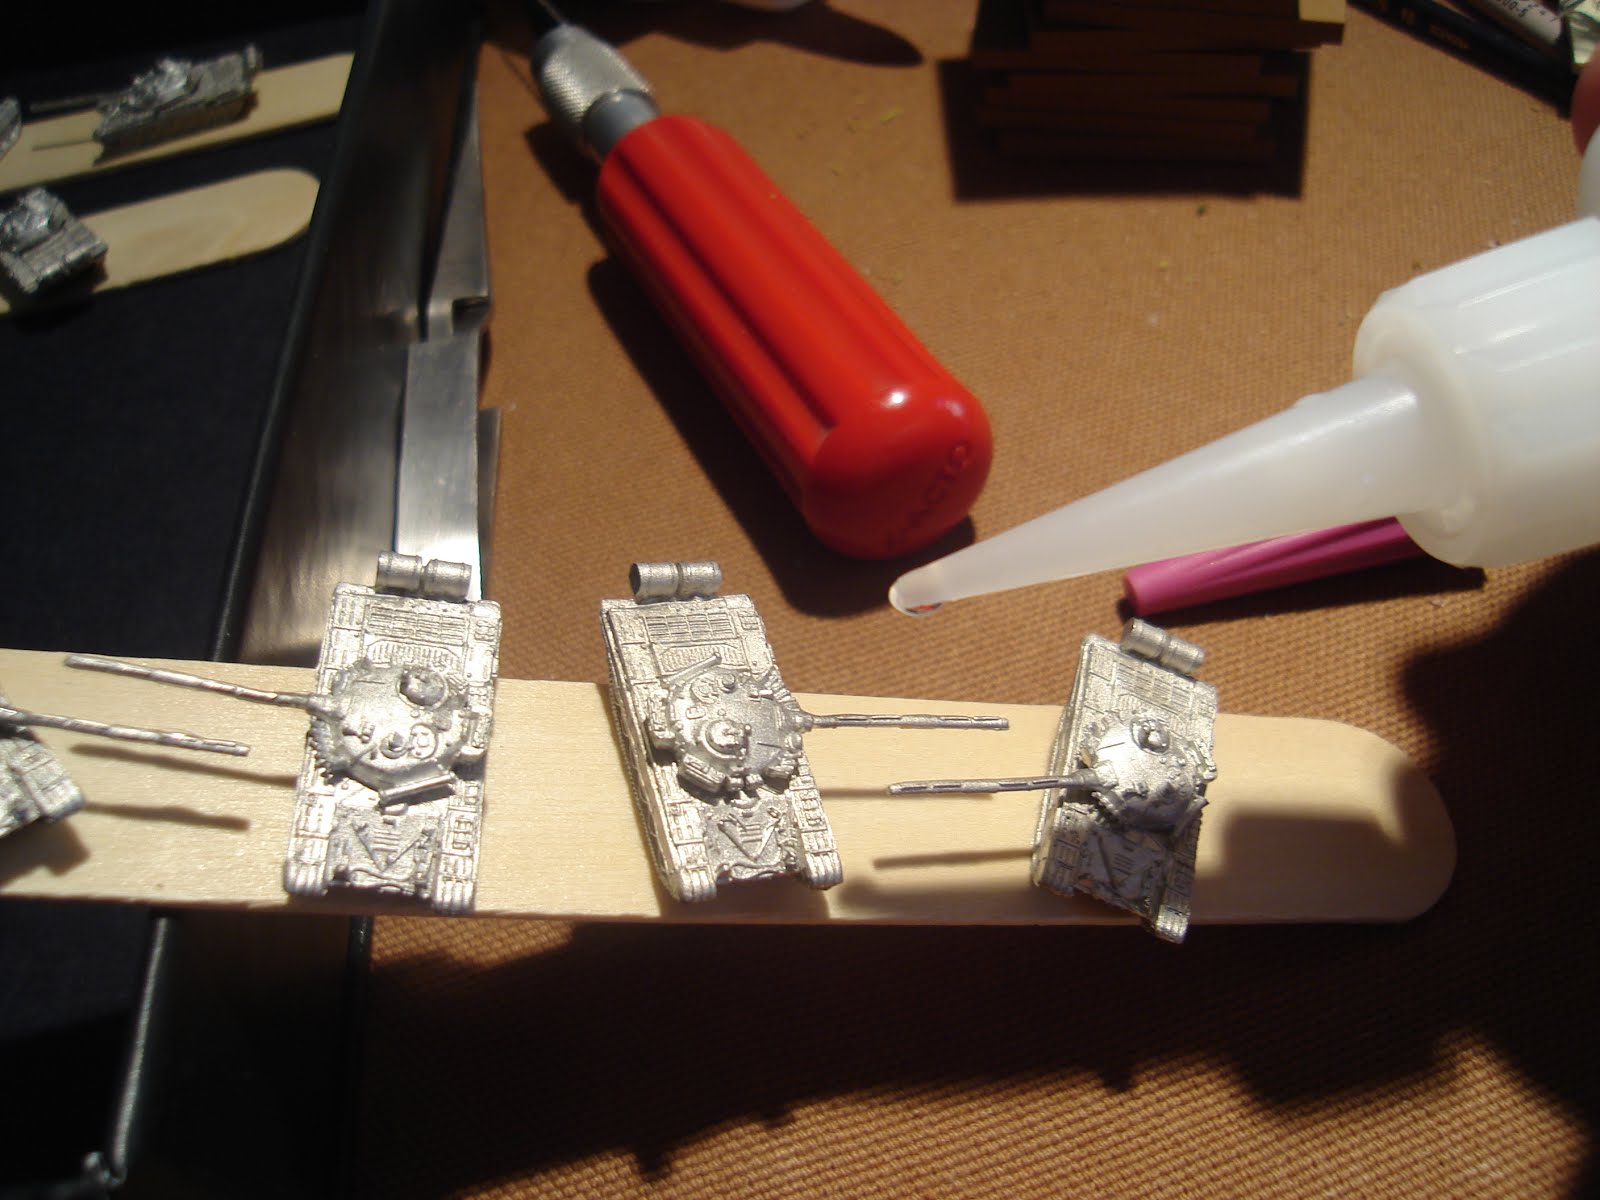
With the turrets secured, the tanks need to be glued to something for upcoming handling; MG placement, priming, painting and then the dipping process. As you may be noticing, I think it important to give the barrels as much chance to survive as possible, so instead of gluing the tank's body parallel with the craft stick, they're glued with the barrels parallel to the stick:

Also, leave plenty of space at each end to handle them with [I already know I'll switch the handling end continuously during the painting process]
I then carefully straighten the barrels out with gentle bending and gentle squeezing with a simple toothless clamp [soasnotto leave marks].

The straightened barrels are then given a thin layer of super-glue [cyanoacrylate] to help them hold straight.
If not dropped or carelessly handled, this should keep them intact as the bases are themselves thick enough to handle without touching the tank at all.
So the steps have been:
- Open blister and figure out what stuff is [use internet as needed], 15 min
- file mold lines, flash, etc off with jeweler's files, 70 min [ten tanks]
- gently clean with soft toothbrush and soak in warm, water w'regular dish soap [I used Dawn] to clean off any film left from the mold. 10 min
- dry, glue on barrels, 15 min [w' research time]
- glue onto craft sticks 5 min.
So far, this has been about 120 minutes, with cleaning mold lines being the most time-consuming. I'd say next time it could be half as long if the vehicles don't need as much cleaning.
Don't let my commentary put you off GHQ or micro armor. The tanks look really good, and I look forward to assembling them and getting them painted up!
Next up - cleaning the BMP-1s!
No comments:
Post a Comment
Thanks for your comment! t will be posted after it's moderated.