Sunday, December 3, 2017

6d6 WWII v.2: One-Hour Wargames #21 "Twin Objectives"

The Limeys attempt to take not one, but TWO objectives from the Camparis!

Table layout and initial deployment above. Book scenario below.


With what I think is a faithful setup and layout, I deploy the two forces as best I can after playing this scenario a good ten times over the last couple of years. There are no less than three playtests of this recorded in this blog HERE, and it makes for nice comparison with how the rules have developed over this timeframe.

Some things can't be predicted, of course, and there are options that fall into the "it all depends" category, but this is the best I could do:
*Italians. Carri platoon on road at top left. ATGs in town-Objective, Mortars at top right are angled to fire out of the corner. At bottom, the fourth platoon of Bersaglieri are deployed on the hill-objective - which is rough terrain - at the bottom left. Deployment restricts Italians to Hill objective and top 6" of the table, the South end of the town and the road line, basically.
- Mortars could be where the Tanks are on the road. I chose to put the Tanks there in the hope that they'd have a bit more working space and be able to engage the British platoons in sequence rather than all at once [which results in a 1-2 turn wipeout].
- The ATGs have a 180 front/rear, like all Units. I put it even with the road instead of angling it to the SouthEast. This was an error as it left a weak spot to their left rear.
- The Infantry can deploy farther back into the rough ground - this means an extra turn or so for the attackers to get LoS which is 4" in the rough terrain [4" is also Close Range]. However I chose to deploy farther forward to deny the British infantry space to establish themselves in the woods, Dug-in. This makes them vulnerable to an attack by the Italian tanks if the British ignore them [they usually don't - it's so quick to wipe out tanks that when you've an advantage it always pays to do so. A lot like Cavalry Units, basically].

British. Two Motor Platoons to left facing the rough ground - their job is to take this objective with the help of the Mortars, which are to the bottom right angled out of the corner [the models are Crusader CS tanks, Close Support, with a 3" howitzer]. The three Crud platoons are in 2 up 1 back formations all facing forward on the deployment line to right. Their job is to drive straight up, destroy the Mortars, flank the ATGs and destroy them, and somewhere along the way knock out the Italian tanks. Should be no problem, right...?

I've decided that for this scenario, the Italian Mortars are the key - they can affect an attack on either objective and they put a lot of casualties on the Brit infantry as they close in on the hill. They also put a Hit here and there on Armor units, sometimes it's enough to make them vulnerable to destruction. As they are unaffected by the Target Priority rule, they have a bit of a sniper affect - I'm OK with this as I envision the commander looking over the battlefield and deciding where their fire will have the best affect given the situation. As they are a local and integrated asset, their reaction time is - and should be - pretty quick.

Turn 1. In a post-deployment  flash of inspiration, I decide to hold off on the Motor Platoon assaulting the woods and dig them in. They'll attack after the Italian Mortars are knocked out, so I fire on them with the British Mortars and they fire on the Cruds most likely to be fired upon by the ATGs and Carri. Hope is that the concentration of firepower will knock out a platoon. The ATGs fire and put a few hits in on the right-most Cruds as the target priority rules have them a priority. Carri move up to place themselves just out of 12" range, hoping the Cruds will move into it so they can get first shot off into them.


Turn 2. Initiative doesn't change [the side without it needs to win by three to take it, and the red-dice Italians don't quite do it at 3-1]. I decide to give the Carri the first shot - I'm totally focused on crushing the mortars and flanking the ATGs. The red platoon at top left only takes weak hits from the Italians but are at 4 Hits, the other platoons are right behind.


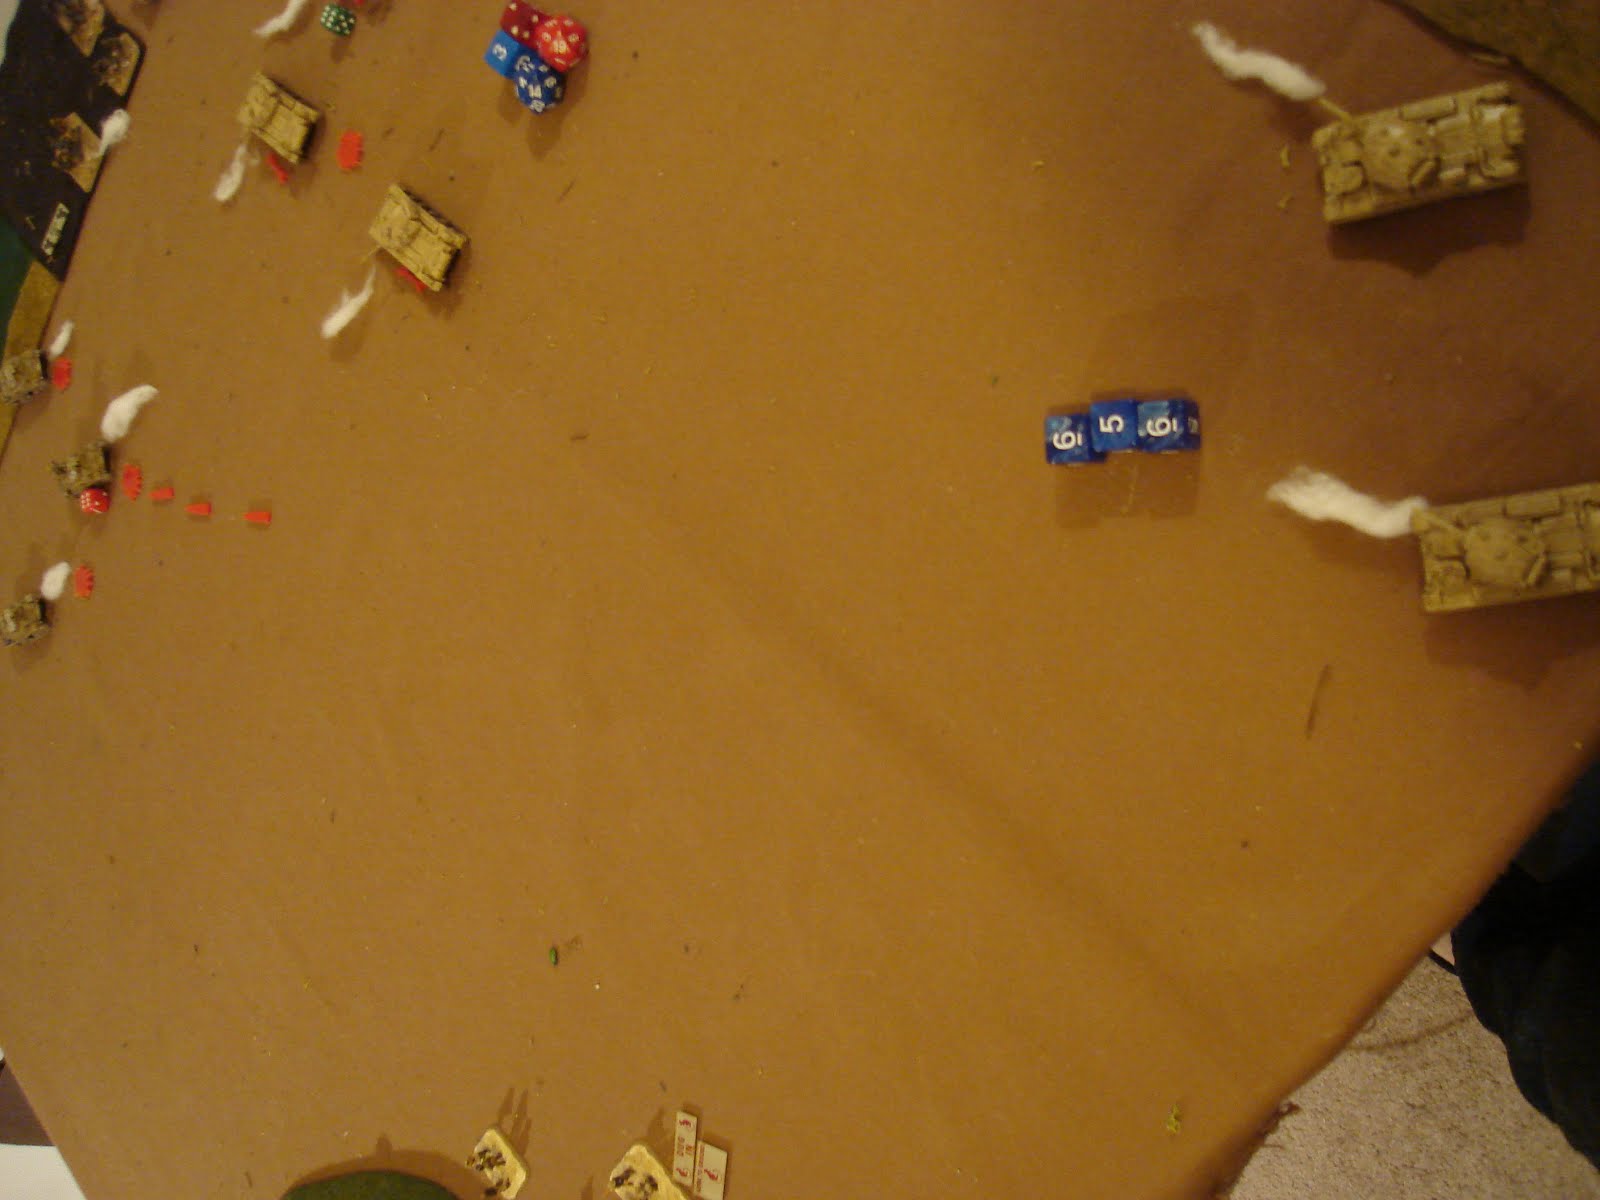
Turn 2 Closeup. The Brit Mortars have been able to pound away at the Italian Mortars well [good dice]. The Green Cruds will advance past the Red next turn to "shield / relieve" them on point. The right-most Cruds will dash at the Mortars and wipe them out!


Turn 3. Rather than be slowed by destroying the Carri platoon, I decide the Cruds must advance at top speed and keep on their original mission. Red Cruds put paint rounds in the chamber and inflict no damage. Final Cruds are under the range of the Mortars, and now immune to their shooting entirely. Overall, plan seems to be progressing well! Carri put two Hits on Red Cruds, pushing them to 6 altogether. Italian ATGs fire at the Green Cruds who've outflanked them at Close Range. As for the Carri platoon...


The Mortars pull off a 1 in 27 shot - all three Mortar rounds hit needing a 5+! Who left the hatch open? Stupido!! Carri platoon unexpectedly crippled with 3 Hits and a Permanent Hit.


Turn 4. The British keep up the pressure, knocking out the Carri platoon, but the Mortars only take one hit. The Italians knock out the Red Cruds with their Mortars, but nearly whiff in their shots on the Green Cruds - only one Hit! The ATGs took one, safely Dug-in in hard cover. The plan is progressing, but not as fast as I'd like, really. The decision point will be the ATGs v. the Green Crud platoon - whoever wins that will probably decide the battle.


Turn 5. Mortars and Cruds pound away on the stubborn Italian defenses. 


Turn 6. Italian Mortars are wiped out. But the ATGs put two Hits on the Green Cruds, who are now one Hit away from dead. They in turn inflict no Hits - doesn't look good!


Turn 7 - Hill. Both Motor Platoons advance, getting decent movement rolls. The Italians defend themselves getting a Hit during the Brit Action Phase using their Ready Action. Italians get a second Hit in their own Action Phase firing.


Turn 7 - continued. The Cruds swap out to save tanks and keep up the pressure. The desperate Italian ATGs pull a perfect roll and inflict 3 Hits so 1 is permanent! Suddenly, the relieving Cruds are looking shaky, altho they did manage to put one Hit on the ATGs.

Turn 8. Mortars get a Hit. One Motor Platoon outflanks, the other digs in. Italians miss... The full attention of two Infantry and one Mortar will be felt next turn as they put down 2 dice for the Mortars, 1 each Infantry, 4 total for a 3+ to get a Hit. Meanwhile, at the Town, the Cruds manage to wipe out the ATGs. It was a very near thing, but they manage and now set themselves to their most important task - brewing up! [sorry, forgot to take a pic!]


Turn 9. And they inflict three Hits on the Camparis while taking one themselves.

Turn 10. Italians squeek out one Hit but take two. The end's in sight...

Turn 11. The Mortars roll a hit and Campari resistence fades as they withdraw.

Whew! A close-run thing.

I made a mistake in not tilting the ATGs back so they didn't have a flank exposed. However, the 180 rule would have made their RIGHT side vulnerable instead, denying the Brits the benefit of concentrating against the Mortars / ATG flank. It would have made the Carri platoon even more critical as they would then be protecting the Right flank of the ATGs.

It was the Campari's battle, and any mistake by the Brits would almost certainly cost them the win. A few sweet dice rolls also helped. The mobility of the Tank platoons is greatly enhanced by the priority rules - The tanks can shift themselves to change which tank unit has priority, while the static defense cannot. I like this, it feels both realistic and playable. The ATGs in the town are a really tough defender - most units will be down to a single attack dice. The key is to knock out the Carri quickly. 

There is a distinct possibility that the Carri would be better replaced for a second ATG platoon - these could Dig-in and give the Cruds even more trouble. As always, force composition has a big impact on the planning and execution of any operation. These scenarios can be very challenging to players as one can't optimize one's force.

So very happy with this playtest, and with the rules in general.

Now, I have to set my mind to planning the Sidi Rizegh big battle and at least finishing my mighty force of Cruds - long overdue!

Tuesday, November 28, 2017

6d6 WWII v.2: Scenario #8 "Melee" with Eager Playtesters

Twas the night before Thanksgiving, and all thru the store,
The gamers were hollering, "More! More!! MORE!!!"
The dice were thrown, the cards were cut, attacks made on the flanks,
In carefree anticipation of feasting, family, and - we hope - lots of thanks.
(with apologies to Clement Clark Moore)

Soooo, with quite the excitement at testing the latest draft - 11 - of my WWII rules on two Veterans and Grognards, I reported as ordered to the local FLGS to see if this draft was as good as I hoped. As a close spin on my Medieval rules, I felt that the mechanics would work well, and "scratch the itch" for a fast-playing but very tactical Company / Battalion level WWII wargame, playable in an hour or so. Will the rules withstand the test of historical knowledge, practical experience and gaming experience? We'll see!

*** EDIT: to track rules development better, these rules are now "6d6 Wargames WWII, v.2" to differentiate them from the posted v.1 one year ago. ***

I've now switched my language regarding the rules - there's so many changes that the most that can be said for Neil Thomas is that he inspired them with his philosophy and the "One-Hour Wargames" book, which I still highly recommend. In the not-to-distant future, I will unveil a legible copy of the rules and send them out to likely victims for blind playtesting. If that interests you, do contact me for the mundane arrangements. Meanwhile, I've pretty much stopped calling them "One-Hour Wargames" and free Mr. Thomas from any responsibility, morale, ethical or legal, that caused by the playing of these rules. ;)

Some mechanics that have crossed over from the Medieval Rules:
- The Initiative [IN] roll-off mechanic. As one side has Initiative and takes its Actions first, followed by the other side, it is possible for the losing side to go second, win IN, and go first in the next turn, effectively getting two Action Phases [interrupted only by Mortar Fire]. This requires winning by 3 as the holder of IN gets a +2 and wins ties. So it doesn't happen often, but it is worth thinking about.
- the 6-Hit Unit: it is so much easier to track with one dice than up to three for 15 Hits!
- the corresponding use of the 3-dice attack mechanic, which lowers the numbers of hits a unit takes in any given attack to the same math chances as the d6 attritional roll with 15 Hit Units. The main difference is that you can "miss" with all three dice, gaining no Hits, with any Unit. In OHW only the weak skirmish units that attack d6-2 can "miss".
- a combo method of varying the number of dice and the Hit number
- rallying off of hits, in a simple, limited way.
- a partially diced move system,
- A combo of Actions and fixed phases [Mortars fire in a separate phase]
Some have been tweaked a bit for WWII and of course the modifiers to the combat dice and target numbers is mostly unique to WWII as well.

Turn 2 - Initiative roll-off. The defending Italians start the game with Initiative, not the attacking Brits. They have an ATG and INF unit on the hill. They go Ready with the ATGs and move the INF into the oasis/scrub [woods] in front of them. The key decision is to dig-in off the hill or on it - the victory condition is sole possession of the hill. The Brits start with three Units of Cruds which begin dashing up the road to set up an ambush on the Axis reinforcements, two platoons of PZIII, an Infantry and a Mortar Unit. Unfortunately, the Cruds roll pretty low and don't get very far. The ATGs shoot on the Ready during the Brit turn, then hammer away at the platoon for the next couple of turns [ATGs that are Dug-in have about a 2-1 Hit advantage v. Armor in the open...as it should be!]

Turn 5 - Action heats up. The Brits got one platoon into short range of the Axis entry point, and one platoon hull-down behind them. They manage to knock out one platoon but the close ranges and dice rolls have put one of the Crud platoons at 6 Hits - it's removed at 7. Meanwhile, the British Motor Infantry are developing an attack on the Italians in the woods, who are Dug-in and Ready. One platoon of Cruds tested the ATGs and didn't like what they got, so pulled back behind the oasis to rally a few hits off before re-entering the fight.
Crud Close Support platoon at bottom left [mortars]. PZIII above road. Italian ATGs on hill at top, Infantry in Oasis. Axis have lost a Unit, but two Crud platoons are badly damaged.

Turn 8 - the battle rages! Stubborn Italian defense of oasis has cost the Brits a Motor platoon. Both the short-range fire and mortar support were tough on the attackers. One platoon of Cruds is gone, the other two are doing OK. The Hull-down one has inflicted a permanent Hit on the PZIII platoon, so they'll always lose one dice when attacking. Lots of decisions have been made, the most interesting being the Brits to take a very aggressive stance against the reinforcements of the defenders. Personally, I never found this to work, it just gets you fighting with more Units a turn or two earlier. If his two Crud platoons fighting the German armor had spent a couple turns shooting up the Units on the hill, they might have secured the Oasis as a staging poin to attack the ATGs with their infantry.
British have half an oasis - but can they get a drink?? Axis mortars below road at right. Axis infantry on hill at top to replace the destroyed ATGs [they didn't dig-in].

Turn 11 - desperate measures. With solid play and average luck on both sides so far, the battle still hangs on a thread. Cruds knocked out the PZIII platoon and are now encircling the embattled Italian Infantry in the oasis. The other digs in as MG and Mortar fire lashes at their comrades. The Italian Mortars work to support their comrades and put hits on Cruds.

Turn 15 - a brutal finale. Well, few survived. The Brits lost a Crud platoon and the Italians both Infantry platoons. The Cruds then moved up and took the hill. The Italian mortars also moved up, but we think - in hindsight - that they had fired and so wouldn't have been able to move. Clearly, however, they would have withheld shooting for movement as it meant the game. Still, the Brits have two good platoons on the table, and the Italians just have Mortars, so it would just be a matter of a few more turns for them to secure victory.

This is not as detailed an AAR as the one over at Sound Officer's Call, but it is focused more on the rules rather than the fun the two playtester's had, anyway. :)  I do encourage you to read Steve's account of the battle, it's not often you'll get to read two AAR's of the same game!

I :up well. There are plenty of clear-cut decisions to be made, and battles are shaped by those decisions interacting along with the dice. Overall, I believe that 3-4 of 5 games will go to the better player with this system, so I am happy with the occasional loss due to bad dice or a bad critical decision. It reminds me a lot of real war!

The combat mechanisms were solid and pretty easy to remember, as are the move rates. Initiative is not a game winner and here it never switched anyway. I am happy that most of the time, a Unit has a couple of choices of what to do - Rally, Dig-in and going Ready are almost always an option for a Unit if they are not moving or shooting, and I have always loved the "saving and preparing" aspect of such a mechanic. When do Units ever just totally sit around and do nothing on a battlefield?? Never! If they are resting, they are also trying to organize and get ammo, improve their position, etc.

So some little things to write up and edits to make, but these are very solid. We will be looking good for the Crusader mega-game in a few weeks!

Tuesday, November 21, 2017

Neil Thomas "Wargaming: An Introduction" Skirmish rules Playtest

"Hey Beau, you think there's any Arabs out here...?"
Nope, none, nothing to worry about...no wargame here!

Well, it was about time I returned to and used the "Wargaming: An Introduction" [WAI] Skirmish rules as NT intended - Rules As Written - so played them RAW in this batrep. This provided an opportunity for me to use my half-forgotten 15mm French Foreign Legion and Arabs. For the force list, I used the British v. Dervish 1885 lists which are perfect.


There is only one scenario in the book, a fight to the death with the only guide being that there should be lots of cover. This is a bit dull, so instead I used #6 Flank Attack from "One-Hour Wargames", which features a 1/3 Red blocking force on the road and a 2/3 ambushing Red foRce from the flank. All of the Blue force is on the road, up to 2/3 the way up the board in zone 1. In this case the French Foreign Legion is Blue and the Arabs are Red. 

This was the second time I played the scenario. I find that I am rarely able to get a set of rules right on the first try! I still forgot something and had to play them a third time...

The game board in the book above, and my take on it below [it's a mirror-image] with the flanking force and its hill to left, and the blocking force behind a hill at the top. All the little bushes give cover if a figure touches them [doesn't need to be between firer and target, its abstracted!]. The distances are around the same, given the switch to metric measurements.


Captain Escargot v. Mullah Mansef [All are Stone Mountain figs still in production].


Mansefs ambushers: 4 Rifles and two camels-riders w'spears, all Average. Blocking the road itself are 6 spearmen and the Mullah himself w'sword.


Escargot's supply train, Elite: 2 Cavalry, 4 rifles, 1 Hero w'pistol [Himself!], supply camels.


Turn 1. French go first and move to get distance from the ambushers; also advance the cavalry to threaten the blocking force at the top with a charge from out of their reach. Note that everyone is touching a bush and now has the cover benefit. Red Arabs advance everyone - rifles to the crest camels and spears close in, all keeping to cover. 


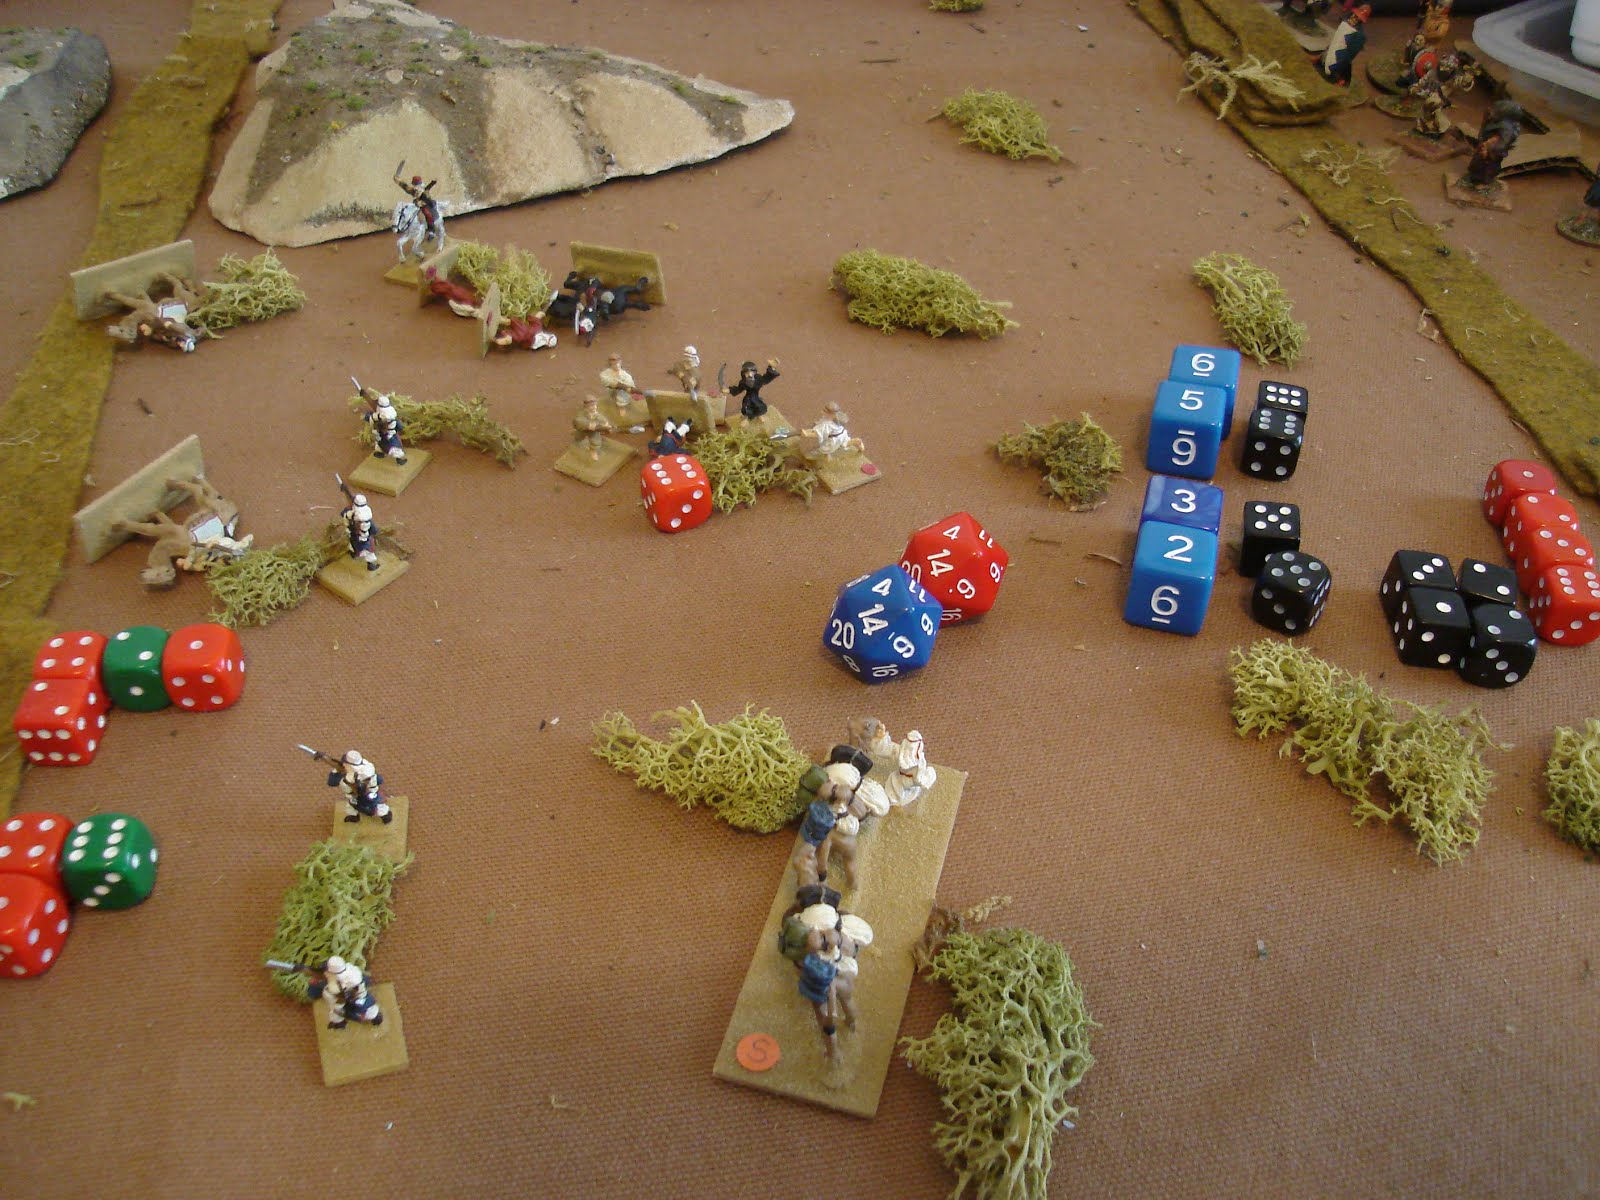
Turn 2. French shift cavalry and supply train out of range of Arab shooting. French rifles shoot at threatening camel-riders getting 3 Hits [3+], 1 is saved [4+] and then they roll on wound table for 1 wound each [a 3-4]. [you can get 0-2 wounds on the rifle wound table, and an Average figure has 3 Wounds]. You can see shooting as blue/red dice, then green dice are cover, red dice wound. Arabs on hill fire getting 2 hits [4+] which are saved by French cover [4+]. Arab blocking force continues to close in using cover. 


Turn 3. The French shoot at Camels getting 3 Hits, 2 are saved and one gets one more wound. Rest of French force positions itself against advancing spearmen; the Hero Escargot with his pistol, backed by two cavalry. Arabs keep closing in. Shooting gets three hits, one stopped by cover, then both miss on the wound table [frustrating...]. 


Turn 4 [forgot to turn dice over, obviously, so now all the turns are off!!]. 
French shooting gives 3 Hits on camels, two are not saved, and the 5 gives two wounds, putting them at 3 and 4 respectively, killing them. A French cavalryman melees a spearman: He rolls four dice [3 for being Elite, one for being mounted, Yellow dice] and the spearman rolls two Black dice. The single highest dice wins - French high of '6' beats out Arab high of '4' and the French cavalryman wins. Note that French next highest dice is also a '6' v. Arab '4', so would have won if Arab high roll was a '6', also. Frenchy rolls a 4 on the wound table and inflicts 2 wounds on the Arab leaving him w'one. Arab shooting [black dice] gets only 1 Hit which is saved. Arab spears and Mullah close in for the kill. 


Turn 4 continued. Arabs attack a cavalryman and win with their second highest dice, 5-4. They inflict 5 wounds and take him down [melee wound table is more severe than rifles].


Turn 5. French Riflemen get two misses and one Hit [light blue dice behind them], needing a 3+, and it isn't saved by cover but he misses on the wound table. The Hero gets two hits with his pistol, inflicting 3 wounds and taking down a spearman - that's a HERO, not just some strange sort of sandwich! The surviving cavalrymen attacks a spearmen and takes him down with 4 hits. 


Turn 5 Arabs. Their shooting results in two hits, one saved, but no wound. They close on Hero Escargot, Mad Mullah Mansef leads the charge himself with four spearmen helping him - cowards! In the ensuing melee, both sides roll well, but the Arabs drop 8 dice to Escargot's four, and beat him on the second-highest dice 6-5. They roll poorly on the wound table but still manage 6 wounds and kill him [he has 5 wounds as a Hero].


Turn 6. French are outraged by the death of their Hero and shoot for revenge. As neither of the Spearmen have cover at this time, all four Hits go straight to the wound table [Yellow dice] causing 3 wounds on each, killing them both. 


Turn 6 French, continued. Cavalryman attacks the Mullah, but Mansef sees him off winning 6-5 on the second highest dice, and inflicting 3 wounds.


Turn 6, Arab. Shooting gets two Hits saved by cover. Spearman and Mullah try to finish off the Cavalryman, but he easily beats them on the second-highest dice, 6-1, killing the spearmen outright with 3 wounds. The Mullah backs off...


Turn 7 French. They fire away at the Mullah getting three hits, one saved by cover, the other two go straight to the wound table inflicting two. The Cavalryman closes in for HIS revenge, barely winning the melee on the THIRD highest dice 2-1. He inflicts one more hit on the Elite Mullah, who can take three wounds, killing him.

At this point, the entire Arab blocking force was dead, and with just a few riflemen surviving, they've no way to close in and damage the French without themselves being at risk, so they fade back into the desert, like a mirage. 

Victory for the Legion, but at what cost!!? Well, a hero and a cavalryman, to be exact.

The use of the OHW scenario was fine. Movement rates are slow, 8cm [3"] in WAI-Skirmish to 6" for infantry in OHW, so about half. That would necessitate extending the scenario length if it was a movement dependent victory condition, perhaps. Victory for this scenario is that 1/3 the French have to exit the board, which is quite doable in the 8 remaining turns. Only tricky thing is that they are supposed to exit via the road, which could put them back in range of the Arab rifles if the rifles are aggressive. 

However, it seems unlikely that 3 of 13 Arabs would stick around at all while the enemy moves on. Net Casualties are 10/13 Arabs including their leader, and 2/8 French. The points were equal and the spear-wielding Arabs were effective in this scenario as they get a bonus for melee. The main issue is that after melee, attacking figs are often not in cover and can be shot.  So one's melee figs may win and wound or kill someone, but they are then standing in the open when the enemy shoots. The only way around this is to move into the cover the enemy is defending and attack him there, then retreat within the cover. All sound tactics to me!

Had the Arabs remained in place, the French would have been forced to attack the spearmen over the hill while being chased by the Arab riflemen. Uncertain if that would work better for the Arabs. Their shooting didn't achieve much, overall, which was probably mostly just bad luck as they had about 20 shots, which should be 10 Hits, halved for cover for 4-5 wounds, but they got none.

This game involves lots of dice, overall, but it goes along pretty quick when you know the mechanics. The use of charts / tables I'm not that keen on, but it is pretty hard to escape when you've the individuality of a skirmish game, and this individual story-telling is what makes skirmish gaming so much fun for so many of us. You can name your Soldiers and follow their path to fame [or infamy as the case may be]. Also, most stories / movies focus on a few individuals so it is easier to have that story line in skirmish gaming. So in those regards the work is worth it; it is still a pretty fast system, taking about an hour or so.

So, what did I forget...the Ambush Action! If a figure doesn't act on their turn, they can interrupt the opponent on his turn at any time to take a shot or charge action [if in weapon or move range]. I did play again using this rule, and it is a pretty big game changer. I overall found it a bit cumbersome as you have to mark who is in Ambush status. Tactically, it rewards a defender as they will always get a first shot against a fig advancing into range.  I don't think it matters much to be able to charge unless you get some sort of charge bonus. This mechanic is a classic old-school wargaming mechanic, so I think it deserves its own follow-up post!

All this does have me enjoying my old figs, glad I didn't get rid of them. As Wargaming Miniatures still makes them, I'm actually tempted to flesh out each force a bit more, and I'm missing a swordsmen unit somehow. Obviously, I don't need more for a skirmish game, but 15mm...it just seems like they should all be on bases and the game should be more of a multi-fig Unit game than a 1 fig = 1 Unit game. Both OHW and the WAI WWII rules would work well for this period, and the 15mm figs are a bit fragile to handle individually. 

I think WAI Skirmish has the right "feel" to substitute for one Fig [rules as written] a base of 3 figs since each fig always has multiple wounds in WAI Skirmish. 15mm Figs work better on a multi-fig base for handling, and there would be more figs on the table for a "mass" effect, which suits 15mm.  Something to think about going forward.  But first, more figures....

Monday, November 20, 2017

Neil Thomas "Wargaming: An Introduction" WWII rules hit Ruweisat Ridge


Forces laid out for playtest: Italians to South, Brits to North.

Well, after reading and re-reading them, I realized there is a lot of potential to these rules and that they aren't as different from the other rulesets in "Wargaming: An Introduction" as I thought at first. That, and Steve from "Sound Officer's Call" is constantly extolling their virtues. So without further delay, I played around with the rules a few times.

The first time, I tried them using OHW Scenario 28: Botched Relief, with three British squads attacking a town supported by two Crusadres and one Crusader CS. The Italian defenders had a squad in the town supported by an ATG outside the town to the left. On the hill to the left were an M113 tank a 75/18 gun, and two more squads of infantry:

This went badly for the defenders. Then I realized that I had put three tanks on the board for a Unit and the rules call for 1 per Unit! But the play was fun despite plenty of dice rolling. 

Here's some visual cues to see how shooting occurs:

A squad of 9 men puts out 12 dice at close range: 7 riflemen dice [green], 3 for the LMG [yellow] and 2 for the SMG [white]. You hit infantry in the open on a 2+ for a murderous 10 Hits on average!
At long range you lose the SMG dice, and hit 2 worse or 4+ [but that's still 5 hits per shot!].
If you move full you only get rifle & SMG dice, so 7 or 9 dice depending on range.  
If you move half you get the LMG dice, so 10-12 dice.
BUT any movement at all and you are -2 to hit, so can't hit at long range at all [you'd need an 8+!] and at short range you hit on a 6+.

You can see how the shooting mechanic emphasizes important factors like Range and Movement, while ignoring the many trivial factors that creep into wargame rules...

Tanks roll to hit with one dice [black above] and then roll one dice to kill a tank [red]. On 1-2 No Effect, a 3-4 tank is immobilized [a second Immobilized kills it] and a 5-6 destroys it.
Against Infantry, tanks roll to hit then get ten dice [green] against infantry, who then get saves. They also have an LMG they can fire at the same target if they move half or less - worth three dice [yellow]. So against Infantry - IF you hit with your main gun which varies from 2+ to 6+ depending on Range - you're rolling 14 dice, total. 
Even if they are entrenched and only hit on a '6', you are still getting about 2 Hits per shot.


ATGs are the same as a tank main gun against a tank or anti-personnel.
Artillery Barrages and Mortars roll for the number of rounds they'll put on the ground [black dice], getting 0-10 [green], and then you roll those to get hits and again the infantry get saves.

One's wrist can get fatigued from all this, especially in solo play!

Anyway, I played again immediately with the proper ratios of tanks and guns [1/Unit, not 3] and switched the infantry in the town to entrenched. This time, the Brits got a punch in the nose with their tanks getting knocked out and the infantry getting trashed by the 75/18 Barrage. I didn't see any way for them to counter, since a Barrage is off-table and there's no counter-battery fire. Still, the feel the rules give for infantry fighting is quite good.

So finally I decided I had to play it rules as written - "RAW" - and chose the "Frontal Assault" scenario. This took place at Ruweisat Ridge in N.Africa, 1942. The Italians are attacking with 12 Units from the West [bottom] with the evening sun behind them giving them the cover benefit due to the glare blinding the Brit gunners [a common Axis tactic]. Defending 3 objectives is 6 British units [substituted by Italian figs] at the top of the pic:


Italian attackers: 6 squads of Italian infantry [2 bases each] and one Elite Bersaglieri with a halftrack [substituted by a truck], three tanks [2xM13/40, 1xSemovente AG] a light ATG and a Barrage.


Brit defenders: three entrenched infantry squads, a mortar [top] /HMG and ATR [middle] a barrage and a Crusader. Three objecives are FoW ones on the big bases behind the three infantry units. With no guidance from the rules, I placed the objectives - 1 in board center, and 2 centered in two back quarters of the board. This has them pretty forward, overall.


Turn 1 Brits. Rolled off and Defenders rolled higher so took the first turn. They fired what they had for some effect [RED DICE are dead infantry, red POW! marker means they just got hit and will check morale start of their turn. The black '6' is on the FO stand [which reminds me to use the barrage each turn!] The killers were the mortar, barrage and forward squad for 9 dead Italians. The HMG missed completely.


Turn 1 Italians. They started the turn just passing all the morale checks -no problems there! The tanks pound on the Brit squad holding the objective, and then they move a squad into contact against the 2 remaining infantrymen. In the Assault, the Brits roll a '1' x 3 for the remaining man, x 2 for entrenched for a total of 6. The Italians had four guys x 3 for 12 so they won and killed the last Brit in the squad. Still holding the objective is the ATR and HMG.


Turn 1 Italians. Infantry roll a '6' and have no problem with their 2 dead. They advance.


Turn 2 Brits. More fire results in wiping out the Italian squad on the objective, and putting a few more hits here and there. The Crud missed the M13/40. The barrage rolled a '6' for 8 dice and got a lot of hits, but the Italians saved them all despite a measly 5+ save!


Turn 2 Italians. Infantry fail two checks [red crosshairs means no actions, green one means move or shoot half] but the rest push forward at the objectives. Crusader gets knocked out by Italian armor. The HMG gets knocked out as well, finally failing its 2+ save. Only the ATR is on the objective, and it keeps missing the Italian tanks! If it is contacted by an assault, it is automatically destroyed...not much to hold an objective with!


Turn 3. Brits keep up the fire, but it's not looking good so they shift over a squad to try and hold the ridge. The Italian horde keeps closing in despite losses. The Italian tanks have very little to stop them at this point, and the far Brit infantry is suppressed with one guy left!


Turn 4. Italians assault. The Brits roll a '1' giving them a total of 3x2=6. Italians roll a '5' for 15 and the last Brit is killed on the run.


Turn 4. Italians Assault the center objective, and auto-kill the ATR.


Whew, that was a smackdown, and I think the Brits left their kettle behind - what a loss! Obviously giving the Italians "cover" the whole time for light conditions was a bit too much. I also should switch a unit to an ATG or something to deal with the Italian armor. Tactically, it was pretty straightforward, with a simple advance with supporting fire from the tanks. Overall the rules were very straightforward and clean. I did have to check them regularly for the little modifiers and such, but it wasn't too burdensome.

A few deficiencies in the rules:

  1. There's no guide as to who has the first turn. All things being equal, I rolled off.
  2. There's no line of sight rules, including firing thru Units. I can take such things either way - depending on scale and historical training and what Units represent on the table one could fire "thru" a unit or not.
  3. 2+ Heavy Weapons Save. This means HMG / ATR / Mortars. Pretty tough any time, but especially when in cover as they're only being hit on a '6' [the need for a Natural '1' followed by a natural '6' is a 1/36 chance, the classic DBA 1-6 disaster]. This is balanced out a bit by the crews being small, usually about 3 people. However, the purpose of heavier support weapons and assault guns was historically to take out HMG nests, and they did this pretty well, usually being a 75mm gun firing HE.
  4. No guide for Terrain amount, placement. The extreme difference between shooting at a unit in open [2+] in cover [4+] or entrenched [6+] means that terrain is absolutely critical. It needs to be both well-defined and there has to be a competitive way to put it on the table.
  5. Targeting Restrictions unclear. It wasn't 100% clear to me if Artillery could fire at Armor, and ATGs fire at infantry. It doesn't appear so from the rules, altho of course it did happen historically. Since the results are usually pretty marginal [even in a game like Flames of War which permits both] it doesn't seem like a big deal if it is eliminated altogether in these rules.
  6. It wasn't clear that a barrage fired every turn, but I figure it has to be or it is almost useless. Plus, Steve said so!
  7. Ditto on the three objectives. No system given, altho there are many out there to steal.
  8. And hey, how about a time limit for the scenario???
I think these are a clean set of rules to fight platoon-level encounters at the same scale as the Battlegroup games, so a big skirmish with support weapons. I think these would be even better with a bit less firepower in the colonial era of the 1870-1930 time. Less support weapons would keep the focus on infantry, and even cavalry [there are rules for cavalry, of course!]. 

Tactically the WWII timeframe is mostly about firepower concentration. Tanks don't last long but can be useful to shoot up infantry. The real infantry killers are artillery Barrages and Mortars, which are effective but quite variable generating zero to 10 hits. The maneuver decisions were very clear. The scenarios and terrain and objective placement have a lot of impact on how interesting the game is and they are very weak.

Some ideas for improvements:

  1. A rally action to remove hits for Infantry [maybe only if they've failed morale?].
  2. A "Take Cover" option for infantry or lots of detailed terrain pieces.
  3. Formation and frontage rules - I favor simple "front and rear" arcs for this period.
  4. A Hull Down benefit for Tanks.
  5. A Tank Assault [not permitted now], and shooting ATGs at infantry [if they did in fact have HE historically] perhaps Artillery at armor.
  6. Infantry support weapons using morale like infantry squads so they can be suppressed half or fully, and perhaps attaching them to an infantry squad would be the easiest way to do that?
  7. Scenario rules, or adapting the OHW scenarios [probably by putting cover into the "open" spaces on the table and tweaking the ratio of tun limit to infantry move rate].
  8.  I don't like that infantry squads use a mechanic that appears to wipe out the squad. I prefer hits that show reduced effectiveness but few actual casualties. I'd like to try reducing the 9 "hits" for infantry squads to 6 or 3 instead, and reduce the amount of dice for shooting proportionately.
But overall these are relatively small things - the core mechanics are solid.

These have me very interested in my 15mm French Foreign Legion v. Arab figs that I rediscovered quite forgotten in an old box. Must try them very soon!

Monday, July 17, 2017

Back on Blogger! Modern Micro Armor concepts...


Look closely at the name - you'll see an homage to the memory of those who served "Up the Blue!"

So have returned from another glorious training session with a Stryker Brigade. Hot, humid, buggy, miserable for much of it, a constant reminder of the sacrifices that need to be made from the small [showering, sleeping] to the big [away from home and family, chance of death by heat cat / accident]. Also, renews a desire to do some modern gaming, if only to help me keep in mind the various staff lessons and approaches that I need to keep track of, ergo...


I'm now working on adapting my take on the OHW WWII rules to Moderns. 

At this point, it's pretty much a set of rules that is ONLY inspired by Neil Thomas' "One-Hour Wargames", really, as so much has been changed. Mainly the commitment to simplicity, and the use of the scenarios are the surviving OHW factors.

Modern / Contemporary OHW Concepts
Well, there are a two main changes I want to make with the update to Contemporary Combat from WWII - I want to portray the rapid pace / destructiveness of fighting and the impact of technology.

Rapid Pace of Modern Combat
This seems to necessitate two main changes:
1. A turn sequence that is highly interactive,
2. A combat mechanic that is quick and deadly, and allows easy incorporation of technology as needed by a scenario / theater / matchup, etc.
These are both "feel" driven and abstract, while also needing to be tech-specific at times so you can "feel" or "use" the technology. It doesn't always have to work, but it needs to be a player option so it represents a choice / coarse of action [COA] during the game.

1. Interactive Turn Sequence.
I tinkered with this in posts HERE, but that was fror Pike and Shotte, which isn't exactly a rapid-pace time of warfare. Today we'd decide and act in seconds or minutes what they would have fuddled around with for hours, pretty much.

IGO-UGO is quite manageable. It is also realistic to say that few actions happen simultaneously, and they are usually more a product of sequential or overlapping decisions and their consequences. Also, some COA are always sequential, in that the plan for one side depends on another event being effected, e.g. "We will advance on the objective when the artillery barrage concludes". So players need to be able to seqentially execute or even string together COA, both for game manageability and realism.

OTOH it is NOT realistic to say that one entire SIDE in a fight performs all of its actions followed by the other. Since decisions are allowed to be made by multiple parties in the vast majority of wargame "units" portrayed on the table. Indeed, the OHW scale would have 2-3 decision makers at least even in the ancient period, up to 1 / Unit in the WWII period. So, we need a turn sequence that allows a few actions by one side, and then a few by the other side, it seems.

NOR is it realistic to say that a side performs all Actions of the same type in a given time frame [move, shoot, close combat]. We need to allow that a Shoot Action may precede another action, e.g. a preliminary artillery barrage going in and concluding before the Blue force closes in on the objective for close shooting or even close combat.

So, I'm looking for an interactive seqence wherein each side gets to execute some Actions followed by the other side, and the Actions may be of several types: Move, Fire, Assault. However, I do not want a burdensome interactive sequence with lots of chits or phasing to remember. Much as I love and respect Fistful of Tows 3, I find its use of 8 Phases with 32 Steps to be quite cumbersome - it doesn't FEEL like fast action when you play it out! And having chits for Fire Zones, Reduced Effectiveness, Quality Checks, Suppression, Overwatch and Hold Fire is also unattractive and difficult to track.

Ergo, I will return to trying out a D6 Roll-Off mechanic. The amount by which one side wins allows that many actions, e.g. 6 v. 3 allows 3 Actions for the winner, 4-3 allows one, etc. Ties will end up with some sort of lost time and/or quick time for Actions. This neatly allows one side to initiate some Actions and then the other to react to it. Hey, if you roll well, you can get up to 5 Actions before your opponent. However, he will also be fighting back every step of the way in combat. Also, it will be easy to give a side with excellent C3 a +1 or something, so they've an advantage.

2. Quick and deadly combat mechanic.
I'd like to retain sequential combat resolution, but have each combat affect both sides simultaneously, rather than the "It's my turn and I shoot and only I inflict Hits on you" aspect of the OHW combat mechanic design. The simultaneous fight allows the turn sequence to be broken up more easily. I also want fewer Hits per Unit, so that I don't have to have 3D6 sitting on each unit. It pretty much fills the table with dice tracking Hits, not aesthetically pleasing.

The easiest way I can think to do this is to steal the DBA roll-off mechanic. If you win, you inflict a Suppressing Hit [can be rallied off], if you double the opponent you inflict a Permanent Hit- PH - [cannot be rallied off], and if you treble the opponent you inflict two PH, and if you quadruple the opponent they are auto-destroyed [poor bastards].  Units can take 3 PH and are then removed. They can also take 3 SH, but all Hits after that are PH Hits. The ratio mechanic has always been an outstanding mathematical model for DBA, it keeps both players fully engaged in the game, and it is quite simple.

EDIT
The above Turn sequence and simultaneous combat introduces a more dynamic flow of actions by permitting a player, through the combination of BOTH the dice rolls [has to lose most of the turns initial roll-offs, then win the initial roll-offs next turn] and planning [has to save the Units he wants to move last, i.e. counter-move, for the end of the turn] to get two Actions before the opponent can Act. 

In this Modern Combat adaptation, I'm using a simultaneous roll-off mechanic, so taking two shots without being able to fight back is not an issue. It does help to win initiative at the beginning of the turn as you get to set the pace of Action. Also, engaging an OPposing UNit -OPUN- in a fight usually takes away its own turn.

I've already done one playtest / development session. I need to do a cleaner playtest.
Yep, it's scenario #8, Melee. 
The Blue ATGMs on the hill have just been wiped out and Green infantry are contesting it. Blue Infantry are digging in on the other side to likewise contest, while another infantry is holding off a few units from the woods, but it doesn't look good there...

Tuesday, June 6, 2017

FOR SALE! Updated April 2025


________________________________________________________________________

1) "Tomorrow's War" $15 plus shipping. New.
Cutting-edge near future to far future sci-fi tactical rules by Ambush Alley games, published in deluxe style by Osprey.  
OOP only a $20 pdf through WargameVault. 
--> Some corners smooshed from poor packaging during shipping.