Showing posts sorted by date for query Scenario 21. Sort by relevance Show all posts

Thursday, January 4, 2018

"Up the Blue!" for modern warfare? Absolutely!

Steve over at "Sound Officer's Call" just can't stop gaming these holidays! After throwing us all out of his house he had another throw-down with micro-armor; but then again, it's something you can do with "One-Hour Wargames".

He banged out Scenario #27 "Disordered Defense" which is an asymmetric sort of scenario in that the Blue *Attacker* has only 4 Units with which to seize the crossroads at the top, while the Red *Defender* has 6 Units. However, Red starts with only 3 and then on Turn 8, halfway thru the game, he gets the other 3 Units. Thus it is 4-3 at the beginning, not much of an edge but Blue does get to set up second and go first. It is thus possible to gang up all three Blue Units on one Red, and get to 4-2 pretty quickly - with some skill and luck, of course!

I really enjoy these 4 v. 6 scenarios, as they get to the heart of the qualitative edge some armies have. I imagine the Blue team as the Germans and the Red as the Russians, for example, or the Blue being the British and the Red the Americans in AWI, or Confederates and Union, etc. A great challenge for both sides.

The start points for the 3 Red Units is as below, one on the Crossroads and two out in front, offset from the road, in Zones 1 and 2. Blue sets up second within 6" of the Southern table edge, and gets moving.


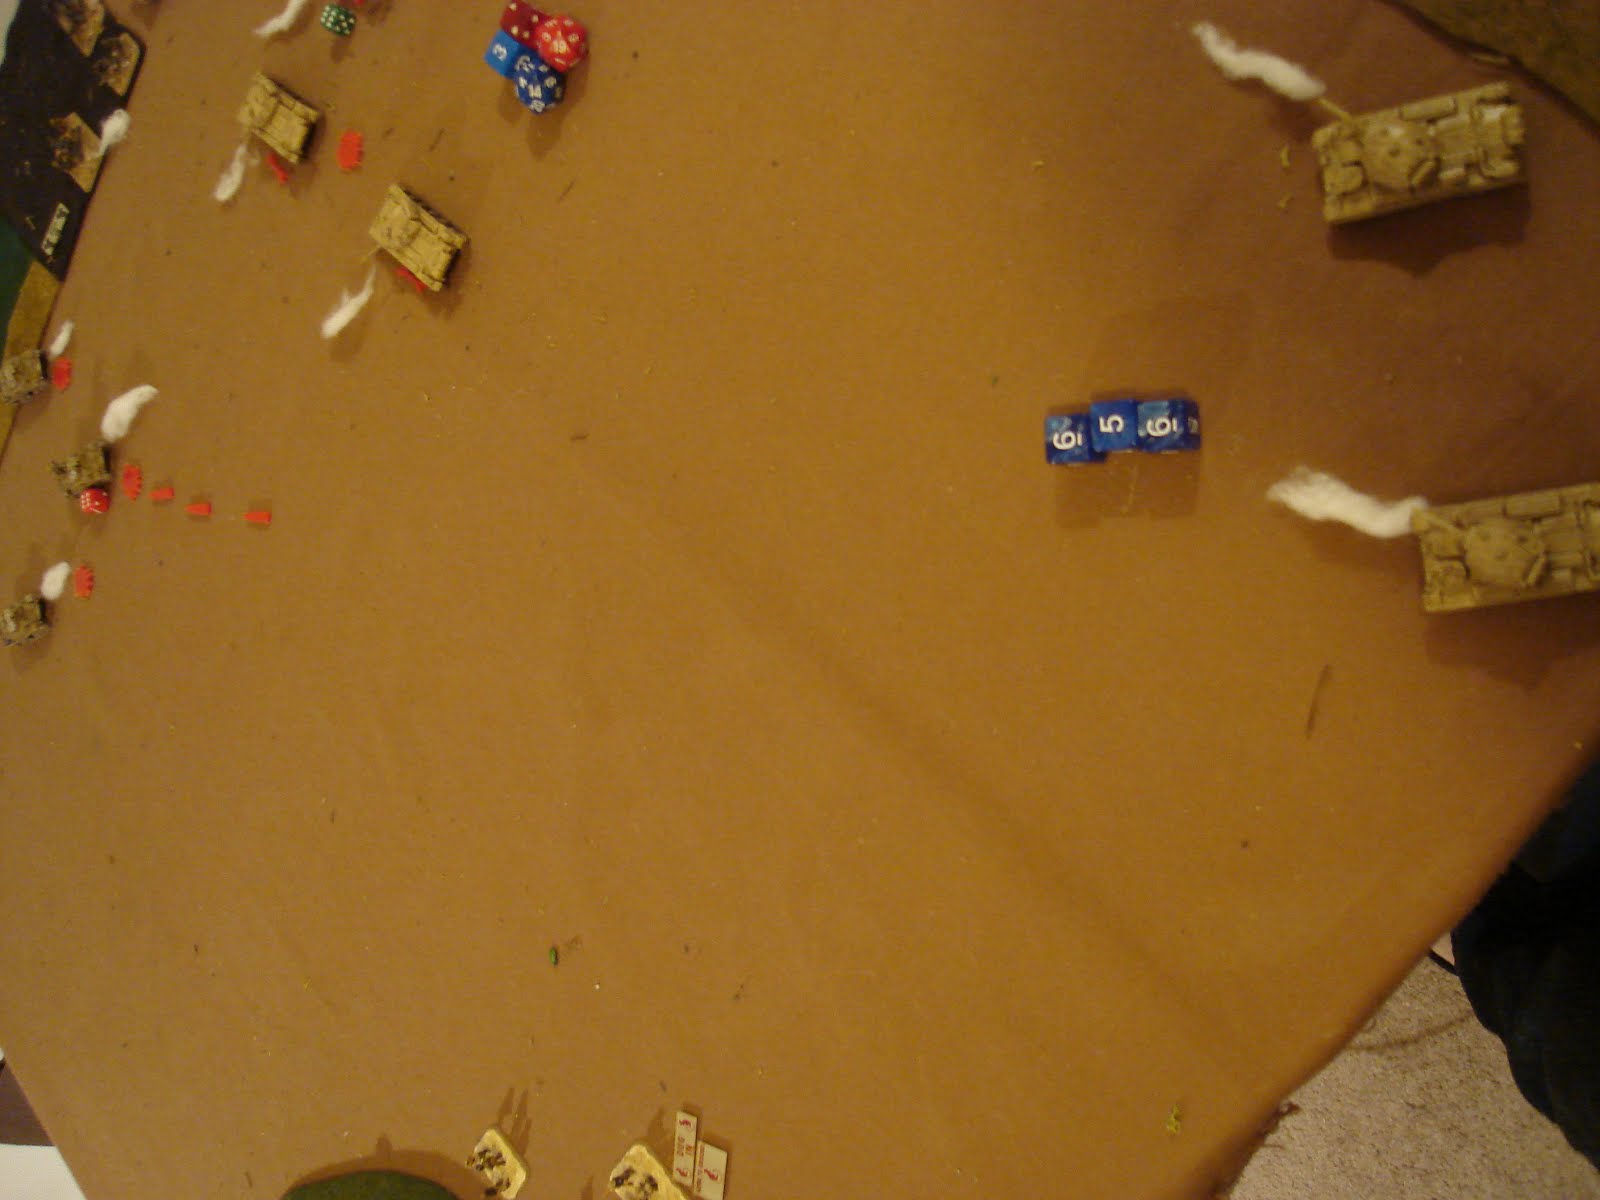
Below is the faithful setup by our Demonstration Officer, Steve. Looks like the Arabs are fielding some, uhm, tan rectangular shapes on a 3-4" base. Well, tanks anyway, I'm sure.

Turn 8, the Isrealis have beat up the Arabs holding the zone, altho one tank Unit of, well, Green Rectangular shapes, has 6 Hits including 2 Permanent Hits, so it is almost dead. Another tank unit has only two Hits. so 21 Hits on Arabs went down for 8 Hits on Isrealis. I'm guessing that the Green Arab Unit is mech infantry, and the two others tanks.


End of Game. The Arabs have headed to Damascus while the Isrealis hold the field - seems the base with 3 Hits is actually dead and awaiting the recovery crews to arrive.

OK, enough kidding around in the briefing, we will now turn it over to CPT Steve - my commentary is in A. BLUE Italics interspersed. and Steve's responses in S. Grey Italics.

"i played a game of scenario 27 and it was quick brutal and fun." The Israeli Magach MBTs (m48s) are good tanks with excellent optics and superior crews. From the OHW standards:
  • long range was extended to 24". 
  • advanced stabilization = move /shoot or shoot / move at half movement.
The egyptian T55s are a first line tank in 1967 at least:.
  • have a standard 12” range and 3+ Hit so are at a disadvantage against m48s in the open desert
  • A. thought: double range is a big advantage, and it is frustrating for a gamer to be shot at helplessly. I suggest checking the history on the effective ranges and considering allowing the same range but at 1 spot worse to Hit on the D6.
  • That being said, I’ve no problem for German 88s to outrange a 2pdr – it would just have to be a scenario consideration for the mission – sometimes gamers have to show some emotional fortitude!
  • The clash between a 4+ v. 5+ shot at long range makes for interesting gaming. Isrealis could be 12” @3+, 24” at 4+ [if they’ve a longer, flatter gun trajectory] while Egyptians could be 8”@ 3+, 16”@ 4+ and 24@ 5+ for example, depending on the quality of their gun, optics and shooting – easy!
The arab infantry have dedicated ATGM units allowing them a 3+ vehicle attack against anything within 48" [A. again, could be 3+ to 24” and 4+ to 48”, etc]
Theyre mechanized so i played it basically that they move as armor and if attacked by a "ready" unit during movement they're defending as light armor.  Stationary they defend as infantry.  [A: slick! again, great rule, would show a “dismounting to fight” doctrine and raises the great design question of “are they like ACW cavalry in that they fight mounted or dismounted?” or strictly "mounted infantry”? ]
The Israelis trashed the egyptians by the way.  4 units of magachs against a mixed bag of Egyptian armor and infantry.  Israelis ended losing a platoon with 3 still on table (one permanent on one platoon).  Egyptians left having their mortar/ada/HQs unit on table.
A: As long as you feel like both sides had a chance and the decisions created an outcome with a likely different outcome with different decisions and average dice then it’s a good game!

My immediate thoughts are that the scenario should play well into both sides strengths / weaknesses – three Arab infantry on the board at start should give the Isrealis a hard time. I’d see them losing a unit in the first couple turns while gobbling up two Arab infantry. The T55s could enter Turn 8, or two T55s plus off-board artillery could enter / be available T8.

Also, you could go with strict NT rules ranges, and say that 1” = 200m, so that the 12” range is 2400m, in which case you’ve made the table twice as big. So your micro-armor base would be about 3-400m x 200m, which seems like a good spread for a tank platoon in the open [v. artillery, etc]. Overall, sounds like the design is halfway there already!


These are very rudimentary ideas [A: and for more ideas, consider NT’s in both OHW and AMW/Nap books, see if they inspire anything] i thought id share but there is great potential for bringing these into the modern era.  Game was decided in half the time.

After this exchange via email, Steve returned with:

S: Thought about this more.  I'd also offer a suggestion to "ease in" to modern era with the 1967 war vrs the 1973 war,  that way we can playtest modern stuff before adding ATGM to the battlefield. 

A: sure – we’re still playtesting WWII stuff for that matter.

No reason to change things too much for tank guns and gunnery.  For the better guns and training I offer the following:
- L7 105mm tank gun on the Israeli tanks you could just say that israeli armored units armed w L7 gun ignore long range modifier.  So any tank unit armed w an L7 or OQF 20 lb gets to ignore the "up one" rule for long range.
- Hence long range still 24 inches for tanks.  But Israeli tanks hit on 3+ Arab tanks at 4+ at long range.
A: nice thinking. historical question [cause I know nada about this period] does the gun give improved performance at long range compared to the Arab gun? Or is it superior performance at all ranges?


S: Tough question about the gun.  Technically at close range a tank gun is a tank gun is a tank gun and performance issues are less of a question.  Both guns could range targets farther away but the Israelis and the L7 gun certainly had an edge in respect to optics, stabilization, and accuracy at long range.  The Arab strategy was to race in to close the range as swiftly as possible. That's why i like the simple ignore long range modifier of up one for tanks armed with this gun.  It's subtle and forces the Arab player to close the range quickly, but the Arab player can still engage targets at long range if he so wishes.

With units squarely divided into armor or mech companies I'd also offer the following players choice:
- After you roll up your force composition, choose an Infantry command or armor command.
Meaning a player who chooses an armored command must field at least 3 armor platoons (switch INF with armor and armor w infantry  on the force structure table).
- A player who has a mech Infantry command must field at least 3 infantry platoons .  In a sense you are switching tanks and infantry in the force structure but it would look and feel right for a modern battlefield. A: This is what I am doing for WWII, also, altho I was going to start with the switch of armor and infantry, then roll the force up.
- Mechanized infantry become 2 units when dismounted and may not rejoin their carriers.  The carriers become a light armor unit and the inf are dismounts just like the ww2 rules. A: sounds good.
- Radio net. ANY Israeli units may call for fire.  Don't need designated spotter for off board arty. A: Roger
- Arab units can call on a shed load of artillery (18-gun battalions, and lots of them.  Arab artillery was bigger caliber than Israeli in 1967, but not very responsive or accurate.  Arabs fielded ww2 Soviet 122mm and 152mm guns.  Israeli fielded 105mm guns and 25 lbers.
A: So give the Arabs a lower priority for guns to arrive, but if they show up they are “very heavy” as opposed to just “heavy”? Or just more of them? From what I understand of gunnery, the weight of the shell isn’t the only factor in how hard they hit, it has to do with how many rounds they put down, etc., right?

One possibility would be to have all Mortars go “UP” one hit number [for standard medium mortars, 75mm field guns, etc]. Then Artillery in the 100+ category would be where the Hit numbers are now, and heavy guns would get the bonus die. What do you think?

S: Arabs are soviet artillery in almost all respects.  Same guns same emphasis on pre planning and same poor response time.  In terms of advantages, yes their calibers are bigger, but they have a hard time coordinating and massing guns "on the fly" like a western army.  I like your suggestion for artillery.  My thoughts are similar:    artillery coordination roll is 4+ or even 5+ but the hit numbers are 3+ if youre lucky enough to get the big guns off table.  Personally soviet styled armies love mortars so id keep the mortar values the same.
Tank movement is d6+6 for all sides owed to better engines wide tracks. A:   possible.

Infantry have auto rifles like AK47 and FN FAL so there should be standard assault rules now.
A: I’m considering making it possible for any infantry, and certain tanks – as long as they really did it.
S: They did. 
Not dramatic changes although the Arabs had huge numerical superiority in tanks that was offset by israeli crew quality, morale, training and of course good gunnery.
A: So the game design question is do the Arabs have bigger game units, or more game units that aren’t as good?
S: More game units that arent as good.


Finally:

S: One characteristic of modern warfare that was noted by the US army observers of the 67 and 73 wars is that it is very very fast.  Units outshoot their onboard ammo quick they run out of gas quick and they sprint and run very fast.  Speeding up mech units might play havoc on the scenarios but if you want it to play out like a modern battle, gear moves fast.  Or at the end of the day yo could just chalk it up to a tank is a tank is a tank.  In which case you could say d6+4.  
A. It would be possible to change nothing, but say that turns represent a shorter amount of time. Therefore instead of speeding up some units [which would affect a lot of the scenarios] you can slow down some Units [which hopefully would affect fewer scenarios] and there has to be a point where the default "slowness" is represented by a fixed standard like leg infantry walking.  

OK, so now you can witness not only two wargame design geniuses at work, but see how one adapts an elegant, straightforward wargame from one period into another similar period. There will definitely be more of this coming, as you can see from my posts on micro-armor preparations!

Sunday, December 3, 2017

6d6 WWII v.2: One-Hour Wargames #21 "Twin Objectives"

The Limeys attempt to take not one, but TWO objectives from the Camparis!

Table layout and initial deployment above. Book scenario below.


With what I think is a faithful setup and layout, I deploy the two forces as best I can after playing this scenario a good ten times over the last couple of years. There are no less than three playtests of this recorded in this blog HERE, and it makes for nice comparison with how the rules have developed over this timeframe.

Some things can't be predicted, of course, and there are options that fall into the "it all depends" category, but this is the best I could do:
*Italians. Carri platoon on road at top left. ATGs in town-Objective, Mortars at top right are angled to fire out of the corner. At bottom, the fourth platoon of Bersaglieri are deployed on the hill-objective - which is rough terrain - at the bottom left. Deployment restricts Italians to Hill objective and top 6" of the table, the South end of the town and the road line, basically.
- Mortars could be where the Tanks are on the road. I chose to put the Tanks there in the hope that they'd have a bit more working space and be able to engage the British platoons in sequence rather than all at once [which results in a 1-2 turn wipeout].
- The ATGs have a 180 front/rear, like all Units. I put it even with the road instead of angling it to the SouthEast. This was an error as it left a weak spot to their left rear.
- The Infantry can deploy farther back into the rough ground - this means an extra turn or so for the attackers to get LoS which is 4" in the rough terrain [4" is also Close Range]. However I chose to deploy farther forward to deny the British infantry space to establish themselves in the woods, Dug-in. This makes them vulnerable to an attack by the Italian tanks if the British ignore them [they usually don't - it's so quick to wipe out tanks that when you've an advantage it always pays to do so. A lot like Cavalry Units, basically].

British. Two Motor Platoons to left facing the rough ground - their job is to take this objective with the help of the Mortars, which are to the bottom right angled out of the corner [the models are Crusader CS tanks, Close Support, with a 3" howitzer]. The three Crud platoons are in 2 up 1 back formations all facing forward on the deployment line to right. Their job is to drive straight up, destroy the Mortars, flank the ATGs and destroy them, and somewhere along the way knock out the Italian tanks. Should be no problem, right...?

I've decided that for this scenario, the Italian Mortars are the key - they can affect an attack on either objective and they put a lot of casualties on the Brit infantry as they close in on the hill. They also put a Hit here and there on Armor units, sometimes it's enough to make them vulnerable to destruction. As they are unaffected by the Target Priority rule, they have a bit of a sniper affect - I'm OK with this as I envision the commander looking over the battlefield and deciding where their fire will have the best affect given the situation. As they are a local and integrated asset, their reaction time is - and should be - pretty quick.

Turn 1. In a post-deployment  flash of inspiration, I decide to hold off on the Motor Platoon assaulting the woods and dig them in. They'll attack after the Italian Mortars are knocked out, so I fire on them with the British Mortars and they fire on the Cruds most likely to be fired upon by the ATGs and Carri. Hope is that the concentration of firepower will knock out a platoon. The ATGs fire and put a few hits in on the right-most Cruds as the target priority rules have them a priority. Carri move up to place themselves just out of 12" range, hoping the Cruds will move into it so they can get first shot off into them.


Turn 2. Initiative doesn't change [the side without it needs to win by three to take it, and the red-dice Italians don't quite do it at 3-1]. I decide to give the Carri the first shot - I'm totally focused on crushing the mortars and flanking the ATGs. The red platoon at top left only takes weak hits from the Italians but are at 4 Hits, the other platoons are right behind.


Turn 2 Closeup. The Brit Mortars have been able to pound away at the Italian Mortars well [good dice]. The Green Cruds will advance past the Red next turn to "shield / relieve" them on point. The right-most Cruds will dash at the Mortars and wipe them out!


Turn 3. Rather than be slowed by destroying the Carri platoon, I decide the Cruds must advance at top speed and keep on their original mission. Red Cruds put paint rounds in the chamber and inflict no damage. Final Cruds are under the range of the Mortars, and now immune to their shooting entirely. Overall, plan seems to be progressing well! Carri put two Hits on Red Cruds, pushing them to 6 altogether. Italian ATGs fire at the Green Cruds who've outflanked them at Close Range. As for the Carri platoon...


The Mortars pull off a 1 in 27 shot - all three Mortar rounds hit needing a 5+! Who left the hatch open? Stupido!! Carri platoon unexpectedly crippled with 3 Hits and a Permanent Hit.


Turn 4. The British keep up the pressure, knocking out the Carri platoon, but the Mortars only take one hit. The Italians knock out the Red Cruds with their Mortars, but nearly whiff in their shots on the Green Cruds - only one Hit! The ATGs took one, safely Dug-in in hard cover. The plan is progressing, but not as fast as I'd like, really. The decision point will be the ATGs v. the Green Crud platoon - whoever wins that will probably decide the battle.


Turn 5. Mortars and Cruds pound away on the stubborn Italian defenses. 


Turn 6. Italian Mortars are wiped out. But the ATGs put two Hits on the Green Cruds, who are now one Hit away from dead. They in turn inflict no Hits - doesn't look good!


Turn 7 - Hill. Both Motor Platoons advance, getting decent movement rolls. The Italians defend themselves getting a Hit during the Brit Action Phase using their Ready Action. Italians get a second Hit in their own Action Phase firing.


Turn 7 - continued. The Cruds swap out to save tanks and keep up the pressure. The desperate Italian ATGs pull a perfect roll and inflict 3 Hits so 1 is permanent! Suddenly, the relieving Cruds are looking shaky, altho they did manage to put one Hit on the ATGs.

Turn 8. Mortars get a Hit. One Motor Platoon outflanks, the other digs in. Italians miss... The full attention of two Infantry and one Mortar will be felt next turn as they put down 2 dice for the Mortars, 1 each Infantry, 4 total for a 3+ to get a Hit. Meanwhile, at the Town, the Cruds manage to wipe out the ATGs. It was a very near thing, but they manage and now set themselves to their most important task - brewing up! [sorry, forgot to take a pic!]


Turn 9. And they inflict three Hits on the Camparis while taking one themselves.

Turn 10. Italians squeek out one Hit but take two. The end's in sight...

Turn 11. The Mortars roll a hit and Campari resistence fades as they withdraw.

Whew! A close-run thing.

I made a mistake in not tilting the ATGs back so they didn't have a flank exposed. However, the 180 rule would have made their RIGHT side vulnerable instead, denying the Brits the benefit of concentrating against the Mortars / ATG flank. It would have made the Carri platoon even more critical as they would then be protecting the Right flank of the ATGs.

It was the Campari's battle, and any mistake by the Brits would almost certainly cost them the win. A few sweet dice rolls also helped. The mobility of the Tank platoons is greatly enhanced by the priority rules - The tanks can shift themselves to change which tank unit has priority, while the static defense cannot. I like this, it feels both realistic and playable. The ATGs in the town are a really tough defender - most units will be down to a single attack dice. The key is to knock out the Carri quickly. 

There is a distinct possibility that the Carri would be better replaced for a second ATG platoon - these could Dig-in and give the Cruds even more trouble. As always, force composition has a big impact on the planning and execution of any operation. These scenarios can be very challenging to players as one can't optimize one's force.

So very happy with this playtest, and with the rules in general.

Now, I have to set my mind to planning the Sidi Rizegh big battle and at least finishing my mighty force of Cruds - long overdue!

Monday, July 4, 2016

6d6 WWII Rules v.1: Scenario 21 Redux P.2

We pick up the battle with the British attack beginning to gain real momentum - but the question now is "Do they have enough time to secure the town?"  The Italian ATGs showed the excellent movement qualities of the little elefante gun, and despite poor movement dice have managed to contest the town after their infantry departed. 

As Tanks are not permitted to end their movement in a town [unless on a road, since roads cancel terrain penalties and restrictions] it is necessary for the Motor Platoons to dash over and seize the town. Hopefully, the Cruds can at least put some hurt on the ATGs and suppress the Italian 75/18s [Mortar Unit] and the Infantry then finish them off - great suspense as well as an opportunity to witness an infantry attack with victory in the balance!

Turn 9 below. The Motor Platoons finally drive off the Italians Bersaglieri. Bring Crack definitely helped keep them alive and kicking during the attack on the waiting Italians. Altho they are both permanently at 2/6 Hits, they have the strength to tackle an ATG Unit even if it is ensconced in a town - or at least I hope they do!
One Crud platoon dashed into firing position in front of town as other rallies down to 2 Hits, preparatory to further combat - losing a Tank Unit would cost the Brits dearly at this point I think. Italian ATGs move farther into the town. With two bases inside, they now get all the benefit, including being Concealed [-1 to enemy Firing D3] and halving casualties. 

Turn 10 below. Pressed for time, the damaged Crud platoon Marches over to the Italian 75/18s who inflict 3 Hits, pushing them to the brink of destruction. The Motor Platoons have moved as quickly as possible into fighting formations but I think they'll be forced to March a turn or two. The ATGs were suppessed by 2 Hits but rallied one off. Altho they could Fire at the Cruds, they secure a victory by surviving, not Crud-killing!


Turn 11 below. The Motor Platoons race to the town. The Italian ATGs rally off Hits, again prioritizing survival rather than damaging the Cruds since they are sitting on a victory unless destroyed. The Italian 75/18s can and do fire upon the closest Brit Infantry and get two Hits.

Turn 12 below. The choice for the Italian Mortars is to direct fire at the Cruds before them or respond to calls for indirect fire at the town. I hoped to knock out the Cruds quickly and support the town without fear of reprisal, but didn't get the kind of roll needed. Looking back, I probably should've risked the Cruds moving to Close Range and engaged the British infantry. As the British form up for the town assault, Tanks and Mortars pound the ATGs with some effect.
In developing the attack, I chose to keep the first platoon out of Close Range, limiting its firepower but keeping it alive. I was quite concerned that if I lost one Infantry Unit I would've have enough to take the town without rolling well - and luck's not always with me!

Turn 13 below. The British keep plinking away but not massing enough firepower to get the Hits needed to eliminate the ATGs. One problem is that the Mortars rolled quite poorly. While the ATGs might be able to knock out a Crud platoon, they are not ideal for fighting infantry, so I keep rallying with them instead going for survival.

Turn 14 below. The Fire of four Units finally scores enough Hits to get the ATGs to 5! Everything depends on their rally roll - they've a 1/3 chance to rally off three Hits which could keep them alive that last turn. However, they only roll a '1'!  With 4 Hits, and 4 British Units firing, defeat seems certain for the Italians! The 75/18s batter the Crud platoon.

Turn 15 below. Finally, at 4 Hits and with a great roll by the Mortars, the Brits get 4 more Hits destroying the Italian ATGs. It was close, but some average rolls at the end and especially the one Infantry at Close Range overwhelmed the Italian gunners who flee into the salt marsh outside of town. The cameraman was so excited by the action that he couldn't keep still...

Game end, Turn 15 concludes. The Italians couldn't knock out the Cruds on the left nor hold the town, altho they nearly made it. A hard-fought game that was very close.


While a bit more complicated than previously, these rules provide the balance of mechanical chrome and nuance I want, while remaining easy to play as the decisions are clear. Do you support an attack with the Mortars or suppress a Unit supporting the defense? Do you maneuver to a better position or shoot where you are instead? Do you Rally, Dig-in or Fire? Do you move to support an attack or fire to suppress the enemy instead. Presenting players with clear choices and letting them exercise command instead of constantly looking up rules or having them explained to them is very important to me. I want relatively new players to be able to participate quickly and simple mechanics that encourage historical play and realities are much more fun than pouring over a rulebook.

I am happy with how these turned out. I'd say they are more complicated than OHW but certainly no more than AMW or the WWII rules in Introduction to Wargaming. Steve really likes those intro rules and I think they are solid, but I want a higher level of game and to be able to throw some actions with several companies or more a side while providing enough nuance to keep players interested.

The main issue now is what chrome bits - if any - should be saved for Advanced or Optional rules? It is also time to post these rules, so you will see them up very soon!

Wednesday, June 29, 2016

6d6 WWII Rules v.1: Scenario 21 Redux, P.1

 The Inglese are advancing upon the town in force Signore - the situation is critical!

Blimey, they've brewed our tea for sure, now!

So, with much in the combat table changed and more addition / subtraction modifiers in place, along with a net "halving" of Hits for units that are Dug-in or in Towns, and many little fine-tunings for measuring Range, etc, I set out with some excitement to see how this played out on table. My goal is still a set of fast-playing rules that deliver enough tactical decisions and historical feel for an enjoyable game, without bogging the players down in decisions that they can't / shouldn't make at the company / battalion command level - which round to shoot at a tank, does Pvt. Snuffy have a hole in his shoe, etc.

I returned to Scenario #21 in Neil Thomas' "One-Hour Wargames" because it is already set up and also because this is meant to be more of a test of the rules rather than a test of how well I play either side, or the forces involved.  That being said, after seven or more plays or partial plays of the scenario, I decided to rate both British Infantry Units Crack and the Italian Mortars as Crack and use an Advanced rule [unpublished] called "Field Gun" that allows light artillery to fire direct or indirect, and at -1 instead of -2 v. Armor [note this is still very different from an ATG which fires at +2 v. Tanks - my justification is both the gun platform itself, rate of fire, and availability of enough AT rounds to make a difference]. 

At the end of the AAR, I'll post the new rules in all their glory!

I found the Italian tanks too weak on the defense here, without a hill behind which they could be hull down.  They died in the first two turns no matter where I put them and even if the ATGs were closer to the British armor. Ergo, I substituted the dual-purpose Italian field gun, the 75/18 which was a very common gun. The ATGs are of course the 47mm elefante portable mountain gun so common in Italian service.

Per last post, the Red defender sets up one Unit on the wooded hill and three within 6" of the North edge of the board.  The Blue attacker sets up in the bottom right two squares, 1' square each, for a 2x1' setup area.  Blue has six Units to four Red Units and must take both the wooded hill at bottom left and town at top center.  Terrain is the road leading to the town, the north edge of which is a marsh [impassible]. 

With much experience for both sides at this point, I set up the Italians with an Infantry on each objective, within it so as not to be in LoS until a Unit was within 4" with two bases to two bases. The ATGs and Mortars are to the West of the town - it has been a tough decision as to put one Unit to the East or not. Putting them both to the West leaves a bit of a dead zone for the ATGs East of the Town altho the Mortars may still fire into that.
The Fire Arc is 180 off the forward, unique base of the three. You can see that the staff base is angled so that the Front arc covers nearly the entire town and all the dead zone past it. By contrast, the ATGs are nestled against the town. An alternative would be to put the one of them in the Northeast corner, but I like the mutual support the gun line presently has.
For the British, I set up two Infantry Units to attack the wooded hill immediately - vehicles are not permitted into it per scenario rules. The CS Crusaders are in the Southeast corner to provide Mortar fire, while the three Crud platoons are in a reverse wedge 2-up/1-back formation at the deployment edge. The plan is to crush the Italians in the woods and send the infantry against the town, while the Tank units damage or destroy the Infantry and ATGs protecting the town. The Mortars will support either as needed. 

Turn 1 below. The British armor advances! Shouting "Tally-ho" and swiwing riding crops and cricket bats, the armored might of the Empire advances against the foe. After some debate, I decided to use the "Ready" status of both gun Units to fire against the Brits in their turn, as well in the Italian turn. Lousy rolling resulted in two Hits on the closest platoon. At two Hits Units are -1 to Hit rolls, at 4 Hits -2, so the Tank platoon is partially suppressed. The Mortars couldn't see the lurking Italians, who responded to the British advance by pushing forward the Infantry in the town. This makes them visible, but also able to support the ATGs.
Turn 1 on the hill. Crack British infantry advance into Close Range. Italians botch fire rolls. The top Unit is out of LoS, while the bottom is both in and at Close Range. The attack ratio isn't that great to take a fixed position: 3-1 with occasional artillery support is barely enough.

Turn 2 below. British dash a crud Unit into a flanking position - note that the Italian Infantry in the town are going to be flanked one way or the other as long as they are up with fire support for the ATGs. Tough decision, but I've found it to be worth it generally. They inflict three Hits upon the Marching Cruds. Other Cruds move into firing positions on the town, but stay out of 12" from the ATGs who still pose a threat with their +2 v. Tanks at every Range. They rolled well and put several Hits on the bottom Cruds forcing them to Rally [the black spoked wheel marker indicates a rally and the roll]. Positioning has gone well so far.
Turn 2 on the Hill. Ineffective fire exchanged, but top Infantry gets two Hits. Should the Brits Dig-in instead of Firing? Probably for the best over the long haul.

Turn 3 below. Cruds pressure the town, getting pressured back and flanking Cruds forced to Rally. Note I forgot to pick up the dust marker from the Italian movement! Unpaved town?
Turn 3 at the Hill. Firepower pressuring everyone, North infantry Dig-in. South Infantry do not and have the Hits to prove it! With 4 Hits they cannot now rally below 2 Hits, so red die.

Turn 4 below. Plenty of shooting, some red dice indicate damage but nothing decisive yet. Italians in town pushed to 4 Hits and rally 2 off.
Turn 4 at hill. Brits dig in but Fire from North Unit forces Italians to 4 Hits and a Rally attempt - bad roll results in only 1 Hit being removed. Could this be the end?

Turn 5 below. Italians pushed hard, ATGs suppressed with town Infantry, but flanking Cruds are destroyed by excellent rolls from Infantry and supporting Mortars [I think they both rolled a '6' or so]. They inflict 5 Hits taking the Cruds to 7 and destroyed. Attack in trouble!
Turn 5 on hill. Fighting lulls as Rallying is done. Italians survive, which is a win for them. British frustrated but the Mortars were used against the ATGs this turn to help the Tanks.

Turn 6 below. Cruds move into Flanking position again, supported by fire from other surviving Cruds. Italian infantry forced to Rally, roll great and go from 5 Hits to 2! ATGs roll a '5' and get rid of all 3 Hits! This is the penalty for failing to bring consistent overwhelming firepower to bear on the defenders, and it cost the Brits a Crud Unit as well as a delay.
 Turn 6 at hill. British Fire forces Italian Rally, but their Mortars inflict a Hit.

Turn 7 below. British Fire and poor Rally leave the town Infantry at 4 Hits. Critical moment! Supporting Cruds unfortunately also at 4 Hits. Quite a pickle since one Crud platoon cannot handle the two gun Units - and they must be destroyed to allow the British Infantry to cross the open space from the Hill to the Town. Poor rolling leaves hill situation identical to above!

Turn 8 below. Tally-ho! Italian Infantry on the go! British switch to captured Panzer Lehr dice and roll well enough to see off the Italians in the town.
Italians respond by dropping Mortar fire on the Cruds, rolling a '6' and inflicting 3 Hits. They also shift the ATGs into the town [I hadn't thought of that before...]. As the Tank Units can't end their move in the town without a road, they will have to use firepower and position to stop this. But the Italians roll a '3' for 4" move -2" b/c of Dug-in, and don't move far.
Turn 8 at the hill. Indecisive. A concentrated effort is required, but the demands of the Cruds attacking the town distract the Mortars and some Rallying weakens the Firepower.

So far, very pleased with how things are playing out. I've surprised myself a couple of times during the game with inspiration for one side or the other, but the quality of leadership is pretty consistent for both and not a factor for the playtest. All the play so far has both good 'feel' and historical precedent, so I've no complaints. A couple of typos and little corrections to the rules, but nothing major.

Had plenty of clear decisions that had to be made, and sometimes I chose well and others not as well, but at all times the choice was clear and the dice have favored both sides at one time or other. My opinion is that a balanced scenario played well by both sides will usually come down to a victory for the player whose good play gives them that little edge with some good luck and a narrow win. Anything else _should_ be a draw, right?

What will happen in the next 7 turns?  Tune in and find out!