The trick is to stay alive for the whole operation...

For the follow-on Mission, I drew "Uplink" which is a pretty complex mission requiring players to secure both objectives C or A in order to use B or D [respectively] to uplink data for 3VPs a pop. It's not easy to fulfill all the requirements under fire. The spread-out setup positions are also interesting.


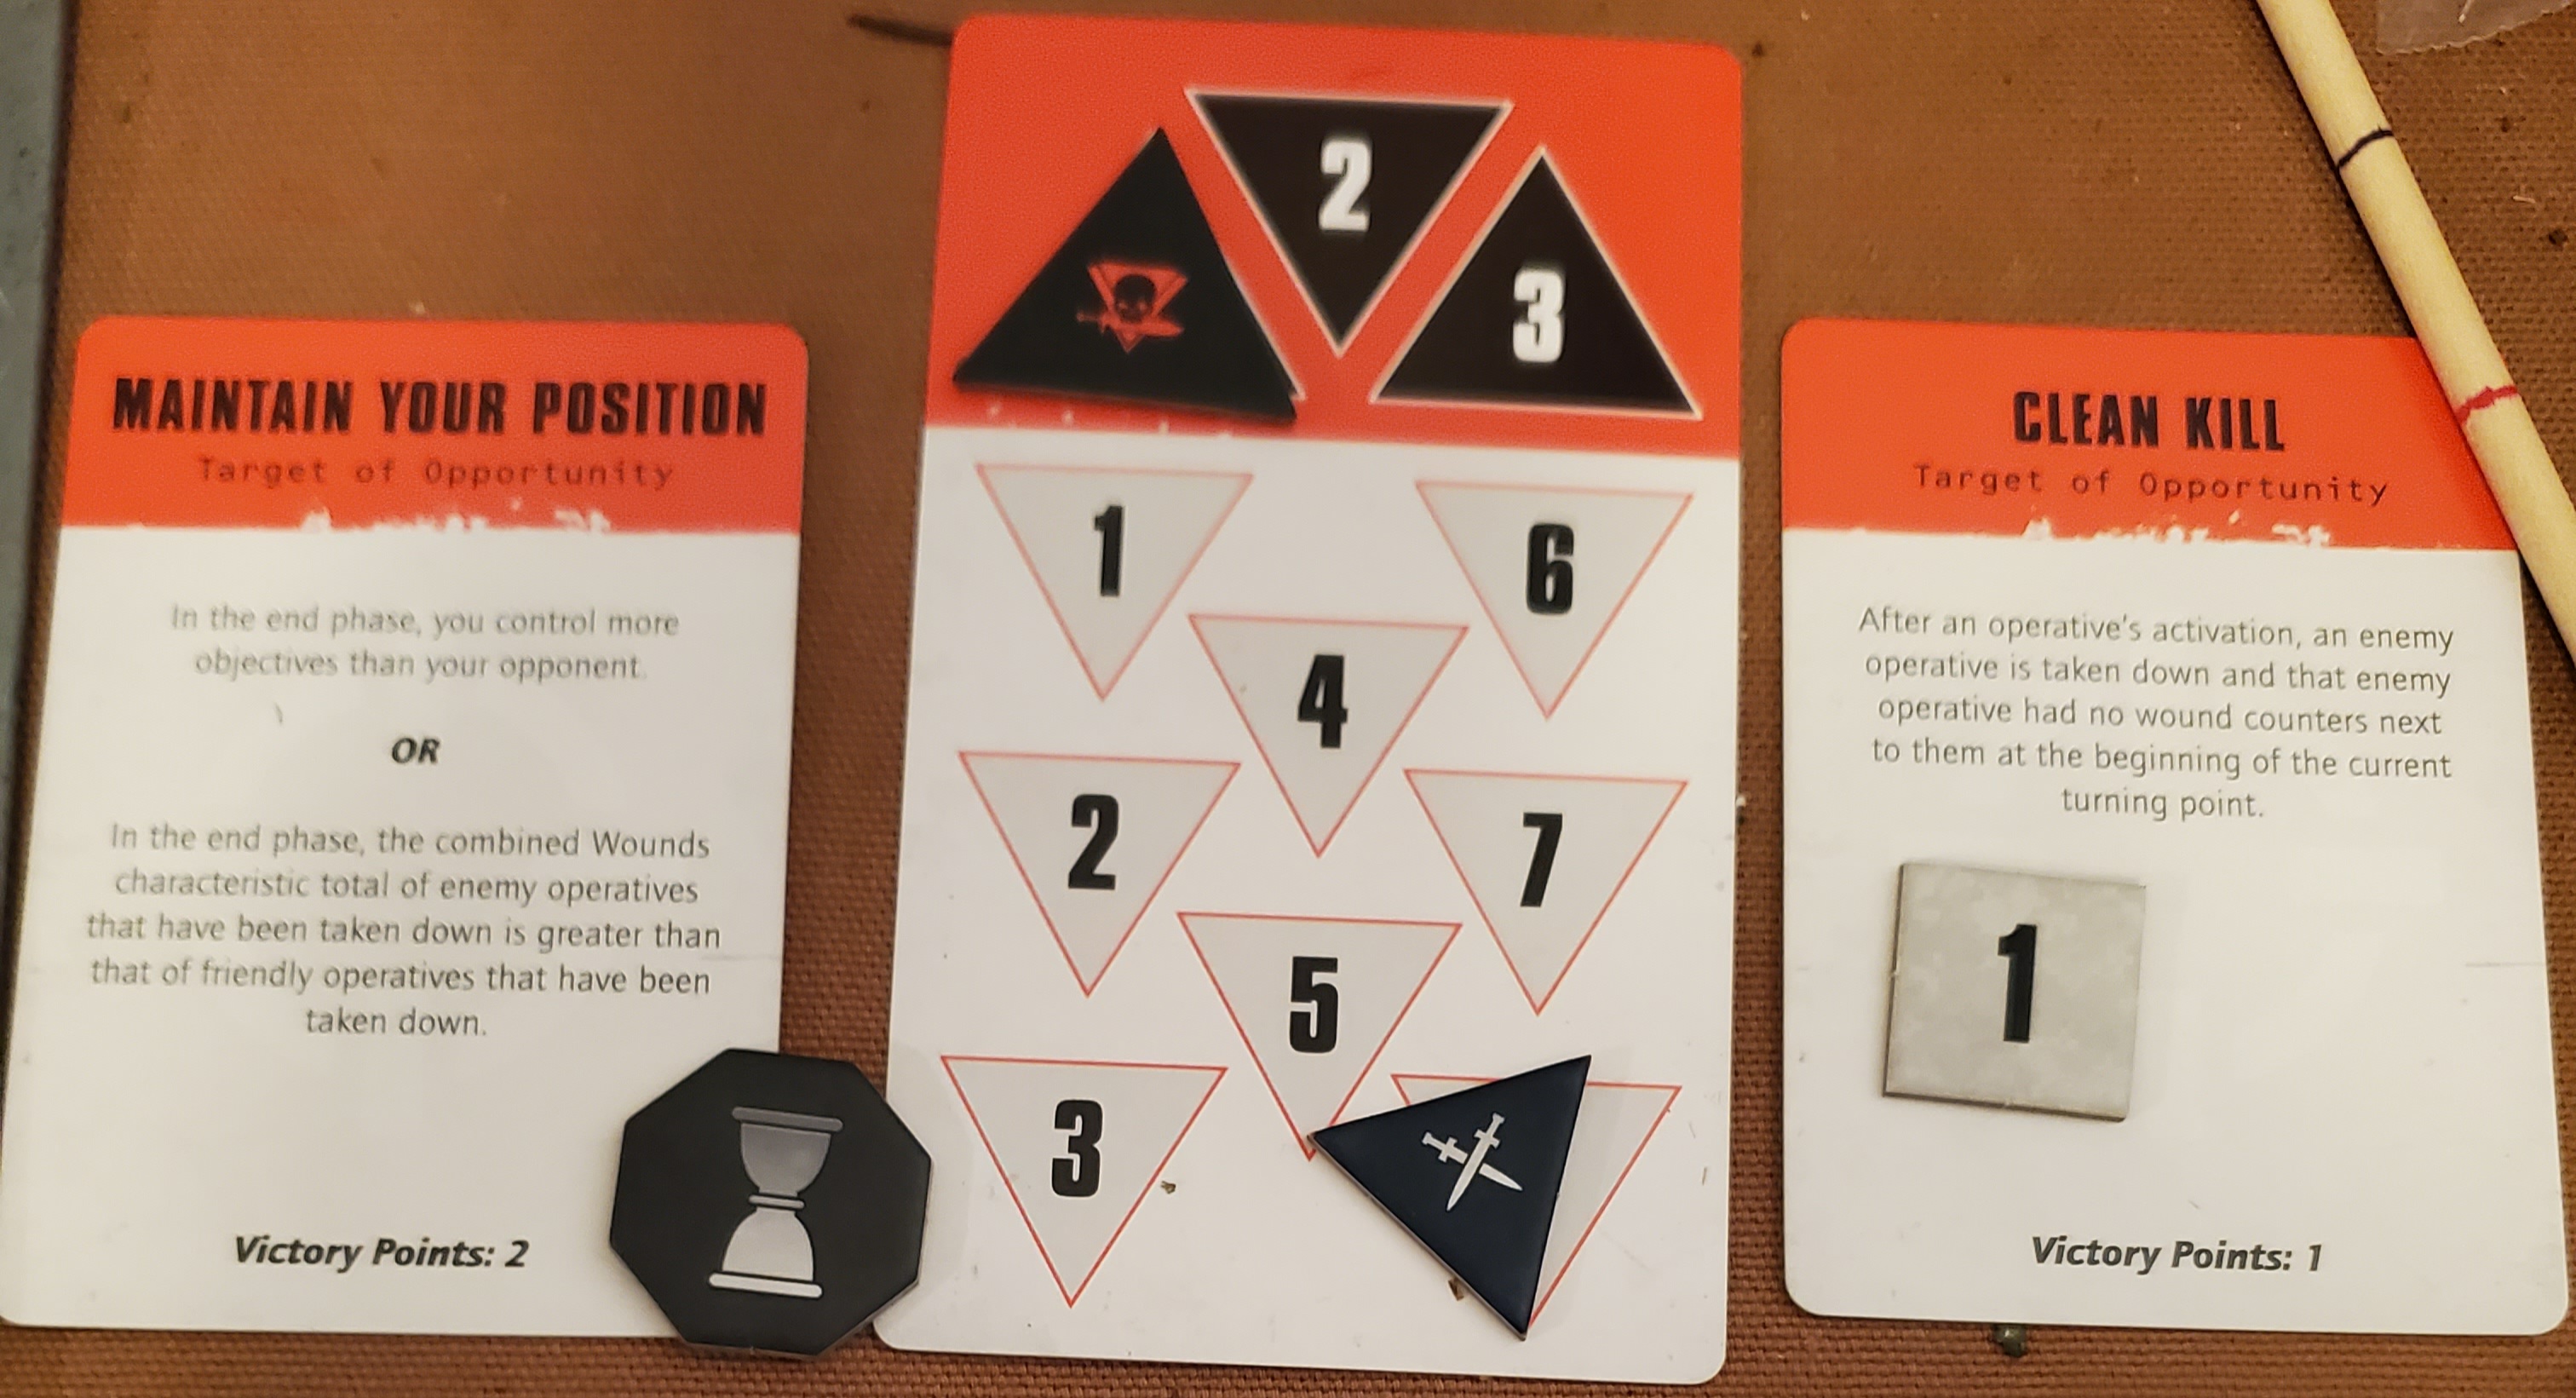
SM have Initiative, and play "Maintain Your Position" while Necrons put down "Clean Kill" which is obvious, since NO SM models have any Wounds at this point, anyway...duh.

For Strategic Ploys in the first Turning Point, SM use "My Faith is My Shield" to give SGT Gideon +1 Defense die. Necrons go with "Advanced Combat Protocols Upload" on a warrior with Gauss Reapper, which will give him two Attacks at Range 5 and 5 dice each. They screen him for the right moment to unleash him later in the turn.

First move, SM boldly advance SGT Gideon into Cover - he now gets a guaranteed Save, plus 3 Defense Dice.

 The Necrons next unleash the Warrior with Advanced Combat Protocols and shoot Red twice - he dies after being finished off by munching Scarabs!

SM Yellow then puts the hurt on a Scarab Swarm, but it only ends up with 11 Hits, and it now has 12 [instead of 10]!
 Green SM has occupied key Cover in mid-board area.

But after a couple of Turns, the Necrons shoot and bite him down, thanks to some hot dice and bad rolls by Gideon! This has not started off well...previously this ploy worked great, with some SMs lasting the whole game!
Next, Red SM advances, and puts some hurt on a Scarab Swarm. The Necrons were able to just kill him, however, so he used the Restoratives card to go down to 6 Wounds!


Play progresses down the board a bit. The Necrons engage SM Grey with devastating fire, but he rolls amazing Saves! Note that the Scarabs have deprived him of key Cover near an objective - pesky little blighters...

As Turning Point 1 ends, the board is looking bad for the SM. They lost two SM to carefully planned fire followed up by Scarab Swarm assaults, are only holding one key piece of Cover, and haven't taken any objectives having been forced to use their Action Points to shoot at Necrons.
 Meanwhile, the Necrons are advancing on objectives at the south end of the board!


Necrons winning 1-0 as they got a Clean Kill.

As the fighting continues through Turning Point 2, the Necrons manage to carefully unveil fire while slowly advancing at the North end. They kill Green SM along the way!
 Turning Point 2 ends with the SM gaining 1 VP for Spread Out and the Necrons a second for "Take the High Ground".

Turning Point 3 is looking grim, with one SM contesting each objective, and unable to support each other.
 But the SM win Initiative again, and have a chance to dent the Necron Warriors a bit. But they only have a few Attacks...

On their first Turn, Yellow SM attacks the Scarab Swarm twice, rolls badly and achieves nothing. Scarabs attack back, get a buncha Hits, and despite two saves the SM goes down!

At the south end, Grey SM takes out the Scarabs but concentrated fire brings him down.

Turning Point 3 ends with an 8-2 Necron win, as they get "Total Annihilation" for 4VP and took two objectives.

Well, that was a brutal massacre! I've actually played this scenario two times previously, and they were both very close but I made some errors with VPs and cards. This time, I thought I had the perfect strategy for the SM and instead they got their teeth kicked in. I've also learned how to maximise every shot by the Necrons, and use the Scarab Swarms better as obstacles and to deprive the SM of Cover.


Very much enjoying the game, so was motivated to clean and assemble Assault Intercessor Team Gideon, and boy are they large models! Bulkier and 4-5 mm taller or so. They are in dynamic poses, not standing straight up, but definitely large.

The SM is a standard-sized guy from "Labyrinth of the Necrons [like the Green, Red, Yellow and Grey SM]. The Necron is from 3rd edition, and is true 28mm with a 25mm base.
"Here we come Undead Pariah's of the Galaxy!"

With the SM defeat, the Necrons are now up to advance to a Special Operation, so stay tuned!
No comments:
Post a Comment
Thanks for your comment! t will be posted after it's moderated.