Wednesday, December 27, 2017

6d6 WWII v.2: Big Battle Totensonntag Game!

OK, so this wasn't the best-planned report, ever. The main problem being that I completely forgot to take any pics at all, which often happens when I run a game - just too focused on it.

In any event, will try for a post here that shows some of the challenges of running a big game and is related to the last post. Thanks to Steve over at Sound Officer's Call for his pics and write-up, which really helped during a busy pre-Christmas season!

Managed to show up just a few minutes after a few of the other guys who were bringing figs. We got into our greetings right away - it was great to see the guys after such a long time! Some of them have been busy with good tasks - work, caring for elderly parents, doing charity work as a storm trooper [pew-pew-pew!] or with the fire department - and it's a reminder that we are always getting away from something to exercise our minds and our little lead men when we show up to game!

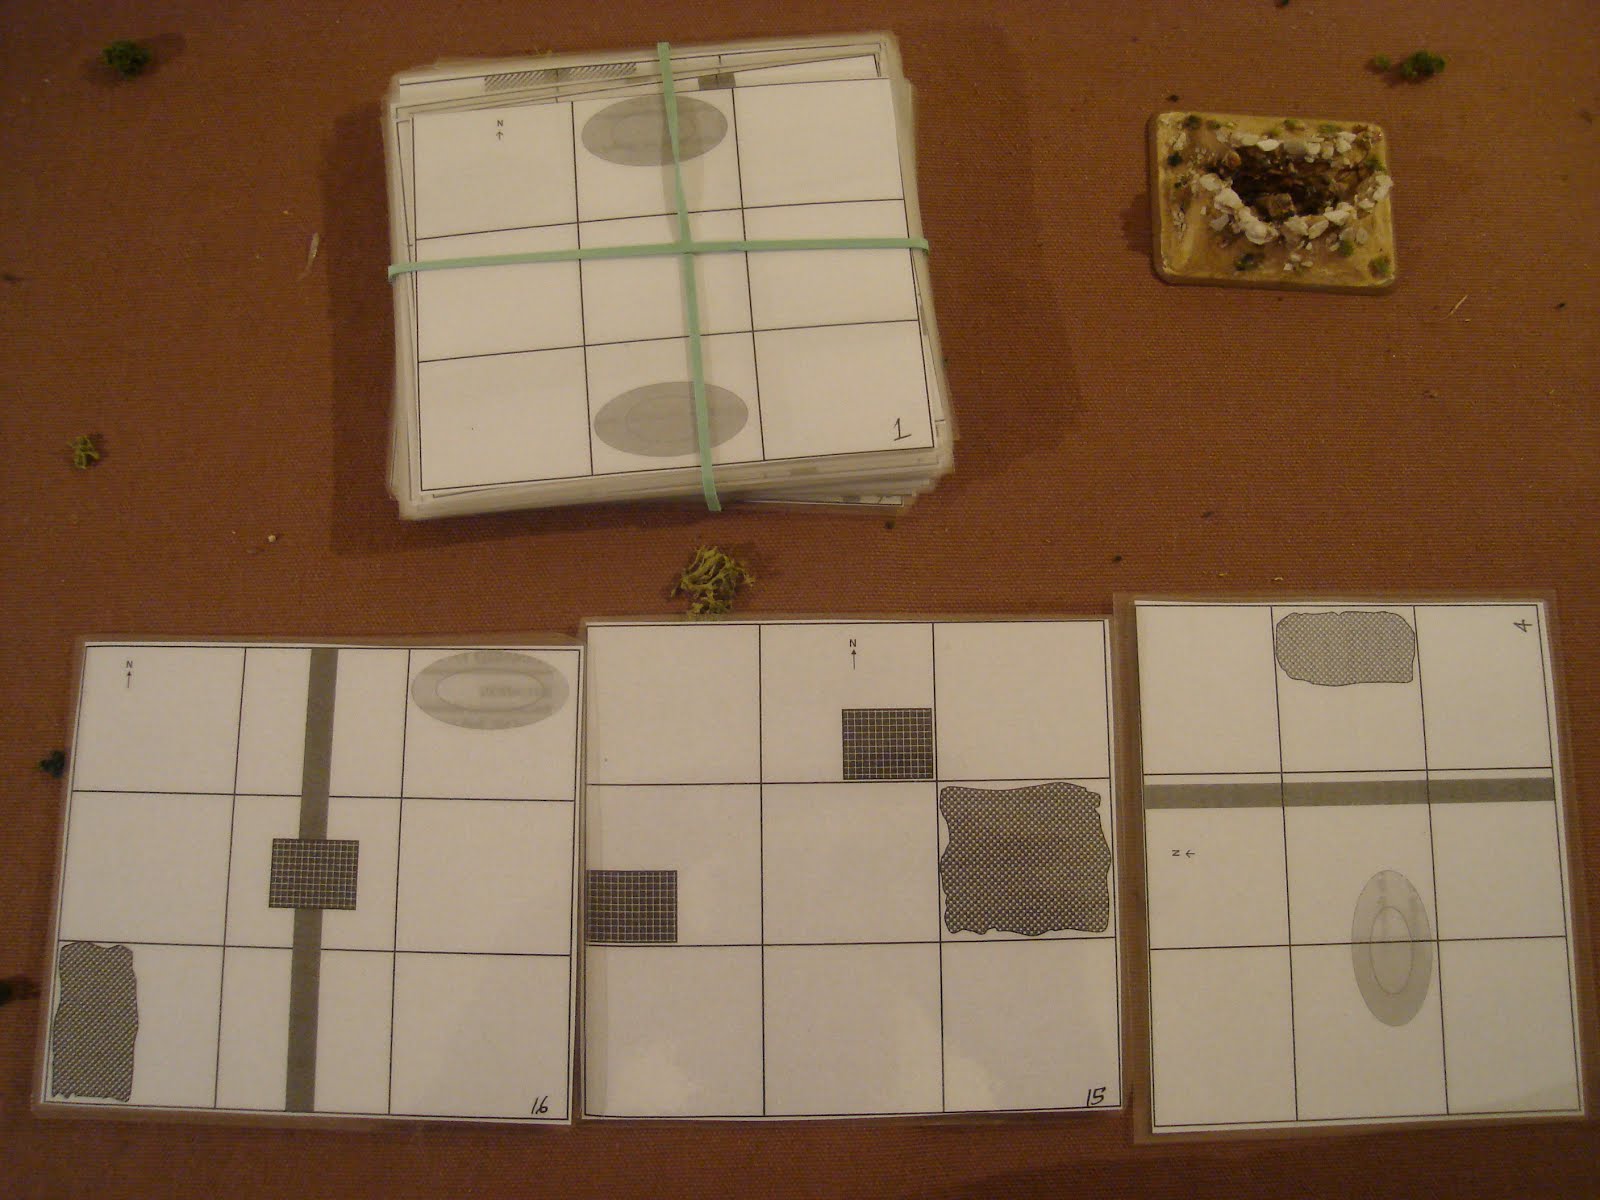
We then hit the task of organizing forces and setting up the table, which went quite quickly. In not too long, this:


became this:

The table is pretty amazing...it's just wood [you can see the wood grain, but it looks a bit like wind-swept stand] but the paint and texture looks astonishingly desert-like. Each end of the game was trimmed 6" as it is an 8x4 table, not a 3x9' table. The extra foot in depth wasn't necessarily a major problem, but it does change how quick units get into the game. I kept the center scenario the correct width of 3' as I didn't think it would make much difference on the two flank scenarios. 

According to 1HW, this meant that the Scen #4 attacker started 6" closer, while the reinforcements for the defender were 6" farther away. This distorts the arrival times by not quite a turn. The Scen #16 didn't matter as it was a meeting engagement and both had a bit farther to go. should've used the extra foot of space as set-up space, and then marked the table edge at 3 feet deep so Units entered exactly as per the scenarios used. I then should've taken the full foot off Scenario #16 as it didn't really matter - they didn't need the width. So the scenario spaces would've been 3x3, 3x3, and 2x3.

Lesson 1: be careful with table dimensions that may distort important aspects of the scenario like the turn attacks or reinforcements get going.

The Reading of the Rules. I toyed with the idea of a QRS. However, the rules are only 3 pages anyway, and it didn't seem worth the effort. It took about 20 minutes or so, and of course wasn't 100% absorbed. However, I did note as the game progressed that players did in fact seem to remember parts of what was said and were able to find their way around with the rules themselves, or even help each other. Below, me as "talking [shiny] head".

Above, Scenario #16 up close, with #15 then #4 in the distance. Brits left, Germans right.

I placed Steve and Dave against people who'd never played so their previous experience with the rules would help, and on opposing sides. Scenario #4 had neither player with any experience with these rules, so I figured I'd be needed there most, but they actually did quite well for themselves. 

One problem was that I had left some of my reminders in the scenario special rules, but they didn't apply for this game. This confused some of the players even though the correct special rules were repeated for thier specific Units below.

Lesson 2: make a very clean copy of the scenario special rules, and do it well in advance!

Scenario #16: Advance Guard. This ended up as 4 crud platoons, 1 Mortar Platoon [25pdrs], 1 Crud CS [Close Support]. But I'm uncertain that the CS tanks were differentiated in all the hubbub. 
Lesson 3: Double-check that your friends set up the forces correctly and the players know what they have.

This was played twice, once by Brian and Butch, and once by me and Butch. The first game was won by the British. The Italian advance got onto the hill but in the ensuing firepower contest the British won.

Game #1, Brit view. British spread out 4 Crud platoons, with AC's on the road and 25pdrs to rear. Italian ACs are on the hill [they were shot off it]. 


Game #1, Italian view.Two Carri platoons to left backed by Infantry, Mortars and ATGs. One problem was that the Italians didn't dig in soon enough, I think. It makes them a tough nut to crack for the Brits who are penalized for lack of HE rounds on the tanks.


The second game, I played the British and confidently dashed up the hill, getting my armored cars on it to spot the enemy and follow up by deploying my entire force off the road a turn ahead of the Italians. I then fought them as they stood, concentrating firepower at every opportunity. Towards the end - I had two Crud platoons left and held the hill, game over! But, I decided to go for 100%. I advanced to wipe out the last Italian Unit, their 75/27 Howitzers, Mortars. In the end, it came down to just a couple of die rolls but I managed to lose my final Crud! So 1-1 on this end, and the scenario seems quite balanced. Lots of opportunities to try different tactics here, definitely deserves some more play in the future.

On the British left, the remains of 7th Armoured Brigade dashed forward in Scenario #4: Take the High Ground. Below, a nice shot of the 4 Honey platoons advancing and facing off against the German reinforcements and their objective. Steve does a nice recap of their play, which included no less than THREE games! I wasn't able to follow it all closely, but they seemed to have done pretty well with figuring out the rules and having fun.


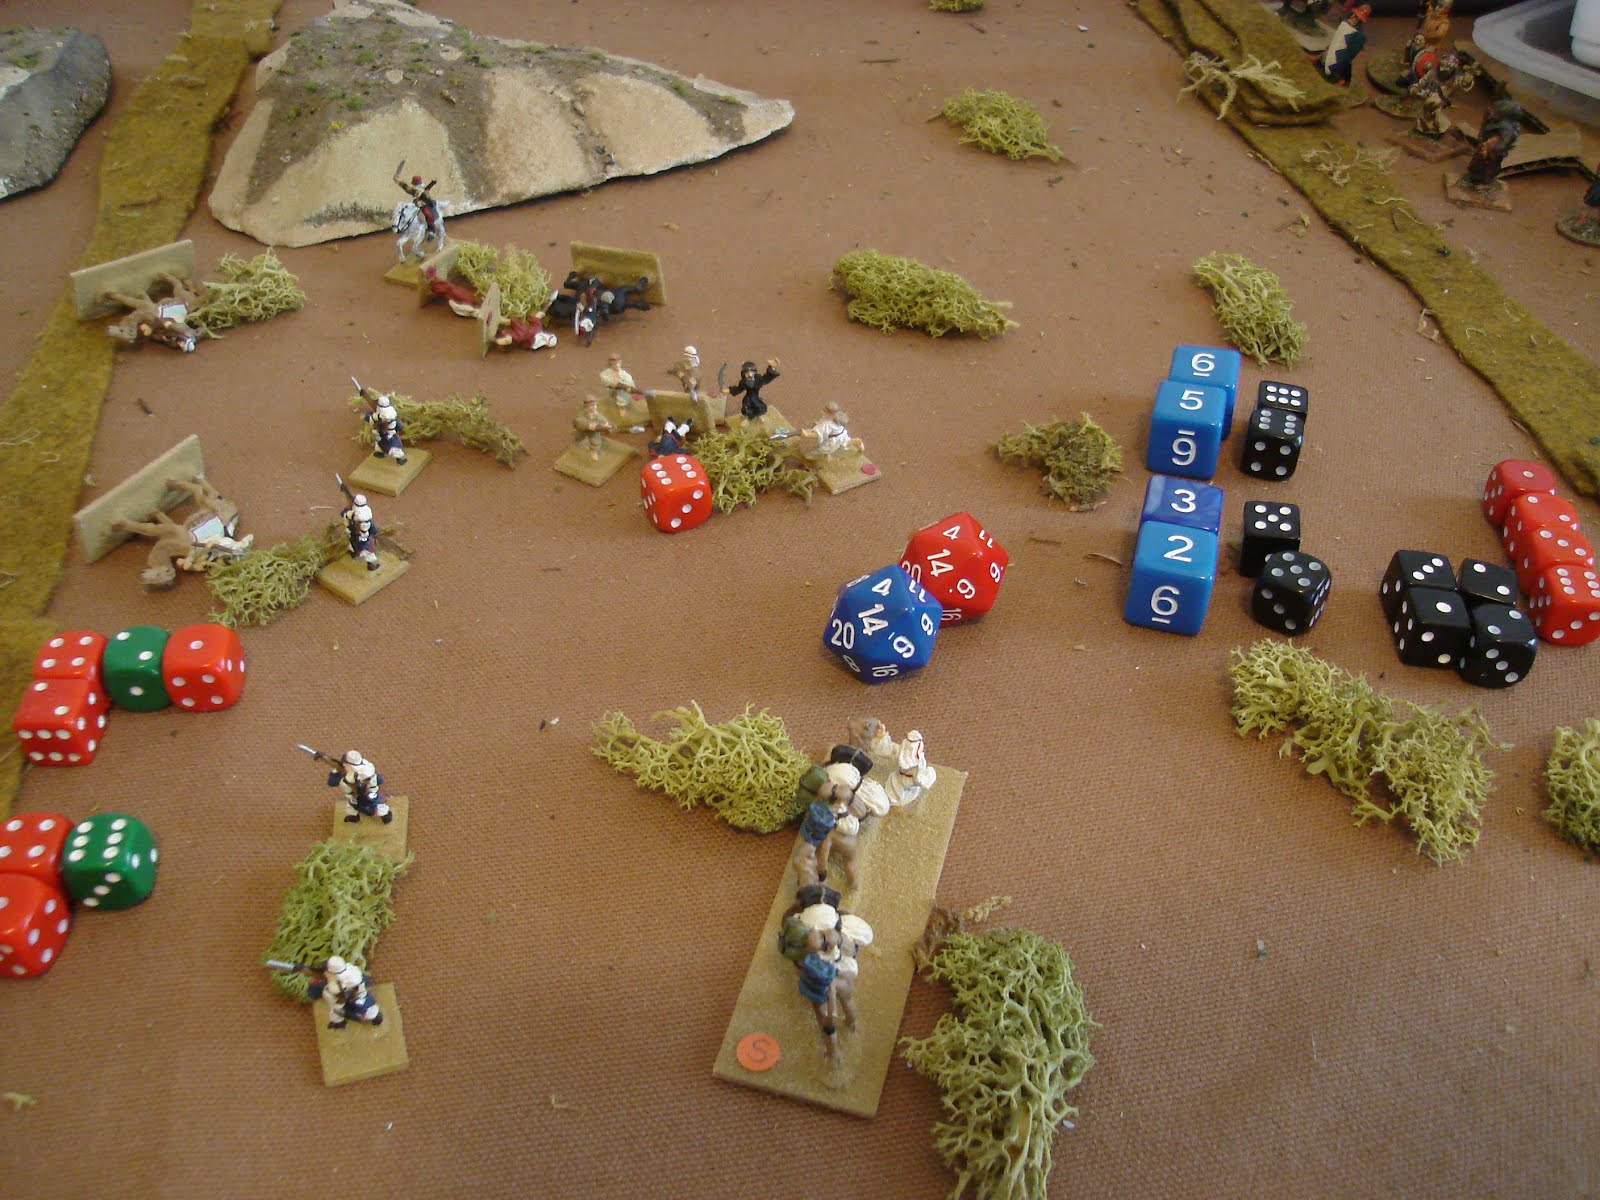
The center was Scenario #15: Fortified Defense, a really great scenario that I will definitely play again and again. It is definitely a game that goes to the 15-turn limit, as the attacker gets to "refit" his force by removing what's left of it at any time and then re-entering the entire force in new shape! In effect, a complete second wave. The Defender has two solid "fortifications" which are Towns in terms of game mechanics. 

I misunderstood the "Additional Weaponry" special rule, which gave both towns some extra fighting ability. In the scenario it says they get a d6 of shooting and - in the early periods of rules [Pike and Shot and earlier] - melee as well. I interpreted this to mean two full Units, which became 25pdrs backing the "garrisons" of an Infantry Unit each. HOWEVER, this also gave the 25pdrs 7 Hits that had to be shot away before they were removed while the scenario rule says that the additional weaponry are destroyed once the garrison Units are eliminated. Below, Infantry Unit garrison backed by second Mortar Unit - 25pdrs.

So in effect the "additional weaponry" adds a d6 of shooting to a unit in the WWII rules, but is destroyed with the garrison Unit, and the entire force has only the 15 Hits of one Unit in the original rules [but I gave it 30, in effect]. So for WWII it functions as a sort of "double dice shooting ability" but no extra hits and no extra range. 

Obviously, the 25pdrs made the defense a bit tougher as it was a 12-8 battle, in stead of a 12-6 battle [albeit two defenders have double-dice in shooting]. This was a bit balanced by the fact that the "towns" were not full fortifications. I played them as "encampments" that gave Dug-in to any unit within them, which is allowed in my version of the rules, anyway - it just takes one turn.

Lesson 4: Make sure you read the scenario rules carefully - preferably, play it out a couple times ahead of the main day!

Below, the result of the extra firepower: attacking Germans taking lots of Hits from the defense. It should be noted that my version gives ATGs and Tanks a Long Range of 24".

This was compounded by the deployment of the Germans, which was very spread out, so it was harder to concentrate firepower. And this was compounded by the South Africans rolling a bunch of crazy rolls, including needing all 6's to hit and getting 3 in one roll!

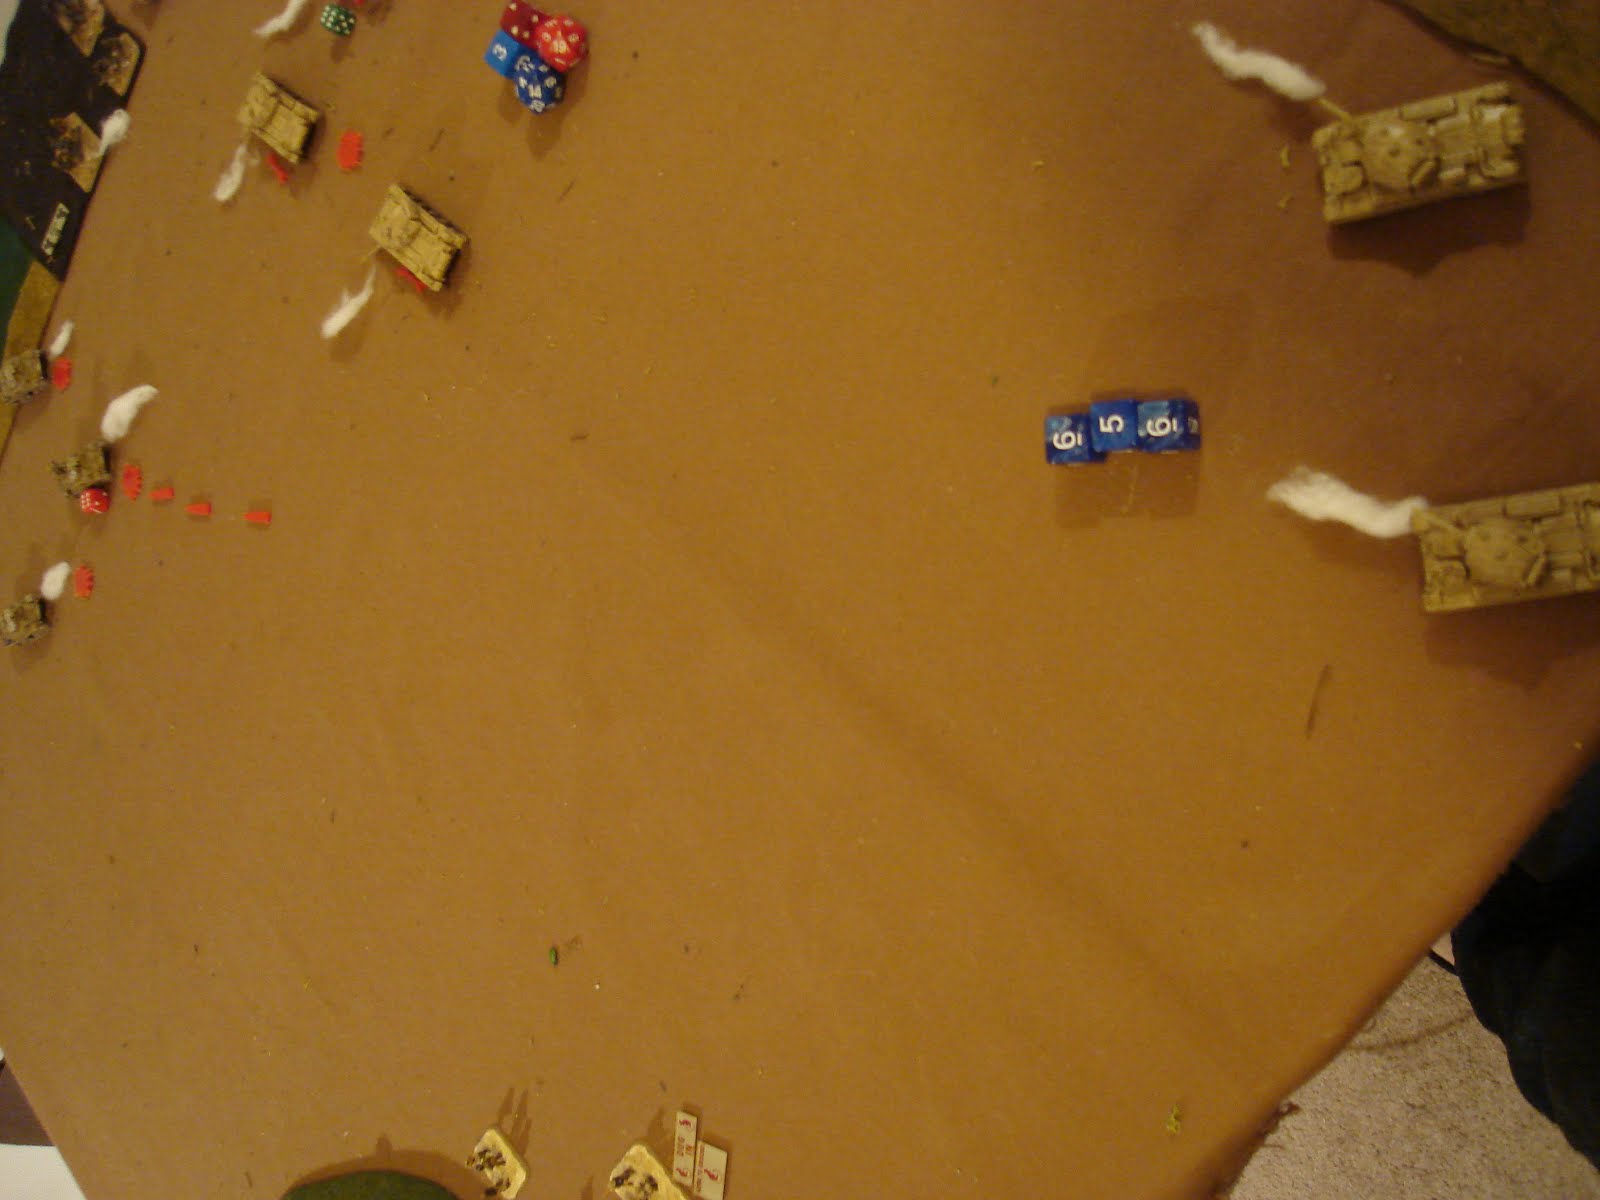
Below. The German second wave. It has more infantry who are supposed to be mopping up what the Panzers have left. South Africans have only lost 2/8 Units, however!

The center game went for the duration. Between the additional Units and the second-wave re-entry, Scenario 15 is going to go 14-15 in turns most of the time, I think.

Overall, 6 games were played in three hours, an average of two a player, which meets the OHW goal of being able to play twice, typically. The victories were a pretty even split, altho I'm not sure about the result of the third Scenario #4 battle.

The players all seemed to have a good time. I was especially pleased to get both a good turnout and lots of Units on the table, as we hadn't played in a long time - a few years, at least! This reminds me of some great comments made at the Gen. Pettygree Blog [LINK] about big games. Sometimes a big battle is just the thing to get creative juices flowing, and provide a creative high point. It reminds me I need to do more painting, altho I've been doing a lot of designing, playing, and basing [especially of medievals]. But the lead mountain has not been dented much lately, and I do enjoy the creativity of painting.

Lesson 5: Sometimes, bigger is better, and a game is "too big to fail" for FUN even if it isn't run perfectly!

"Tanks for the memories" all who came out and played, I hope we get some games in sooner rather than later!

Monday, December 18, 2017

Designing Big Battle Totensonntag Game: 3 scenarios, 10 Steps

Presviously, I posted in my medieval blog about designing and then running a large "One-Hour Wargames" medieval game. In the past during the Flames of War era, we used to throw big games occasionally at the FLGS. Sometimes it would be Tanksgiving, and other times I set up Sidi Rizegh battles for 6-10 people with thousands and thousands of points a side. By the end, there'd be burning Cruds and Honeys EVERYWHERE!!! And we had lots of fun, which is what gaming is supposed to be about.

So, been meaning to not only present my WWII rules, but to get together the local gang who quit FoW together. Been a few years since some of them played. Some sold off all the stuff they had, others have it buried in a closet somewhere. This seemed like the right way to get people together and show them something I'm pretty excited about and really enjoy playing. Spearheading the effort and full of encouragement was Steve from "Sound Officer's Call", who has been leading the charge for "The Quest for the Holy WWII Rules".

First, a large game is like a party.
This is really different from a 1-1 game, and hosting skills will need to be used.

Second, shape the game around the attendees and the miniatures they can bring. 
Take your number of respondents, divide in half, and plan the basic game around those people. In my case there were ten people contacted, and I got 5 who said they'd make it, 4 maybes and 1 no. So I planned for 6 people as I could play - or not.

Third, decide on an historical battle, if possible.
People who do historical minis usually are big history fans - they'd rather re-fight something that actually happened than a fictional scenario, no matter how plausible. This was a little different from the medieval battle. For that one, I didn't have a specific historical scenario in mind. I just came up with a plausible historical scenario [securing a series of hills to further invest a castle that was off-board] and put three "One-Hour Wargames" side by side for a 3x9 board. I wanted to set up the same size again based on respondents - I was almost certain we'd have 6 people or more show up. If we had 5 I could play, and if 4 I'd just host. This time I went historical and dug around and found good info on Sidi Rizegh HERE, and decided it would work perfectly.

Fourth, do the research so you can present the battle in an interesting fashion.
I read all of the posted material and article, and decided that November 23, 1941, aka  Totensonntag or "Sunday of the Dead" was the right battle for Sidi Rizegh this time around. Totensonntag was the major counter-attack by Afrika Corps against the British 5th South African Brigade south of Sidi Rezegh [up the escarpment] supported by various bits and pieces of disorganized Brit tank regiments. 

At first, I was tempted to do the morning battle, for which I had several scenario ideas:

'The Sidi Rezegh Battles 1941' by J.A.I. Agar-Hamilton and L.C.F. Turner, published by Oxford University Press, Cape Town, 1957

but the main battle was a real humdinger, so I went with it!

Fifth, don't do a sideshow if you can do the main show!

Here is the map from which I got the basic idea:

'The Sidi Rezegh Battles 1941' by J.A.I. Agar-Hamilton and L.C.F. Turner, published by Oxford University Press, Cape Town, 1957

From this, I zoomed in on what looked like the best battle setup:

Given the map scale, a 3-mile wide battle will fit nicely into the center where "B ECH" is in the bottom of the South African camp [dotted line]. 36" is a mile in the scale I use for these rules, 1" = 50 yards [or meters].

There'd be a main drive up the center by 15th Panzer Division at 5th S. A. Brigade, with Italians on the left confronted by what was left of 22nd Armoured Brigade [Cruds!] and British 7th Armoured Brigade bits attacking from the right. This was ideal since I have a load of Italians, and could shift the battle a bit to the left if some of my Germans didn't show up due to real-life issues around this holiday season.

Sixth, keep the figures available in mind as you choose your scenarios.

I then played around with my "One-Hour Wargames" scenario cards, picking out different ones and flipping them around, turning them, changing angles, etc:

As is often the case, I liked the scenarios I picked but needed to invert them [do a mirror image] for them to make better sense on the battlefield, or to alter them a bit. I decided on the following as being true to the historical account, as well as interesting:
WEST. Scenario 16, Advance Guard. A meeting engagement of equal forces [6 Units] - sharp and sudden - between Ariete and 22nd A.B, fighting to hold the center Town.
CENTER. Scenario 15, Fortified Defense. Attacker must take both towns [black squares] against up-armed equal force [6-units], BUT gets a total refit of his force as reinforcements [so 6 Units, then 6 more]. This was perfect for the overwhelming Panzer attack up the middle, and the two fortified towns would make good encampment areas for dug-in units.
EAST. Scenario 4, Take the High Ground. Attacker must take hill against an equal force, but only 2 defending Units start on the Hill. The rest enter as reinforcements from the West edge. A good and simple attack by 7th Armoured Brigade against the flank of the German Panzer attack - it caused them some alarm, but never threatened to stop their advance.

Just one thing to emphasize here. I don't think that the OHW rules need to be confined to the strict parameters of the OHW scenarios. However, the scenarios are pretty carefully thought out, and work well the vast majority of the time. This makes it wise to consider using them "as-is" a few times so you get an idea of reasonable victory conditions given the timing, forces, distances etc. Push the force 6" farther apart, and the attacker will need another turn! 

So something to keep in mind as you plan you own historically inspired games. I think most historical situations and accounts [especially ancient accounts] are so limited that it is impossible to know exactly what happened. The best thing to do is to fit the history - as best as it can be known - into a scenario that you already know works, modifying it a bit as needed.

So from this, I sketched out some ideas.


Then I did my alterations, inversions, etc.


Then I did a more detailed and specific map, using square paper to keep the details right.

Unfortunately, I ended up with the hill 6" too far back on Scenario 4 to the right. Oh well...

I then made notes on the initial six forces I'd use for the three battles. I included reinforcements for people who showed up late and decided they wanted to play.

Seven, plan to accommodate everyone who might make it.
Have plans for people who don't make it [especially if they've figures you need!] and for those who show up at the last minute. Remember that they could be doing something else, and that the most  important thing is to have fun - pushing figs and dropping dice!

Eightprovide rules and force lists a few weeks in advance and invite feedback.
While I did put the rules out a few days in advance, I wasn't able to get all the forces figured. I still had some people who weren't certain they'd be there, and I even had Bir-el Gubi as a backup in case only my British forces showed up to fight my Italians! This isn't a bit deal as I've at least 3 full forces of Italians, and a force of Cruds for the Limeys.

I did get some feedback from the guys about the rules, so made some more clarifications.

Nine. Pack everything up a day in advance.
If you leave it, something will happen and you'll end up rushing, and rushing means broken figures! I had everything packed and was tinkering with the force lists at the last minute. I should've done that a few days earlier, also.

Ten. Make sure that Home-6 is on board with what's going on.
Yeah, cause she could put arsenic in your coffee, shred your suits, or other even worse things, like stomp on your figures, right? Remind her, if there's a problem, that you could have a worse hobby - a boat or a plane - or hang out in bars and strip clubs blowing money and acting stupid. Also, it's nearly impossible to meet attractive women playing historical miniatures, so you can't get into that sort of trouble, either. Overall, it's a pretty harmless, nerdy hobby, which she should know, but you may have to occasionally remind her. Just don't spend the grocery money on figures or rules!

OK, I hope these ten steps give you some help in case you want to throw your own game some time!

Next up, we'll talk about the Big Day itself - but Steve beat me to the punch with a "Sound Officer's Call" post, so I'll be posting something that isn't reduntantly repetitive soon.

Sunday, December 3, 2017

6d6 WWII v.2: One-Hour Wargames #21 "Twin Objectives"

The Limeys attempt to take not one, but TWO objectives from the Camparis!

Table layout and initial deployment above. Book scenario below.


With what I think is a faithful setup and layout, I deploy the two forces as best I can after playing this scenario a good ten times over the last couple of years. There are no less than three playtests of this recorded in this blog HERE, and it makes for nice comparison with how the rules have developed over this timeframe.

Some things can't be predicted, of course, and there are options that fall into the "it all depends" category, but this is the best I could do:
*Italians. Carri platoon on road at top left. ATGs in town-Objective, Mortars at top right are angled to fire out of the corner. At bottom, the fourth platoon of Bersaglieri are deployed on the hill-objective - which is rough terrain - at the bottom left. Deployment restricts Italians to Hill objective and top 6" of the table, the South end of the town and the road line, basically.
- Mortars could be where the Tanks are on the road. I chose to put the Tanks there in the hope that they'd have a bit more working space and be able to engage the British platoons in sequence rather than all at once [which results in a 1-2 turn wipeout].
- The ATGs have a 180 front/rear, like all Units. I put it even with the road instead of angling it to the SouthEast. This was an error as it left a weak spot to their left rear.
- The Infantry can deploy farther back into the rough ground - this means an extra turn or so for the attackers to get LoS which is 4" in the rough terrain [4" is also Close Range]. However I chose to deploy farther forward to deny the British infantry space to establish themselves in the woods, Dug-in. This makes them vulnerable to an attack by the Italian tanks if the British ignore them [they usually don't - it's so quick to wipe out tanks that when you've an advantage it always pays to do so. A lot like Cavalry Units, basically].

British. Two Motor Platoons to left facing the rough ground - their job is to take this objective with the help of the Mortars, which are to the bottom right angled out of the corner [the models are Crusader CS tanks, Close Support, with a 3" howitzer]. The three Crud platoons are in 2 up 1 back formations all facing forward on the deployment line to right. Their job is to drive straight up, destroy the Mortars, flank the ATGs and destroy them, and somewhere along the way knock out the Italian tanks. Should be no problem, right...?

I've decided that for this scenario, the Italian Mortars are the key - they can affect an attack on either objective and they put a lot of casualties on the Brit infantry as they close in on the hill. They also put a Hit here and there on Armor units, sometimes it's enough to make them vulnerable to destruction. As they are unaffected by the Target Priority rule, they have a bit of a sniper affect - I'm OK with this as I envision the commander looking over the battlefield and deciding where their fire will have the best affect given the situation. As they are a local and integrated asset, their reaction time is - and should be - pretty quick.

Turn 1. In a post-deployment  flash of inspiration, I decide to hold off on the Motor Platoon assaulting the woods and dig them in. They'll attack after the Italian Mortars are knocked out, so I fire on them with the British Mortars and they fire on the Cruds most likely to be fired upon by the ATGs and Carri. Hope is that the concentration of firepower will knock out a platoon. The ATGs fire and put a few hits in on the right-most Cruds as the target priority rules have them a priority. Carri move up to place themselves just out of 12" range, hoping the Cruds will move into it so they can get first shot off into them.


Turn 2. Initiative doesn't change [the side without it needs to win by three to take it, and the red-dice Italians don't quite do it at 3-1]. I decide to give the Carri the first shot - I'm totally focused on crushing the mortars and flanking the ATGs. The red platoon at top left only takes weak hits from the Italians but are at 4 Hits, the other platoons are right behind.


Turn 2 Closeup. The Brit Mortars have been able to pound away at the Italian Mortars well [good dice]. The Green Cruds will advance past the Red next turn to "shield / relieve" them on point. The right-most Cruds will dash at the Mortars and wipe them out!


Turn 3. Rather than be slowed by destroying the Carri platoon, I decide the Cruds must advance at top speed and keep on their original mission. Red Cruds put paint rounds in the chamber and inflict no damage. Final Cruds are under the range of the Mortars, and now immune to their shooting entirely. Overall, plan seems to be progressing well! Carri put two Hits on Red Cruds, pushing them to 6 altogether. Italian ATGs fire at the Green Cruds who've outflanked them at Close Range. As for the Carri platoon...


The Mortars pull off a 1 in 27 shot - all three Mortar rounds hit needing a 5+! Who left the hatch open? Stupido!! Carri platoon unexpectedly crippled with 3 Hits and a Permanent Hit.


Turn 4. The British keep up the pressure, knocking out the Carri platoon, but the Mortars only take one hit. The Italians knock out the Red Cruds with their Mortars, but nearly whiff in their shots on the Green Cruds - only one Hit! The ATGs took one, safely Dug-in in hard cover. The plan is progressing, but not as fast as I'd like, really. The decision point will be the ATGs v. the Green Crud platoon - whoever wins that will probably decide the battle.


Turn 5. Mortars and Cruds pound away on the stubborn Italian defenses. 


Turn 6. Italian Mortars are wiped out. But the ATGs put two Hits on the Green Cruds, who are now one Hit away from dead. They in turn inflict no Hits - doesn't look good!


Turn 7 - Hill. Both Motor Platoons advance, getting decent movement rolls. The Italians defend themselves getting a Hit during the Brit Action Phase using their Ready Action. Italians get a second Hit in their own Action Phase firing.


Turn 7 - continued. The Cruds swap out to save tanks and keep up the pressure. The desperate Italian ATGs pull a perfect roll and inflict 3 Hits so 1 is permanent! Suddenly, the relieving Cruds are looking shaky, altho they did manage to put one Hit on the ATGs.

Turn 8. Mortars get a Hit. One Motor Platoon outflanks, the other digs in. Italians miss... The full attention of two Infantry and one Mortar will be felt next turn as they put down 2 dice for the Mortars, 1 each Infantry, 4 total for a 3+ to get a Hit. Meanwhile, at the Town, the Cruds manage to wipe out the ATGs. It was a very near thing, but they manage and now set themselves to their most important task - brewing up! [sorry, forgot to take a pic!]


Turn 9. And they inflict three Hits on the Camparis while taking one themselves.

Turn 10. Italians squeek out one Hit but take two. The end's in sight...

Turn 11. The Mortars roll a hit and Campari resistence fades as they withdraw.

Whew! A close-run thing.

I made a mistake in not tilting the ATGs back so they didn't have a flank exposed. However, the 180 rule would have made their RIGHT side vulnerable instead, denying the Brits the benefit of concentrating against the Mortars / ATG flank. It would have made the Carri platoon even more critical as they would then be protecting the Right flank of the ATGs.

It was the Campari's battle, and any mistake by the Brits would almost certainly cost them the win. A few sweet dice rolls also helped. The mobility of the Tank platoons is greatly enhanced by the priority rules - The tanks can shift themselves to change which tank unit has priority, while the static defense cannot. I like this, it feels both realistic and playable. The ATGs in the town are a really tough defender - most units will be down to a single attack dice. The key is to knock out the Carri quickly. 

There is a distinct possibility that the Carri would be better replaced for a second ATG platoon - these could Dig-in and give the Cruds even more trouble. As always, force composition has a big impact on the planning and execution of any operation. These scenarios can be very challenging to players as one can't optimize one's force.

So very happy with this playtest, and with the rules in general.

Now, I have to set my mind to planning the Sidi Rizegh big battle and at least finishing my mighty force of Cruds - long overdue!

Tuesday, November 28, 2017

6d6 WWII v.2: Scenario #8 "Melee" with Eager Playtesters

Twas the night before Thanksgiving, and all thru the store,
The gamers were hollering, "More! More!! MORE!!!"
The dice were thrown, the cards were cut, attacks made on the flanks,
In carefree anticipation of feasting, family, and - we hope - lots of thanks.
(with apologies to Clement Clark Moore)

Soooo, with quite the excitement at testing the latest draft - 11 - of my WWII rules on two Veterans and Grognards, I reported as ordered to the local FLGS to see if this draft was as good as I hoped. As a close spin on my Medieval rules, I felt that the mechanics would work well, and "scratch the itch" for a fast-playing but very tactical Company / Battalion level WWII wargame, playable in an hour or so. Will the rules withstand the test of historical knowledge, practical experience and gaming experience? We'll see!

*** EDIT: to track rules development better, these rules are now "6d6 Wargames WWII, v.2" to differentiate them from the posted v.1 one year ago. ***

I've now switched my language regarding the rules - there's so many changes that the most that can be said for Neil Thomas is that he inspired them with his philosophy and the "One-Hour Wargames" book, which I still highly recommend. In the not-to-distant future, I will unveil a legible copy of the rules and send them out to likely victims for blind playtesting. If that interests you, do contact me for the mundane arrangements. Meanwhile, I've pretty much stopped calling them "One-Hour Wargames" and free Mr. Thomas from any responsibility, morale, ethical or legal, that caused by the playing of these rules. ;)

Some mechanics that have crossed over from the Medieval Rules:
- The Initiative [IN] roll-off mechanic. As one side has Initiative and takes its Actions first, followed by the other side, it is possible for the losing side to go second, win IN, and go first in the next turn, effectively getting two Action Phases [interrupted only by Mortar Fire]. This requires winning by 3 as the holder of IN gets a +2 and wins ties. So it doesn't happen often, but it is worth thinking about.
- the 6-Hit Unit: it is so much easier to track with one dice than up to three for 15 Hits!
- the corresponding use of the 3-dice attack mechanic, which lowers the numbers of hits a unit takes in any given attack to the same math chances as the d6 attritional roll with 15 Hit Units. The main difference is that you can "miss" with all three dice, gaining no Hits, with any Unit. In OHW only the weak skirmish units that attack d6-2 can "miss".
a combo method of varying the number of dice and the Hit number
- rallying off of hits, in a simple, limited way.
- a partially diced move system,
- A combo of Actions and fixed phases [Mortars fire in a separate phase]
Some have been tweaked a bit for WWII and of course the modifiers to the combat dice and target numbers is mostly unique to WWII as well.

Turn 2 - Initiative roll-off. The defending Italians start the game with Initiative, not the attacking Brits. They have an ATG and INF unit on the hill. They go Ready with the ATGs and move the INF into the oasis/scrub [woods] in front of them. The key decision is to dig-in off the hill or on it - the victory condition is sole possession of the hill. The Brits start with three Units of Cruds which begin dashing up the road to set up an ambush on the Axis reinforcements, two platoons of PZIII, an Infantry and a Mortar Unit. Unfortunately, the Cruds roll pretty low and don't get very far. The ATGs shoot on the Ready during the Brit turn, then hammer away at the platoon for the next couple of turns [ATGs that are Dug-in have about a 2-1 Hit advantage v. Armor in the open...as it should be!]

Turn 5 - Action heats up. The Brits got one platoon into short range of the Axis entry point, and one platoon hull-down behind them. They manage to knock out one platoon but the close ranges and dice rolls have put one of the Crud platoons at 6 Hits - it's removed at 7. Meanwhile, the British Motor Infantry are developing an attack on the Italians in the woods, who are Dug-in and Ready. One platoon of Cruds tested the ATGs and didn't like what they got, so pulled back behind the oasis to rally a few hits off before re-entering the fight.
Crud Close Support platoon at bottom left [mortars]. PZIII above road. Italian ATGs on hill at top, Infantry in Oasis. Axis have lost a Unit, but two Crud platoons are badly damaged.

Turn 8 - the battle rages! Stubborn Italian defense of oasis has cost the Brits a Motor platoon. Both the short-range fire and mortar support were tough on the attackers. One platoon of Cruds is gone, the other two are doing OK. The Hull-down one has inflicted a permanent Hit on the PZIII platoon, so they'll always lose one dice when attacking. Lots of decisions have been made, the most interesting being the Brits to take a very aggressive stance against the reinforcements of the defenders. Personally, I never found this to work, it just gets you fighting with more Units a turn or two earlier. If his two Crud platoons fighting the German armor had spent a couple turns shooting up the Units on the hill, they might have secured the Oasis as a staging poin to attack the ATGs with their infantry.
British have half an oasis - but can they get a drink?? Axis mortars below road at right. Axis infantry on hill at top to replace the destroyed ATGs [they didn't dig-in].

Turn 11 - desperate measures. With solid play and average luck on both sides so far, the battle still hangs on a thread. Cruds knocked out the PZIII platoon and are now encircling the embattled Italian Infantry in the oasis. The other digs in as MG and Mortar fire lashes at their comrades. The Italian Mortars work to support their comrades and put hits on Cruds.

Turn 15 - a brutal finale. Well, few survived. The Brits lost a Crud platoon and the Italians both Infantry platoons. The Cruds then moved up and took the hill. The Italian mortars also moved up, but we think - in hindsight - that they had fired and so wouldn't have been able to move. Clearly, however, they would have withheld shooting for movement as it meant the game. Still, the Brits have two good platoons on the table, and the Italians just have Mortars, so it would just be a matter of a few more turns for them to secure victory.

This is not as detailed an AAR as the one over at Sound Officer's Call, but it is focused more on the rules rather than the fun the two playtester's had, anyway. :)  I do encourage you to read Steve's account of the battle, it's not often you'll get to read two AAR's of the same game!

I :up well. There are plenty of clear-cut decisions to be made, and battles are shaped by those decisions interacting along with the dice. Overall, I believe that 3-4 of 5 games will go to the better player with this system, so I am happy with the occasional loss due to bad dice or a bad critical decision. It reminds me a lot of real war!

The combat mechanisms were solid and pretty easy to remember, as are the move rates. Initiative is not a game winner and here it never switched anyway. I am happy that most of the time, a Unit has a couple of choices of what to do - Rally, Dig-in and going Ready are almost always an option for a Unit if they are not moving or shooting, and I have always loved the "saving and preparing" aspect of such a mechanic. When do Units ever just totally sit around and do nothing on a battlefield?? Never! If they are resting, they are also trying to organize and get ammo, improve their position, etc.

So some little things to write up and edits to make, but these are very solid. We will be looking good for the Crusader mega-game in a few weeks!

Tuesday, November 21, 2017

Neil Thomas "Wargaming: An Introduction" Skirmish rules

"Hey Beau, you think there's any Arabs out here...?"
Nope, none, nothing to worry about...no wargame here!

Well, it was about time I returned to and used the "Wargaming: An Introduction" [WAI] Skirmish rules as NT intended - Rules As Written - so played them RAW in this batrep. This provided an opportunity for me to use my half-forgotten 15mm French Foreign Legion and Arabs. For the force list, I used the British v. Dervish 1885 lists which are perfect.


There is only one scenario in the book, a fight to the death with the only guide being that there should be lots of cover. This is a bit dull, so instead I used #6 Flank Attack from "One-Hour Wargames", which features a 1/3 Red blocking force on the road and a 2/3 ambushing Red foRce from the flank. All of the Blue force is on the road, up to 2/3 the way up the board in zone 1. In this case the French Foreign Legion is Blue and the Arabs are Red

This was the second time I played the scenario. I find that I am rarely able to get a set of rules right on the first try! I still forgot something and had to play them a third time...

The game board in the book above, and my take on it below [it's a mirror-image] with the flanking force and its hill to left, and the blocking force behind a hill at the top. All the little bushes give cover if a figure touches them [doesn't need to be between firer and target, its abstracted!]. The distances are around the same, given the switch to metric measurements.


Captain Escargot v. Mullah Mansef [All are Stone Mountain figs still in production].


Mansefs ambushers: 4 Rifles and two camels-riders w'spears, all Average. Blocking the road itself are 6 spearmen and the Mullah himself w'sword.


Escargot's supply train, Elite: 2 Cavalry, 4 rifles, 1 Hero w'pistol [Himself!], supply camels.


Turn 1. French go first and move to get distance from the ambushers; also advance the cavalry to threaten the blocking force at the top with a charge from out of their reach. Note that everyone is touching a bush and now has the cover benefit. Red Arabs advance everyone - rifles to the crest camels and spears close in, all keeping to cover. 


Turn 2. French shift cavalry and supply train out of range of Arab shooting. French rifles shoot at threatening camel-riders getting 3 Hits [3+], 1 is saved [4+] and then they roll on wound table for 1 wound each [a 3-4]. [you can get 0-2 wounds on the rifle wound table, and an Average figure has 3 Wounds]. You can see shooting as blue/red dice, then green dice are cover, red dice wound. Arabs on hill fire getting 2 hits [4+] which are saved by French cover [4+]. Arab blocking force continues to close in using cover. 


Turn 3. The French shoot at Camels getting 3 Hits, 2 are saved and one gets one more wound. Rest of French force positions itself against advancing spearmen; the Hero Escargot with his pistol, backed by two cavalry. Arabs keep closing in. Shooting gets three hits, one stopped by cover, then both miss on the wound table [frustrating...]. 


Turn 4 [forgot to turn dice over, obviously, so now all the turns are off!!]. 
French shooting gives 3 Hits on camels, two are not saved, and the 5 gives two wounds, putting them at 3 and 4 respectively, killing them. A French cavalryman melees a spearman: He rolls four dice [3 for being Elite, one for being mounted, Yellow dice] and the spearman rolls two Black dice. The single highest dice wins - French high of '6' beats out Arab high of '4' and the French cavalryman wins. Note that French next highest dice is also a '6' v. Arab '4', so would have won if Arab high roll was a '6', also. Frenchy rolls a 4 on the wound table and inflicts 2 wounds on the Arab leaving him w'one. Arab shooting [black dice] gets only 1 Hit which is saved. Arab spears and Mullah close in for the kill. 


Turn 4 continued. Arabs attack a cavalryman and win with their second highest dice, 5-4. They inflict 5 wounds and take him down [melee wound table is more severe than rifles].


Turn 5. French Riflemen get two misses and one Hit [light blue dice behind them], needing a 3+, and it isn't saved by cover but he misses on the wound table. The Hero gets two hits with his pistol, inflicting 3 wounds and taking down a spearman - that's a HERO, not just some strange sort of sandwich! The surviving cavalrymen attacks a spearmen and takes him down with 4 hits. 


Turn 5 Arabs. Their shooting results in two hits, one saved, but no wound. They close on Hero Escargot, Mad Mullah Mansef leads the charge himself with four spearmen helping him - cowards! In the ensuing melee, both sides roll well, but the Arabs drop 8 dice to Escargot's four, and beat him on the second-highest dice 6-5. They roll poorly on the wound table but still manage 6 wounds and kill him [he has 5 wounds as a Hero].


Turn 6. French are outraged by the death of their Hero and shoot for revenge. As neither of the Spearmen have cover at this time, all four Hits go straight to the wound table [Yellow dice] causing 3 wounds on each, killing them both. 


Turn 6 French, continued. Cavalryman attacks the Mullah, but Mansef sees him off winning 6-5 on the second highest dice, and inflicting 3 wounds.


Turn 6, Arab. Shooting gets two Hits saved by cover. Spearman and Mullah try to finish off the Cavalryman, but he easily beats them on the second-highest dice, 6-1, killing the spearmen outright with 3 wounds. The Mullah backs off...


Turn 7 French. They fire away at the Mullah getting three hits, one saved by cover, the other two go straight to the wound table inflicting two. The Cavalryman closes in for HIS revenge, barely winning the melee on the THIRD highest dice 2-1. He inflicts one more hit on the Elite Mullah, who can take three wounds, killing him.

At this point, the entire Arab blocking force was dead, and with just a few riflemen surviving, they've no way to close in and damage the French without themselves being at risk, so they fade back into the desert, like a mirage. 

Victory for the Legion, but at what cost!!? Well, a hero and a cavalryman, to be exact.

The use of the OHW scenario was fine. Movement rates are slow, 8cm [3"] in WAI-Skirmish to 6" for infantry in OHW, so about half. That would necessitate extending the scenario length if it was a movement dependent victory condition, perhaps. Victory for this scenario is that 1/3 the French have to exit the board, which is quite doable in the 8 remaining turns. Only tricky thing is that they are supposed to exit via the road, which could put them back in range of the Arab rifles if the rifles are aggressive. 

However, it seems unlikely that 3 of 13 Arabs would stick around at all while the enemy moves on. Net Casualties are 10/13 Arabs including their leader, and 2/8 French. The points were equal and the spear-wielding Arabs were effective in this scenario as they get a bonus for melee. The main issue is that after melee, attacking figs are often not in cover and can be shot.  So one's melee figs may win and wound or kill someone, but they are then standing in the open when the enemy shoots. The only way around this is to move into the cover the enemy is defending and attack him there, then retreat within the cover. All sound tactics to me!

Had the Arabs remained in place, the French would have been forced to attack the spearmen over the hill while being chased by the Arab riflemen. Uncertain if that would work better for the Arabs. Their shooting didn't achieve much, overall, which was probably mostly just bad luck as they had about 20 shots, which should be 10 Hits, halved for cover for 4-5 wounds, but they got none.

This game involves lots of dice, overall, but it goes along pretty quick when you know the mechanics. The use of charts / tables I'm not that keen on, but it is pretty hard to escape when you've the individuality of a skirmish game, and this individual story-telling is what makes skirmish gaming so much fun for so many of us. You can name your Soldiers and follow their path to fame [or infamy as the case may be]. Also, most stories / movies focus on a few individuals so it is easier to have that story line in skirmish gaming. So in those regards the work is worth it; it is still a pretty fast system, taking about an hour or so.

So, what did I forget...the Ambush Action! If a figure doesn't act on their turn, they can interrupt the opponent on his turn at any time to take a shot or charge action [if in weapon or move range]. I did play again using this rule, and it is a pretty big game changer. I overall found it a bit cumbersome as you have to mark who is in Ambush status. Tactically, it rewards a defender as they will always get a first shot against a fig advancing into range.  I don't think it matters much to be able to charge unless you get some sort of charge bonus. This mechanic is a classic old-school wargaming mechanic, so I think it deserves its own follow-up post!

All this does have me enjoying my old figs, glad I didn't get rid of them. As Wargaming Miniatures still makes them, I'm actually tempted to flesh out each force a bit more, and I'm missing a swordsmen unit somehow. Obviously, I don't need more for a skirmish game, but 15mm...it just seems like they should all be on bases and the game should be more of a multi-fig Unit game than a 1 fig = 1 Unit game. Both OHW and the WAI WWII rules would work well for this period, and the 15mm figs are a bit fragile to handle individually. 

I think WAI Skirmish has the right "feel" to substitute for one Fig [rules as written] a base of 3 figs since each fig always has multiple wounds in WAI Skirmish. 15mm Figs work better on a multi-fig base for handling, and there would be more figs on the table for a "mass" effect, which suits 15mm.  Something to think about going forward.  But first, more figures....