
https://y.yarn.co/f7361559-904d-4435-89bc-55ed94b25a7e_screenshot.jpg
Starting goals were to put in all the essentials that are always left out of all the OHW rules, like Line of Sight, summarized here [CLICK] for convenience. You can't play the game easily without these mechanics: you will either have to argue about them every game, or, if you are a very British gentleman, discuss to satisfaction or roll-off!
I also wanted to reduce the "gameyness" that is inevitable when players have total control of all Units at all times, and a 1,000 foot high vantage point of the battle. Great example is that you shoot at a unit that is almost dead, but you roll badly. You want this unit dead! You shoot another unit at it, and continue until it is dead. This Total Firepower Control is not seen until the modern era.
This project began with wanting to address these key issues, but eventually expanded into additional mechanics that added a lot more realism and challenge at a modest cost in additional complexity.
This draft is dated December 7th, 2019, and I hope they will NOT live in infamy! They have been playtested, tweaked and re-drafted like crazy, with long-time gamers, newbies and incounted solo outings - since they play so quick, even a game taking notes and photos ends in under two hours.
The full design goals :
- play out in under an hour with familiar players.
- put the mission and tactics first, gear and game mechanics second.
- present players with realistic choices for a company commander.
- allow platoons to make some targeting and survival decisions on their own, regardless of player desires.
- the better player should win 3-4 of every 5 games; if player skill is equal, the dice will decide.
- speculative and test range qualities of military gear get tossed; gear plays as doctrine, training and history reveal.
- game mechanics are traditional; it's the combination that produces the right flow and feel.
- new players with game experience quickly understand the game mechanics and principles, but there's plenty of nuance for experienced gamers.
- all of which needs to be strongly shaped by history, lest we inadvertently find ourselves playing a fantasy game!
Well, let's see how well these goals were met. And if you would like to test for yourself, contact my hotmail, brasidas19003.
One-Hour Wargames Scenario #17
Red Italians run into the Blue British in the desert during Operation Crusader, fall of 1941. They want to use a low rise as a point of observation and move to seize it, but find themselves opposed; they call for reinforcements and the situation escalates.
Each deploys one platoon on table 6" in from their base line, Red first on North side, followed by Blue in the South.
Red gets the first Player Turn.
Each side gets one reinforcing platoon entering at their base line on the roll of 4+ each turn - players are free to pick, it seems [but it would be interesting to roll random, or write ahead of time, eh?].
Winner must be in exclusive possession of the hill by Turn 15.
Forces available
Italians: Compagnia Bersaglieri, Regulars
3 Infantry platoons, Bersaglieri
2 Tank platoons, M13/40 Carri - Veterans
1 ATG platoon, 47mm elefante
British: Armoured Squadron, Regulars
1 Motor Infantry Platoon, Rifle Brigade
4 Tank platoons, Crusader Troops
1 Mortar platoon, Close Support Crusader. This small platoon has two tanks with 3" howitzers instead of tank guns, and the 2iC crusader tank. Accordingly, it fires as a field mortar.
It should be noted that this is the FIFTH time I've played the scenario with the same forces - I tried various opening deployments and plans for both sides and with very different mid-games being the result:
- Turns 1-5 are focused on gaining a position advantage. This is usually focused on fire lanes around the hill, and more intensely on occupying your side of the hill with a big ?? about holding a position on the hill crest; while the crest allows you to see into the oppositions entire rear, they can all see you and you tend to become a Fire magnet!
- Turns 6-10 there's loads of fighting; trying to concentrate firepower, eliminate a couple Units, set up for end game.
- Turns 11-15 are focused upon a bloody confrontation at the hill, since the dance clock is running out.
Below, is the end result couple games ago:

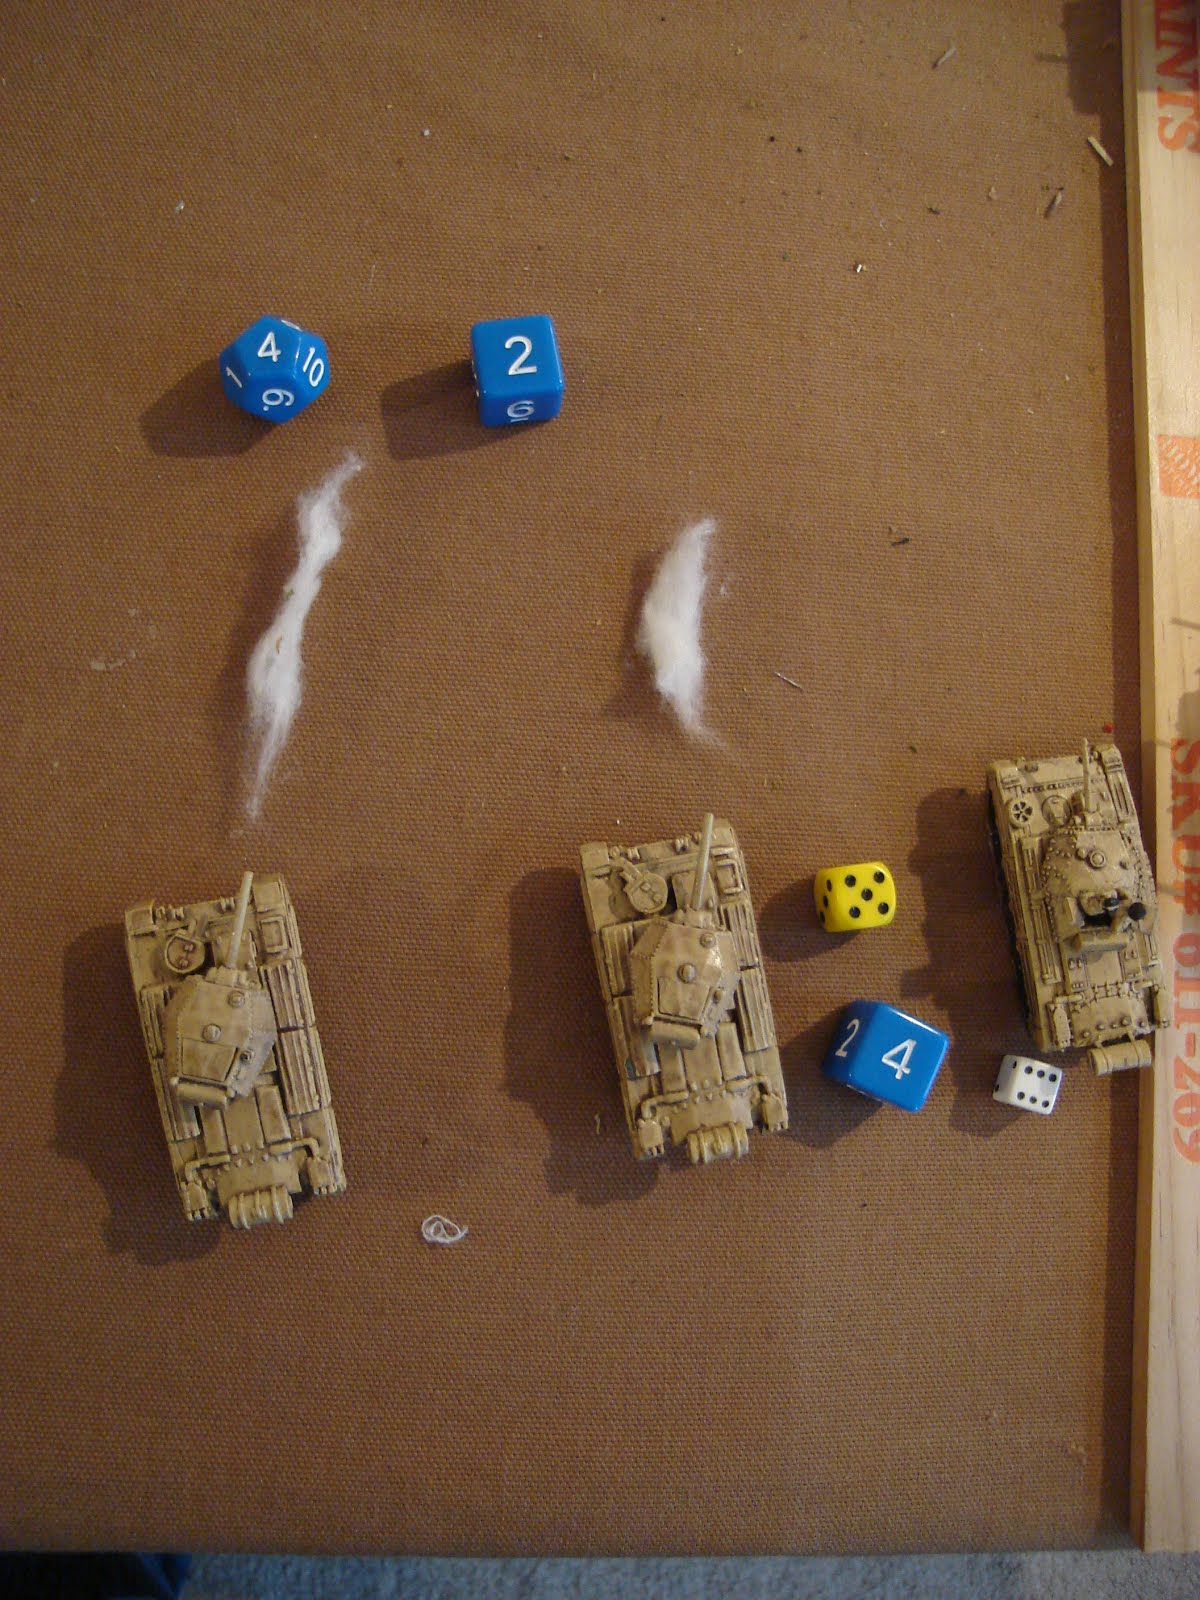
Note: large base to right is just on the table for a bit of color. At center upon the objective is an Italian infantry platoon dug in on far side, with hull-down British crusaders on the near side, both somewhat battered at this point. It was a draw as both are upon the hill.
Below, end of last game: Italians mob the hill with infantry and drive the Crusader troops back or destroy them. BUT, a last-minute end run with the final Crud platoon was made possible when it rolled an '11' for 16" of movement, so...what the heck, they dashed onto the hill. Italians then missed loads of dice to destroy them needing only ONE HIT! so they ended up with a draw.

Considering the available forces, I again chose to deploy Italian ATGs first. In a shoot-out with tanks, they inflict hits at a 2-1 ratio if Dug-in and will dominate the table out to their 24" range and the hill crest. If moved against, they will also get the first shot if they are Ready [having saved their Action from their turn].
Given the scenario description, I decide they have been hastily unlimbered by their trucks upon sighting the British armor approaching, and are neither Dug-in, nor Ready. I deploy them in a wide line to minimize the possibility of being successfully smoked by the British Mortars. 
The British oppose them with their Mortars, the CS Support Crusaders. They are mobile and can begin shelling the ATGs beyond their 24" range, firing to 48" [the entire table and more]. It won't be decisive if the ATGs Dig-in since Field Mortars merely harass but can't destroy a Dug-in Unit. Still it challenges them the best way possible. The other choice was actually the Rifles platoon - they need the time to get to the hill, Dig-in, and hold it. However, they are outranged by the ATGs and Tanks, and Tanks are more mobile; I didn't want to lose my only infantry if the Cruds showed up late.

The British oppose them with their Mortars, the CS Support Crusaders. They are mobile and can begin shelling the ATGs beyond their 24" range, firing to 48" [the entire table and more]. It won't be decisive if the ATGs Dig-in since Field Mortars merely harass but can't destroy a Dug-in Unit. Still it challenges them the best way possible. The other choice was actually the Rifles platoon - they need the time to get to the hill, Dig-in, and hold it. However, they are outranged by the ATGs and Tanks, and Tanks are more mobile; I didn't want to lose my only infantry if the Cruds showed up late.
Turn 1. At start, Italians get IN and are presently outranged by the CS Cruds who can inflict slow but steady damage upon them. The ATGs can't hurt them unless they drag their Portable guns closer...
 Which they do...but only roll 2" for movement, dangit! The cruds easily hit twice, which is both their Fire dice. Both fail to roll high enough for reinforcements.
Turn 2 [ignore what the dice say...] Italians get a Carri platoon which rolls a 9" Maneuver Move while losing some inches as they are "Slow" tanks. The ATGs move within 24" of the CS Cruds while taking another two hits, four total. Brits also get reinforced, their Cruds shelter from the ATGs behind the hill but threaten the Carri. Still, the Italians have an advantage.

Turn 3, Italians retain IN. They Dig-in the ATGs, and put some Hits on the Cruds, but get slammed in return, taking a Permanent Hit from the Cruds and one quite fortunate Hit from the CS Cruds 3" howitzer. This really throws a wrench into the Italian plans to develop the battle...

Turn 4, Italians keep IN. They get reinforced, and I chose another Carri platoon as the first was getting beat up! They speed onto the table while the other Carri Rally off a Hit, failing their Quality Test for the second Hit.The ATGs rallied off a couple Hits, getting one freebie and passing a check for the other. At 4+ Hits, Units count as Suppressed and must check Quality to see I f they are free to act. If they fail, they have to Rally or Dig-in as the platoon struggles for survival on the modern battlefield. British also get no reinforcements but destroy the rallying Carri platoon with help from the CS Cruds. Definitely takes some pressure off.

Turn 4 redux [I forgot to turn over the turn dice!]. Italians get no reinforcements but retain IN. Their ATGs strike hard at the CS Cruds, inflicting a Permanent Hit supported by two more from the Carri, for 5 Hits. In return, the Cruds hit like snipers 3/3 damaging another Carri platoon while the Motor Infantry race onto the board in their carriers [these count as a transport upgrade for the Unit, and will be removed as soon as the passengers dismount].

Turn 5. Italians fire with modest results - ATGs missed completely. Brits move the CS Cruds left to preserve them as the Motor Platoon advances to the objective.

Turn 6. The Brits seize the IN from the Italians, beating their roll by 3. They can take it or conceded to them, but choose to take it and the first Player Turn. Effectively, they get two Player Turns in a row. May seem extreme to some, but as this is a fairly attritional combat system, with opportunities to rally, it mostly forces a change of plans to the other side. Here, it helps the Brits re-position but not much else.

Brit Fire is weak, but they bring on a reinforcing Crud Troop and dismount their Motor Platoon on the objective. It is looking good - they've massed firepower in the tank contest, and their only infantry are just where they need to be!

Italians rally their Carri, inflict a Hit on the Motor Infantry with the ATGs and dash their reinforcing Bersaglieri to the objective, hoping to contest it before the Brits are Dug-in.
Turn 7. A Respite occurs as the modified IN roll-off was a tie. Every Unit may Dig-in or Rally. Carri and ATGs rally for Italians, British CS and Cruds all also pass Rally tests, while the Motor Platoon Digs-in on the objective. The turn then ends as the Soldiers all catch a breather. Brits make tea.

Turn 8. No one has IN after a Respite, and you can't have two in a row. Italians edge out Brits and take IN back. They dismount their infantry and advance, get a reinforcing infantry, and lay down some Fire, pressuring the near Crud troop.

British Turn 8 starts poorly as they fail reinforcement roll and bolo their tank fire. The CS Cruds are stable thanks to the Respite so they advance to the hill. The Motor Platoon rolls 3/3 Hits and gives a Permanent Hit to the Bersaglieri advancing upon them! Sort of makes up for the Crud problem since they are at the objective.

Turn 9. Italians keep IN, advance more infantry onto table and at the objective while Digging-in the hurt platoon. Carri wipe out the near Cruds facing them while the ATGs hit 2/2. Overall, a solid turn that really helped them out.

Brits also reinforce, bringing Crud Troop on table. They shift CS Cruds left, not wanting them to crest the hill and get destroyed - they'd be Hull Down, but there's a lot of Italian Fire power over that crest!
Turn 10. Speaking of Italian Firepower... they wipe out the Motor Platoon! This shows the danger of cresting that hill! They retreat the Carri hoping to Rally them later. The new Crud Troop is too much Fire for them and their ATGs will make the Cruds think twice about advancing into LoS.
 Brits get final reinforcing Crud Troop. All Cruds advance - Tally Ho and away we go!
Turn 11. Italians keep IN, and seize the hill with two Infantry platoons - who take the crest position! Optimistic or foolish? We'll see! Their ATGs go "Ready" which is basically an overwatch mechanic - it allows them to Fire in the opposing Action Phase. They now have three Infantry platoons on or near the objective, with Tanks and ATGs supporting, albeit not all in good shape. Has the tide turned??

Brits advance all Cruds forward, and into Close Range of the Italian infantry on the hill crest! They also shell them with the CS Cruds. But will it be enough to challenge their position? The Italian ATGs take their "Ready" Fire and put two Hits onto the closer Crud troop.

Turn 12. Maneuvering is over, and everyone settles in for a knife fight! Italians dig-in or take shots. Their Infantry on the hill punish the Crud platoon for getting too close, putting 5 Hits upon it. In return, they lose the Carri platoon to long range fire from the right flank Cruds.

Turn 13...another Respite.

Brits miss both Quality rolls for an additional Hit to rally off, so settle for modest Hit reductions. Italians are looking strong.

Turn 14. Italians seize IN...again.
Still, one can always roll like this! No Hits on Cruds during the Italian Close range shooting phase. Instead of giving a bonus for Close Range shooting, I make it a distinct, free-Fire Phase. It has interesting tactical effects while keeping the Fire mechanics simpler. As you can then Fire during the Action Phase, it is essentially twice as effective if you choose to Fire again, but gives more options than just Firing as you could Rally, Dig-in, Move, etc, instead of Firing.

During their Action Phase, one Bersaglieri miss extraordinarily, while the other rolls perfectly, not only inflicting another Permanent Hit but...

...putting the Cruds to 7 Hits and destroyed.

We should call that "the hill crest of death"!
Turn 14. As the clock runs out, the Italians inflict some punishing Fire upon the Brits, removing one Crud Troop, pushing a second to 5/7 Hits, and holding out fairly well. The Brits push the CS Cruds into "touch" to gain a dice and put a hit onto one Infantry platoon. They also put some Hits onto the ATGs, but not enought to threaten their destruction.

Turn 14...redux. Yes, I failed to turn over the dice. This is actually turn 16 or so...Italian Infantry drive off the CS cruds, the ATGs a Crud platoon, there will soon be little left to challenge them at this rate.

Turn "15" ish. Well, the Italians cleared the area around them of Perfidious Albions, and there's no way for them to be challenged. The remaining Cruds roll great and threaten the ATGs with destruction, except that...the game ends.

well, really, the game ended a couple turns ago, but I finally managed to remember and record this turn! Brits have no way to move onto the hill and contest it, rolling too low to fully get on and challenge it meaningfully. Game over!

Well, twas a 17-turn game, but the result would be the same either way since the Italians have been holding the hill and dominating the Crud troops for a few turns.
Should be noted that this scrape would fight entirely different if the British had an infantry force, but I haven't quite finished painting them [altho recent progress has been made, thankfully and my painting contest CLICK will hopefully inspire all to make progress on their forces, also]. Infantry v. Infantry will develop a turn or two slower, and where to commit forces becomes the critical decisions.
Very happy with these rules!
They satisfy the original goal of fleshing out OHW WWII, but with added friction and simple mechanics, BOTH Fire and Maneuver are much more realistic. Critical to this is the mechanics for Line of Sight, scale/range, Suppression and Target Priority. These last two keep players at the Company Command level; you move and fight platoons, which obey until they are Suppressed or enemy closes in at which time they make their own decisions for Targeting, Rallying and Digging-in.
Some of you may recall that I stopped posting the rules in full around March of 2018 - the last full set was from 2016 [CLICK]. It was then I really felt that the rules had come along so well that they would be worth selling. Inspired by Mr. Nordic Weasel and his approach, I will be offering these in an inexpensive format at a cheap price at some unknown point, through some unknown medium, but likely direct or Wargamevault.com
The purpose will be to continue the final phase of development which will greatly benefit from the participation of others, and allow many new questions to be asked. So do check in and state your interest.
Happy Christmastide and you can get start 2020 by going...Up the Blue!
Merry Christmas to you and yours!
Merry Christmas to you and yours!