The game and each Turn starts with an Initiative card draw, high card takes first Player Phase and the low second Player Phase. Players then continue to draw cards in this same order IGO-UGO fashion until a Joker is pulled as ANY card draw and the Tun IMMEDIATELY ends. This means you do not resolve the rest of your unspent AP, or even the shot you are in the middle of resolving.
Between this Hard Stop rule with the Jokers [there are two in each deck] and the possibility of drawing Ace [1] to King [13] for either side, and you get a pretty wild variation in Action Points [AP] which results in the turns being unpredictable and pressuring the players to prioritize their AP use for the critical Actions to achieve victory first, and the secondary goals or supporting measures second.
For example, the Japanese definitely have two key weapons in this scenario, a crew-served HMG and a Sniper [1 AP to Fire each]. The HMG draws 3 cards to shoot and can spread them over 3 figures that are close to each other. The Sniper draws 2 cards but they are both at one figure. So the Sniper has double the chance of getting a hit compared to a regular rifle [1 card] and the HMG has 3 cards and 3 potential targets. Each Japanese Player Phase therefore would start with them spending their first 2 AP on these weapons, then on the next weapons with good targets, and last on movement.
Is this realistic? Arguably yes, very much so. Not only does the HMG have a better shot for the same AP, but it has more potential targets if they opposition doesn't spread out. A few squads or a platoon are going to create an attack or a defense around their best weapons, and in the end will use them a lot more often than the bolt-action rifles both sides Soldiers have.
Soldiers with bolt rifles tend to find their best use in closing with the enemy that has been downed by the better weapons and getting an auto-kill on them. Most of the Jap casualties occurred this way. For the Brits, most casualties were from the HMG and Sniper as inevitably some Hearts were drawn. The stream in this scenario prevented a Jap counter-attack but they might have made some good counter-attacks if it had not been there and victory conditions had been different.
Table Center. A lot of the action will be happening here. The central position of the crew-served HMG at the destroyed building combined with the slowing nature of crossing the stream [costs two moves - sounds standard BUT in this game two moves or 12" costs 4 Action Points [AP], 1 for the first 6" move and 3 for the second] provides a substantial tactical obstacle. As it should, IMHO.
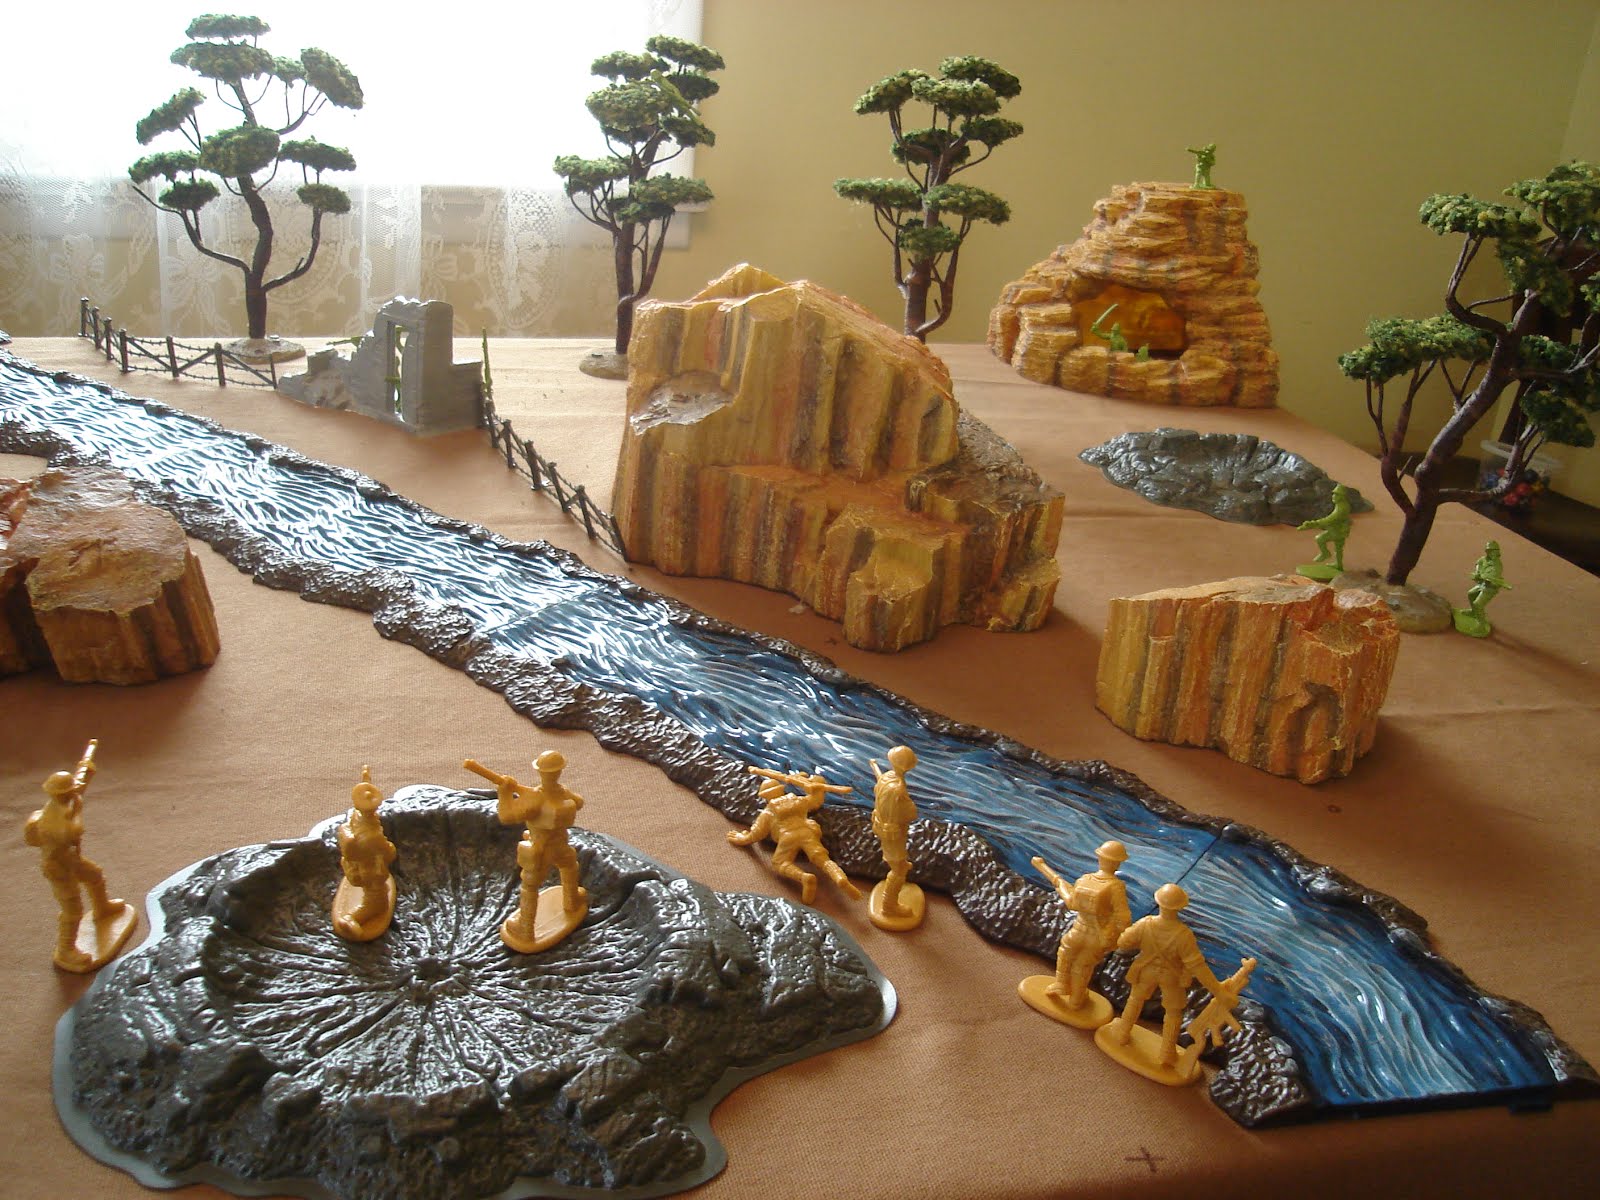
Table left. This is also important, as it is quite possible to take advantage of the isolated village garrison of 3 Soldiers and wrack up a few casualties on the Japs. If they withdraw, they will have difficulty crossing the stream and will almost certainly be under enemy fire as they do so. Third option [as yet untested] is to fade back into the village out of LoS and snipe opportunistically at the advancing Brits...but it costs 2 AP to advance into LoS and shoot, and you then may be shot back at, anyway.
Turn 1 - doesn't last long. Brits get several AP and then the Japs 9 [but only 2 get used] and a Joker is pulled.

Turn 1 ends with the Brits having advanced across the stream and towards the village, but having inflicted no "Downs" on the Japs since they spent most APs on advancing, not shooting - this may be a mistake. But, my priority was to stage the Brits to move into the village and get across the stream to grenade the house. They also needed to position themselves on both the Recon Points atop the large hills.

As there are no casualties it isn't even worth drawing a Force Morale Resolution Card. I go to Casualty Resolution and draw for the guys, scuse me, "Blokes" hosed by the HMG. They draw two Hearts [Red is Dead] and a Spade [Black is Back]. Ugh! 2/3 dead but at least the Bren gunner survived.

Heckuva way to start off Turn 2 - Brits win Initiative, and draw an 'Ace=1'!

They take one shot with a Bren gunner, and...JOKER! Turn 2 ends in a nano-second. And only the Ginnies have casualties, so I draw and they easily pass with a King=13, needing a 3+. The Sakis don't have to draw at all as they've no dead. Those two dead guys are going to be a build-in suspense factor for a while!

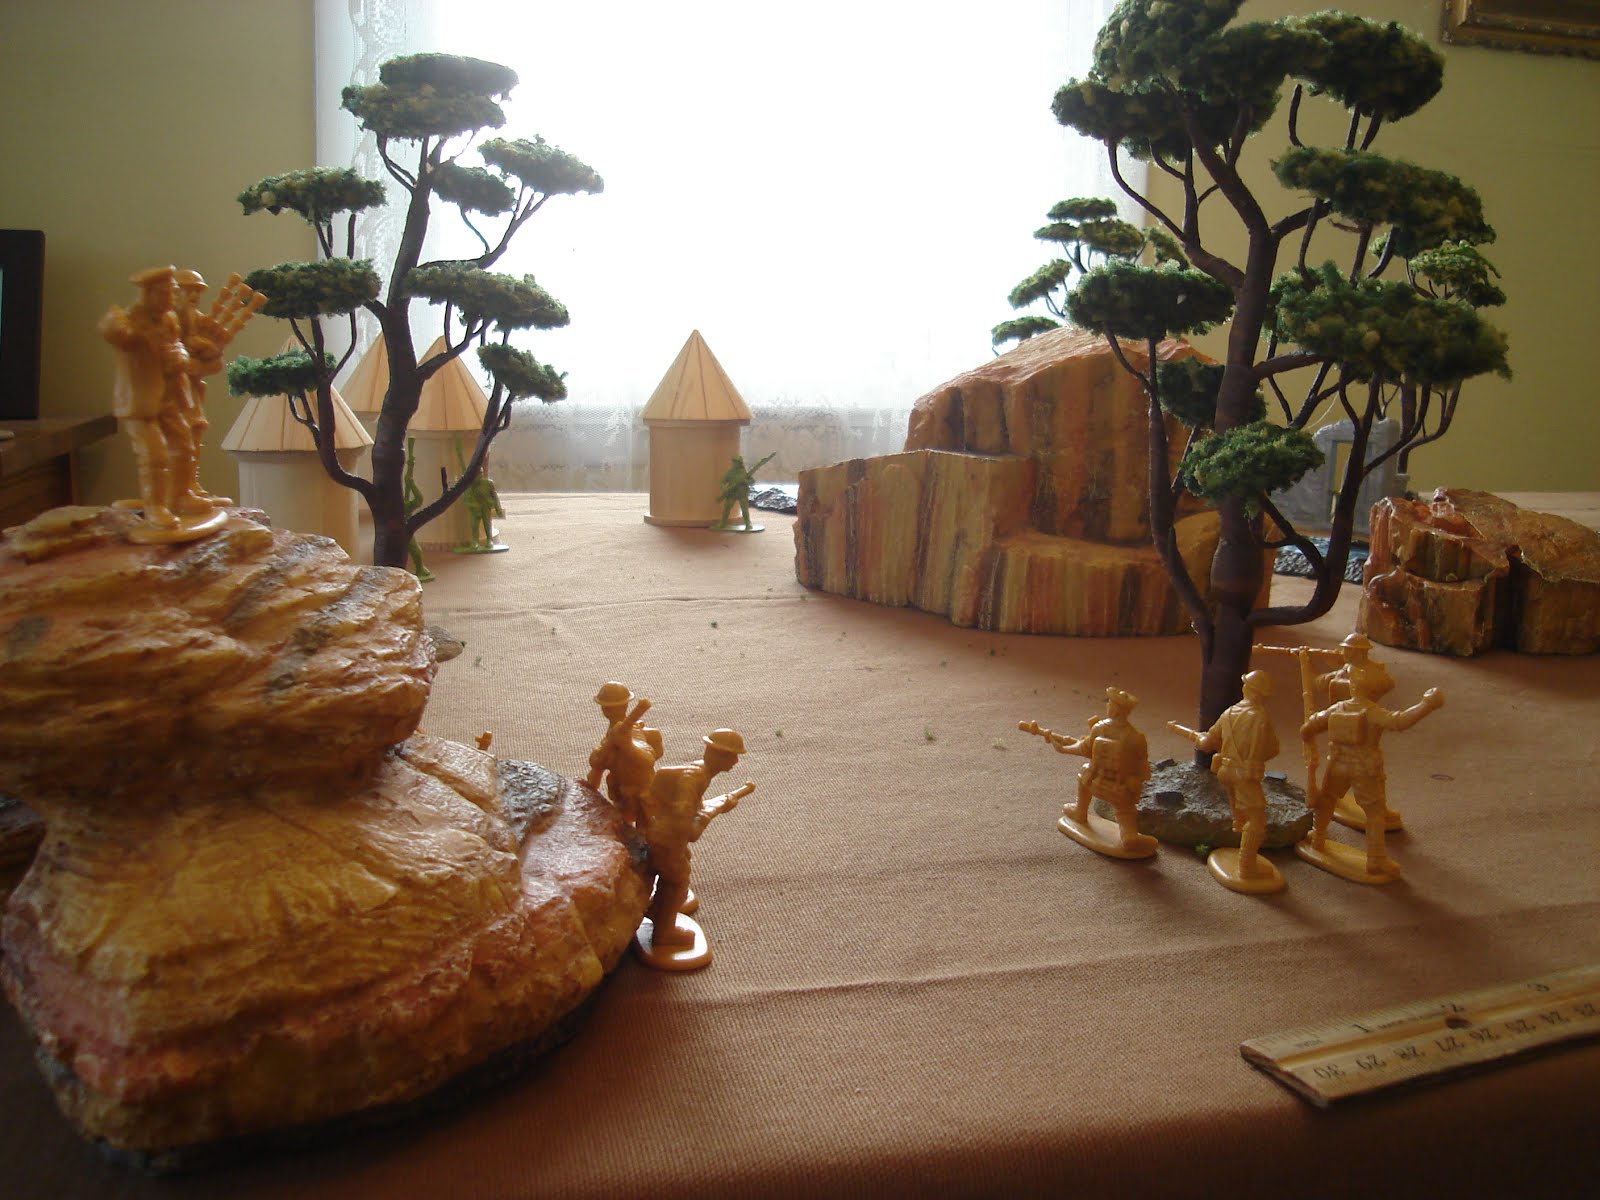
Tactical Reflection. The position of the HMG in the destroyed house results in it dominating the center of the board. Due to its high rate of fire [3 shots] for 1 AP, it is always going to be used in a Player Phase as the first or second AP used [at least if there are targets and the Jap is thinking]. Below, we can see its ability to sweep the stream, hence the same guy going down over and over.

apologies for blurry camera...the action was pretty intense here!
Joker appears, ending Turn 3 abruptly. The Brits draw an '8' and easily pass Force Morale, while their lone casualty draws a Black and is Back...again.

Turn 4 also ends quickly, soon after the Japanese draw a Jack [=11 AP] and barely use any AP. Brits pass Force Morale with a squeek like a mouse, not a roar like a lion! Pity, the Japs had drawn 11 AP with a Jack, and only spent 1 AP!

Turn 5 starts with a Brit Queen and a priority to inflict casualties on the Japs. While they do Down one, the turn abruptly ends. The Brits pass again on a '10' needing only a 3+, but the whole effect is a bit intimidating. When will the Limey's Luck Run Out and the Sushis Win?? The lone Brit casualty survives along with his Jap opponent, both on Black = Back. Jap deck is reshuffled after running out so both Jokers are back in play...argh!

Turn 6 arrives and the Brits drawn an Ace, but the Japs do to and win Initiative anyway since Hearts beat Clubs! They then draw a '10' for AP. This could be decisive...

But the Brits weather the storm. t doesn't last long and a Joker is pulled and the Brits pass on a '3'.

Tactical Interlude. My Cpl w' Tommy Gun and Grenades manages with great effort to get within throwing distance of 9", but then is unable to hit the target for several Phases. I love the old scatter dice, so chose to use them - this is not in the rules. I felt that surely he would manage to hit 50% of the time but no...

Heading into Turn 7, the Ginnies have still not inflicted any casualties on the Sakis. This is a problem, as there's no point in even having them pull a Morale Resolution card as they cannot fail.

This turn ends immediately, as the Japs win the Initiative draw and pull a Joker. Brits pull a Queen and easily pass, still needing a 3+ to stay on the field.

Turn 8, Brits win Initiative and pull a deuce for AP. Don't spend it all in one place! I of course choose to fire a Bren and toss a grenade at the house, but to little effect.

Tactical Interlude
Below, we see the Jap HMG's other dangerous avenue of fire, thru the rock formations to the Brits in cover by the jungle in the setup area. There were four here originally, but all have moved up and now two are in front of the tree [out of the LoF of the HMG] and the other two are by the small rock and atop the recon point of the large rock formation. Still, those cost 4 AP just for the initial movements. But, they've put a lot of pressure on the Japanese in the village, Downing and killing some.

Turn 8 lasts a bit, and the Japs have finally taken some losses. Both sides easily pass their Morale and stay in the fight. There were middlin' card draws so lots of emphasis on trying to shoot Soldiers and get them Down.

In Casualty Resolution, the Brits pull three diamonds who will stay Down unless rallied by a Leader [x] and lose a Sgt as a casualty with the 2 of Hearts.

Turn 9 ends with the Brits on both Hilltop Recon Objectives, and 3-4 in losses, favoring the Japs.

Brits draw and easily pass with a '10', but the unfortunate Japs pull a 2 needing a 4+ but they've three more cards since Lt. Kancho is Leader [3]...and they pull 3-2-2, and depart the field!

Dang, that was a surprise! As the Japs retreated and the Brits secured two VP for the Recon Points and 3 for a prisoner, they easily won the scenario.
The Brits just squeaked by with two Force Morale draws of '3' needing a 3+, while the Japs folded quickly with some bad draws, sort of the equivalent of rolling a '1' on a d6 when your force may retreat, and rolling that '1' the first try.
Overall, this scenario again fought just fine, and except for the rapid turnover of Jokers in the middle of the game, it flowed by Turn [not by Player Phases] a lot like any game that uses dice-activations [DBA] instead of auto-activations [FoW].
Rules Thoughts.
1) I really like the "Diamonds are Forever" rule. It increases tension over the survival of the Down Soldiers [pinned, really] and suddenly it matters to get them Back in the Fight.
2) Begs for a "Rally" rule. Quite simply a Leader can spend an AP and rally the fig that is still Down. Or you could say that you need a 6+ draw, and Leader [x] gets 'x' cards to perform the rally on figures within 3" of him. So the heroic Leader [3] types can rally up to 3 figs depending on card draws.
3) One solution for the emotional pain of lost AP on a good card draw interrupted by a Joker would be to have a game pause for Force Morale and Casualty Adjudication then swing straight back into the interrupted Action Point that was being resolved, so that no AP draw is ever wasted.
4) It should be noted that dicing for combat is dangerous to the Game Design. It slows up the Joker pace a lot which means that players will be adjudicating Force Morale and Casualties less often. In the case of the former, the game will certainly last longer and forces will get more depleted. In the case of the latter, there is a steadily increasing likelihood that you will have all of your force Down, in which case you face being slowly wiped out in Close Combat. This may not be a problem, of course, depending on your view of combat realities and what you want in a game.
Want to play this again, but tracking more carefully the AP that are gained and spent each full game Turn.
Excellent and informative insights and like the suggested mods.
ReplyDeleteHonestly, I'm thinking these rues would be ideal for small unit actions in modern day, with operators vs all comers etc.
I agree - that's why I was using Star Wars stuff. I think it is fine RAW, but if you want fewer interruptions you can just remove Jokers, etc. It is easily tweaked to preference but one has to be careful since the design is unusual not to break it by accident.
ReplyDeleteLooking forward to more games of this in 2020!