
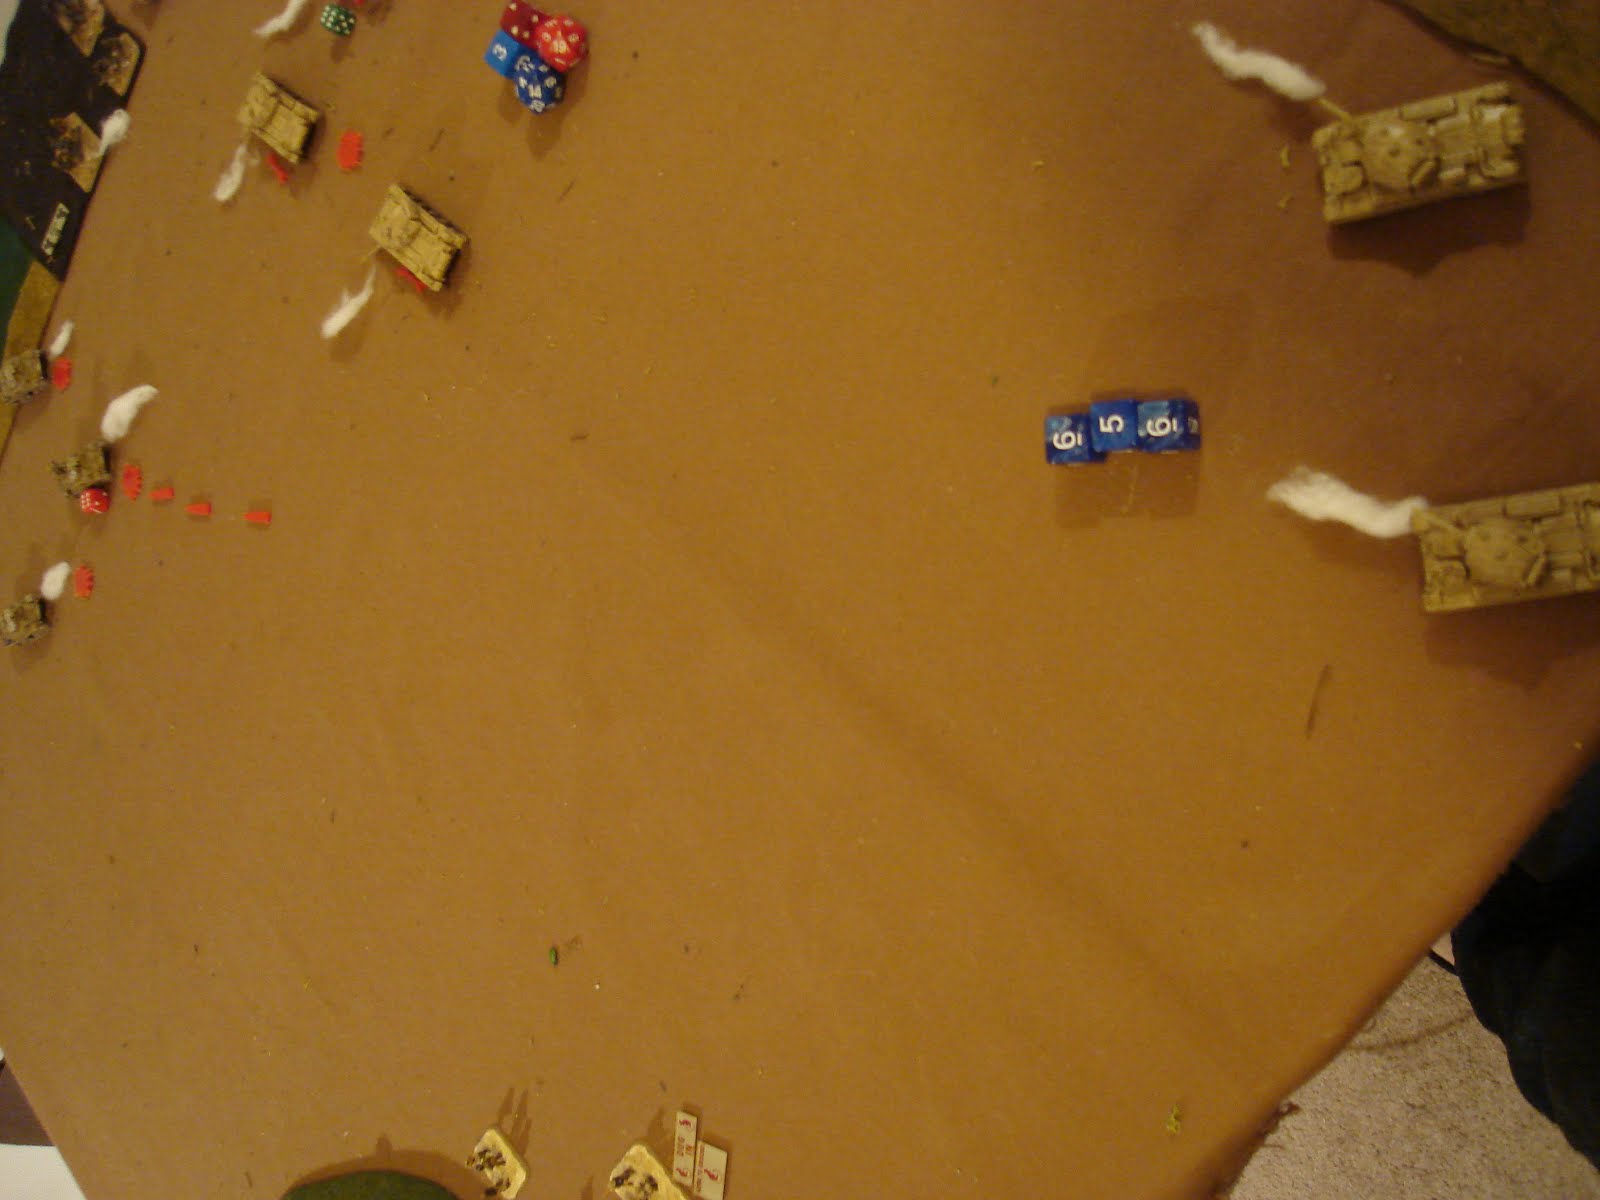
Table layout and initial deployment above. Book scenario below.

With what I think is a faithful setup and layout, I deploy the two forces as best I can after playing this scenario a good ten times over the last couple of years. There are no less than three playtests of this recorded in this blog HERE, and it makes for nice comparison with how the rules have developed over this timeframe.
Some things can't be predicted, of course, and there are options that fall into the "it all depends" category, but this is the best I could do:
*Italians. Carri platoon on road at top left. ATGs in town-Objective, Mortars at top right are angled to fire out of the corner. At bottom, the fourth platoon of Bersaglieri are deployed on the hill-objective - which is rough terrain - at the bottom left. Deployment restricts Italians to Hill objective and top 6" of the table, the South end of the town and the road line, basically.
- Mortars could be where the Tanks are on the road. I chose to put the Tanks there in the hope that they'd have a bit more working space and be able to engage the British platoons in sequence rather than all at once [which results in a 1-2 turn wipeout].
- The ATGs have a 180 front/rear, like all Units. I put it even with the road instead of angling it to the SouthEast. This was an error as it left a weak spot to their left rear.
- The Infantry can deploy farther back into the rough ground - this means an extra turn or so for the attackers to get LoS which is 4" in the rough terrain [4" is also Close Range]. However I chose to deploy farther forward to deny the British infantry space to establish themselves in the woods, Dug-in. This makes them vulnerable to an attack by the Italian tanks if the British ignore them [they usually don't - it's so quick to wipe out tanks that when you've an advantage it always pays to do so. A lot like Cavalry Units, basically].
British. Two Motor Platoons to left facing the rough ground - their job is to take this objective with the help of the Mortars, which are to the bottom right angled out of the corner [the models are Crusader CS tanks, Close Support, with a 3" howitzer]. The three Crud platoons are in 2 up 1 back formations all facing forward on the deployment line to right. Their job is to drive straight up, destroy the Mortars, flank the ATGs and destroy them, and somewhere along the way knock out the Italian tanks. Should be no problem, right...?
I've decided that for this scenario, the Italian Mortars are the key - they can affect an attack on either objective and they put a lot of casualties on the Brit infantry as they close in on the hill. They also put a Hit here and there on Armor units, sometimes it's enough to make them vulnerable to destruction. As they are unaffected by the Target Priority rule, they have a bit of a sniper affect - I'm OK with this as I envision the commander looking over the battlefield and deciding where their fire will have the best affect given the situation. As they are a local and integrated asset, their reaction time is - and should be - pretty quick.
Turn 1. In a post-deployment flash of inspiration, I decide to hold off on the Motor Platoon assaulting the woods and dig them in. They'll attack after the Italian Mortars are knocked out, so I fire on them with the British Mortars and they fire on the Cruds most likely to be fired upon by the ATGs and Carri. Hope is that the concentration of firepower will knock out a platoon. The ATGs fire and put a few hits in on the right-most Cruds as the target priority rules have them a priority. Carri move up to place themselves just out of 12" range, hoping the Cruds will move into it so they can get first shot off into them.

Turn 2. Initiative doesn't change [the side without it needs to win by three to take it, and the red-dice Italians don't quite do it at 3-1]. I decide to give the Carri the first shot - I'm totally focused on crushing the mortars and flanking the ATGs. The red platoon at top left only takes weak hits from the Italians but are at 4 Hits, the other platoons are right behind.

Turn 2 Closeup. The Brit Mortars have been able to pound away at the Italian Mortars well [good dice]. The Green Cruds will advance past the Red next turn to "shield / relieve" them on point. The right-most Cruds will dash at the Mortars and wipe them out!

Turn 3. Rather than be slowed by destroying the Carri platoon, I decide the Cruds must advance at top speed and keep on their original mission. Red Cruds put paint rounds in the chamber and inflict no damage. Final Cruds are under the range of the Mortars, and now immune to their shooting entirely. Overall, plan seems to be progressing well! Carri put two Hits on Red Cruds, pushing them to 6 altogether. Italian ATGs fire at the Green Cruds who've outflanked them at Close Range. As for the Carri platoon...

The Mortars pull off a 1 in 27 shot - all three Mortar rounds hit needing a 5+! Who left the hatch open? Stupido!! Carri platoon unexpectedly crippled with 3 Hits and a Permanent Hit.

Turn 4. The British keep up the pressure, knocking out the Carri platoon, but the Mortars only take one hit. The Italians knock out the Red Cruds with their Mortars, but nearly whiff in their shots on the Green Cruds - only one Hit! The ATGs took one, safely Dug-in in hard cover. The plan is progressing, but not as fast as I'd like, really. The decision point will be the ATGs v. the Green Crud platoon - whoever wins that will probably decide the battle.

Turn 5. Mortars and Cruds pound away on the stubborn Italian defenses.

Turn 6. Italian Mortars are wiped out. But the ATGs put two Hits on the Green Cruds, who are now one Hit away from dead. They in turn inflict no Hits - doesn't look good!

Turn 7 - Hill. Both Motor Platoons advance, getting decent movement rolls. The Italians defend themselves getting a Hit during the Brit Action Phase using their Ready Action. Italians get a second Hit in their own Action Phase firing.

Turn 7 - continued. The Cruds swap out to save tanks and keep up the pressure. The desperate Italian ATGs pull a perfect roll and inflict 3 Hits so 1 is permanent! Suddenly, the relieving Cruds are looking shaky, altho they did manage to put one Hit on the ATGs.

Turn 8. Mortars get a Hit. One Motor Platoon outflanks, the other digs in. Italians miss... The full attention of two Infantry and one Mortar will be felt next turn as they put down 2 dice for the Mortars, 1 each Infantry, 4 total for a 3+ to get a Hit. Meanwhile, at the Town, the Cruds manage to wipe out the ATGs. It was a very near thing, but they manage and now set themselves to their most important task - brewing up! [sorry, forgot to take a pic!]

Turn 9. And they inflict three Hits on the Camparis while taking one themselves.

Turn 10. Italians squeek out one Hit but take two. The end's in sight...

Turn 11. The Mortars roll a hit and Campari resistence fades as they withdraw.

Whew! A close-run thing.
I made a mistake in not tilting the ATGs back so they didn't have a flank exposed. However, the 180 rule would have made their RIGHT side vulnerable instead, denying the Brits the benefit of concentrating against the Mortars / ATG flank. It would have made the Carri platoon even more critical as they would then be protecting the Right flank of the ATGs.
It was the Campari's battle, and any mistake by the Brits would almost certainly cost them the win. A few sweet dice rolls also helped. The mobility of the Tank platoons is greatly enhanced by the priority rules - The tanks can shift themselves to change which tank unit has priority, while the static defense cannot. I like this, it feels both realistic and playable. The ATGs in the town are a really tough defender - most units will be down to a single attack dice. The key is to knock out the Carri quickly.
There is a distinct possibility that the Carri would be better replaced for a second ATG platoon - these could Dig-in and give the Cruds even more trouble. As always, force composition has a big impact on the planning and execution of any operation. These scenarios can be very challenging to players as one can't optimize one's force.
So very happy with this playtest, and with the rules in general.
Now, I have to set my mind to planning the Sidi Rizegh big battle and at least finishing my mighty force of Cruds - long overdue!
No comments:
Post a Comment
Thanks for your comment! t will be posted after it's moderated.